How to Build a Heat Shroud/ Heat Shield
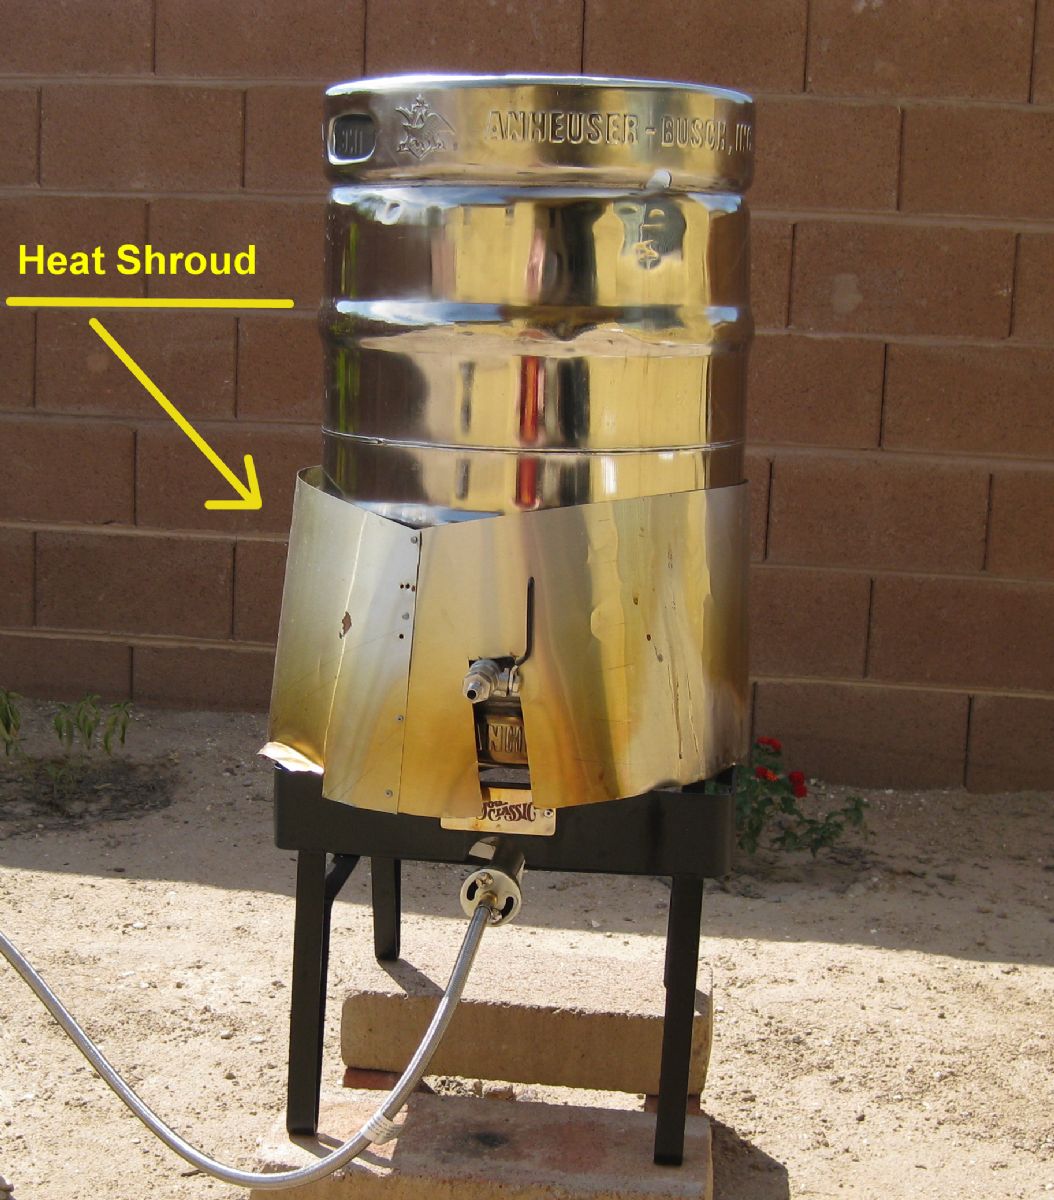
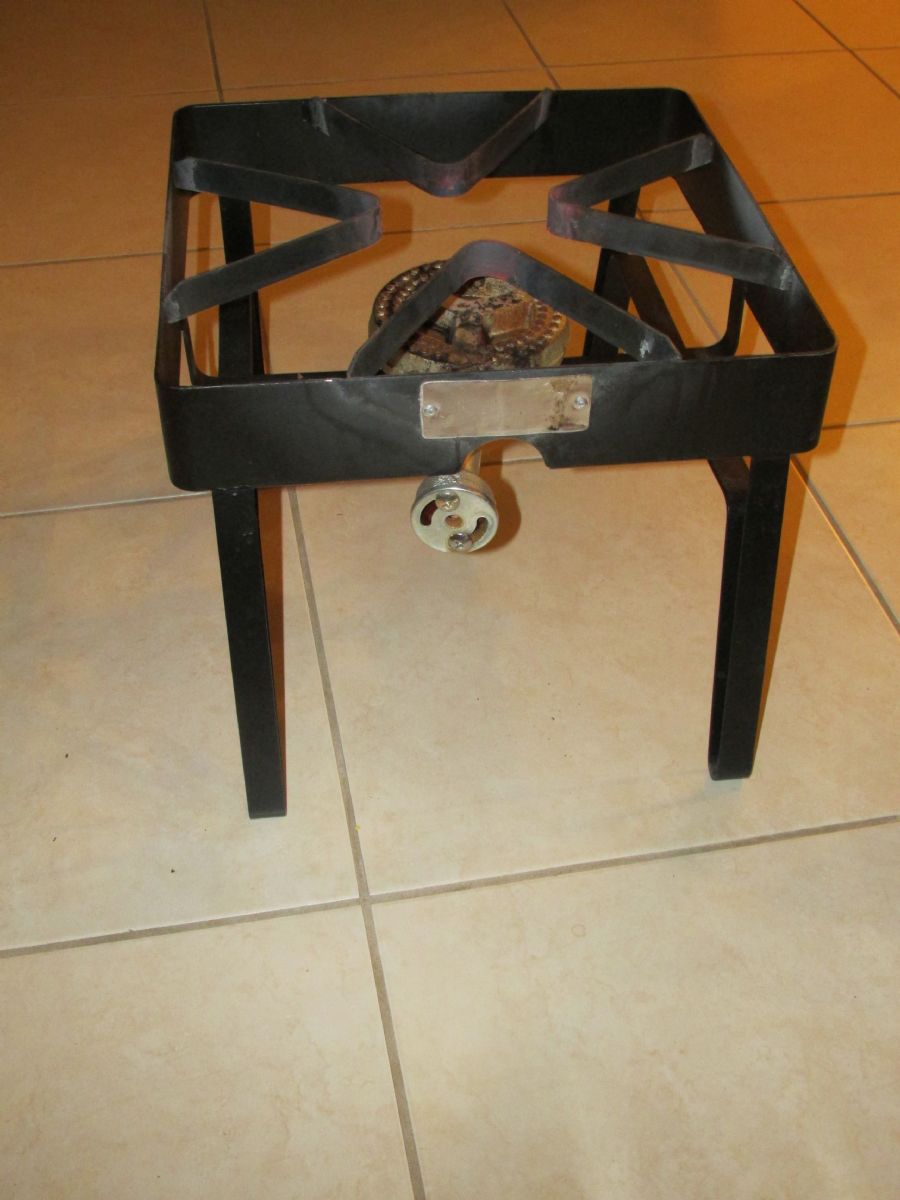
A heat shroud can be used to improve heat efficiency when brewing with a keggle; remember a keggle is a keg that’s been converted into a brewing kettle. Generally when brewing with a keggle, the keggle is placed over some sort of burner, usually a propane outdoor burner or turkey fryer, and heat is directly applied only to the bottom of the keggle. Often carried by your local homebrew shop and seemingly the homebrew’s burner of choice, we recommend Bayou Classic Outdoor Burners, either the Bayou Classic SP10 (round) or the Bayou Classic SQ14 (square) variety, which retail for around $50-$65. We view the square-top burner to have a more stable design, however the round-top comes with a built-in flame screen for added heat efficiency.
By placing a metal shroud around the base of the keggle, not only can heat from the flame of the burner be better collected and redistributed around the bottom half of the keggle so that the keggle heats faster thereby reducing the amount of time and propane needed when brewing, the heat shroud also increases heat efficiency by shielding the flame from wind and general heat loss. Efficiency becomes even more important with larger batch sizes.
For the purposes of this tutorial, we'll be looking at how to build a heat shroud that would fit a standard sized American keg that sits on top of a Bayou Classic SQ14 Burner (the square model).
In order to build a heat shroud, you’ll need the following tools and materials:
1. Computer paper and Scotch tape to build a paper model first (Optional)
2. Aluminum Sheet Metal/Roof Flashing (Approximately 60 inches in length)
3. Tin Snips or Scissors strong enough to cut through aluminum
4. Pop Riveter/Pop Rivet Gun
5. Rivets
The Design: The ideal shape of the heat shroud is somewhat cone-shaped with the bottom being wider in circumference than the top, something like a dog cone, or an old school megaphone but not nearly as extreme in bottom diameter. The reason for the wider end being at the bottom is to have a wider area to collect more heat, but be careful not to go too wide as the shroud will need a base to rest on, which is why it's a good reason to build a paper mock-up design before cutting into your aluminum.
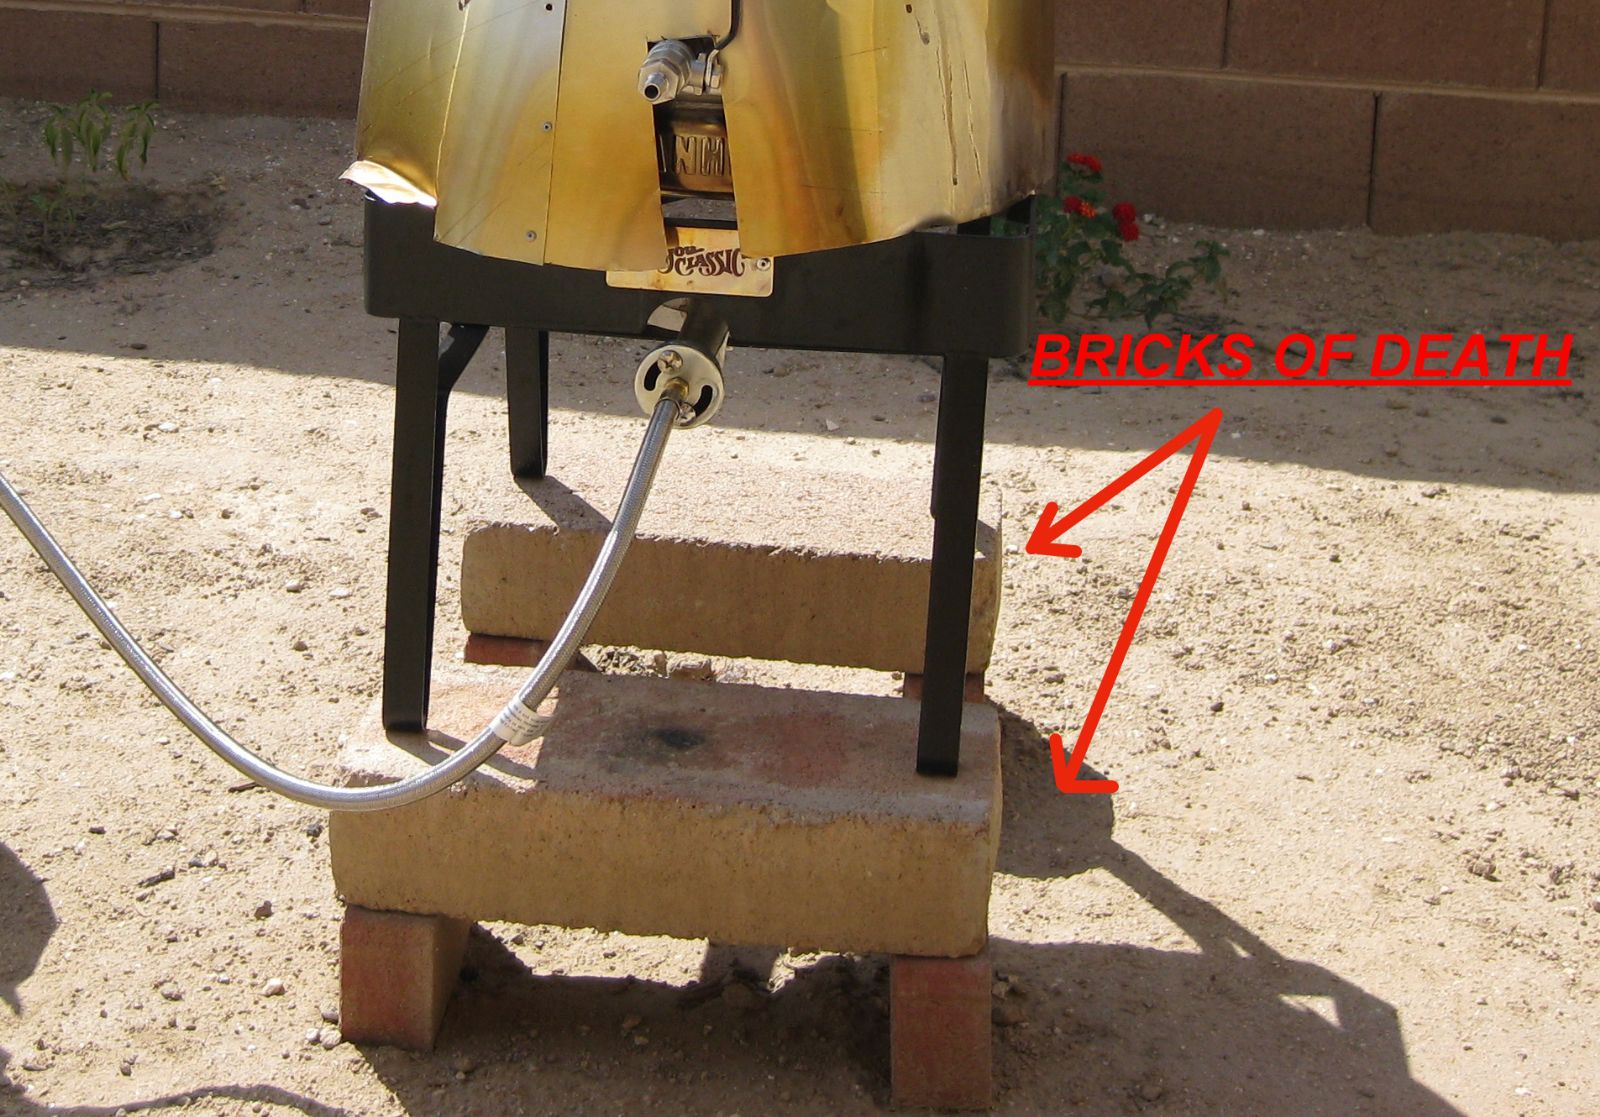
Measurements: To make the shroud, we need to shape a piece of metal that connects the square burner to the round keg, but we need to know the measurements of the keg and the burner first. A standard U.S. 15.5 Gallon keg is 15.5" in diameter with roughly ¼” high ribs along the side, and the Bayou Classic SQ14 Burner is square with each side measuring 16”. As the design of our shroud will be somewhat cone shaped, we will allow the bottom of the shroud to sit on the top of the burner and overhang it by 1” on each side. That means that the lower diameter of the shroud will be 16+1+1= 18”.
NOTE: Please measure your keg and burner to ensure correct measurements!
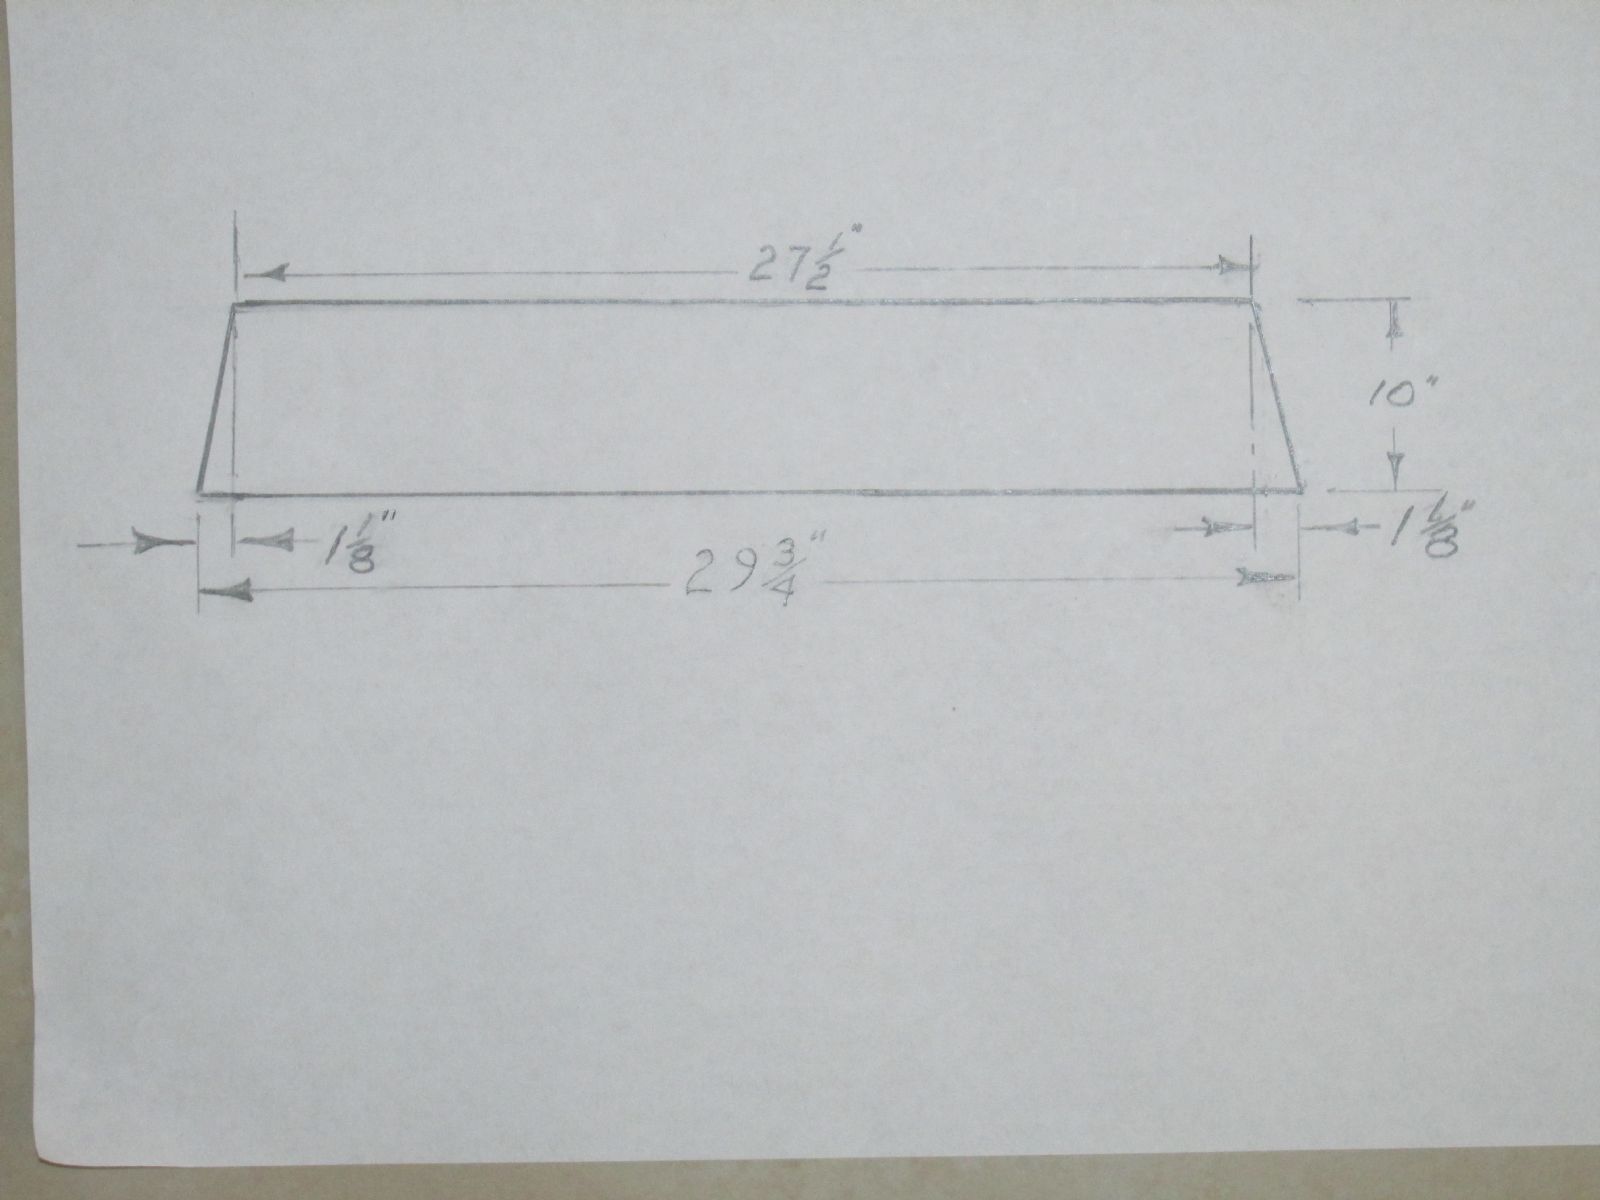
So now we have the two dimensions that we need to make the shroud. Again, the shape of the shroud will be a simple cone section. The upper diameter is 16½” and the lower diameter is 18”. From high school geometry (or Pre-K geometry if you're outside the U.S.), remember that the circumference of a circle is π times the diameter. Then the length of the upper circumference is 3.14 x 16.5”~ 52”, the lower diameter is 3.14 x 18 ~ 56.5 . We chose to leave a 3” overlap on the ends so the two dimensions are 55 inch for the top and 59.5 for the bottom.
The shape of the piece of metal will be a trapezoid. That is a rectangle with the top two edges pushed in a little bit. Notice that the way that you would actually cut the 10” wide piece of aluminum would be to cut a piece 59½” long and then measure back 2¼” from the top edge of each end.
It is better to make the shroud in two pieces and pop rivet the two pieces together. To make two pieces, simply divide the 59½” overall length in half, which would make the two identical pieces 29¾” long. Likewise cut back half the length to 1 1/8” from each top corner, which will yield a 27½” top length.
Paper Model: Before constructing your aluminum heat shroud, it's probably best to make a quick mock-up or model with computer paper and tape so that if you make a mistake, it’s with the paper and not the aluminum. Doing so will give you some practice and allow you to gain some confidence in the process. You can make two shroud model pieces out of eight 8½”x11 sheets of copying paper. Cut the paper to a 10” length. Lay them out with about a ½ - 1” overlap on a table to the 29¾” length and put two short pieces of tape on the edge of each paper to join them and then flip it over to tape the backside. Now measure 1 1/8” from the upper corner and put a mark. Draw a line from the lower corner to the upper mark. This is the edge of your pattern. Now cut off this piece and you will have your two trapezoid pieces for your heat shroud model. Take the two model strips and draw a line 1½” from each diagonal edge. This is the amount that one strip will overlap the next strip. Now lay the pieces on the floor and tape the two edges together.
.jpg)
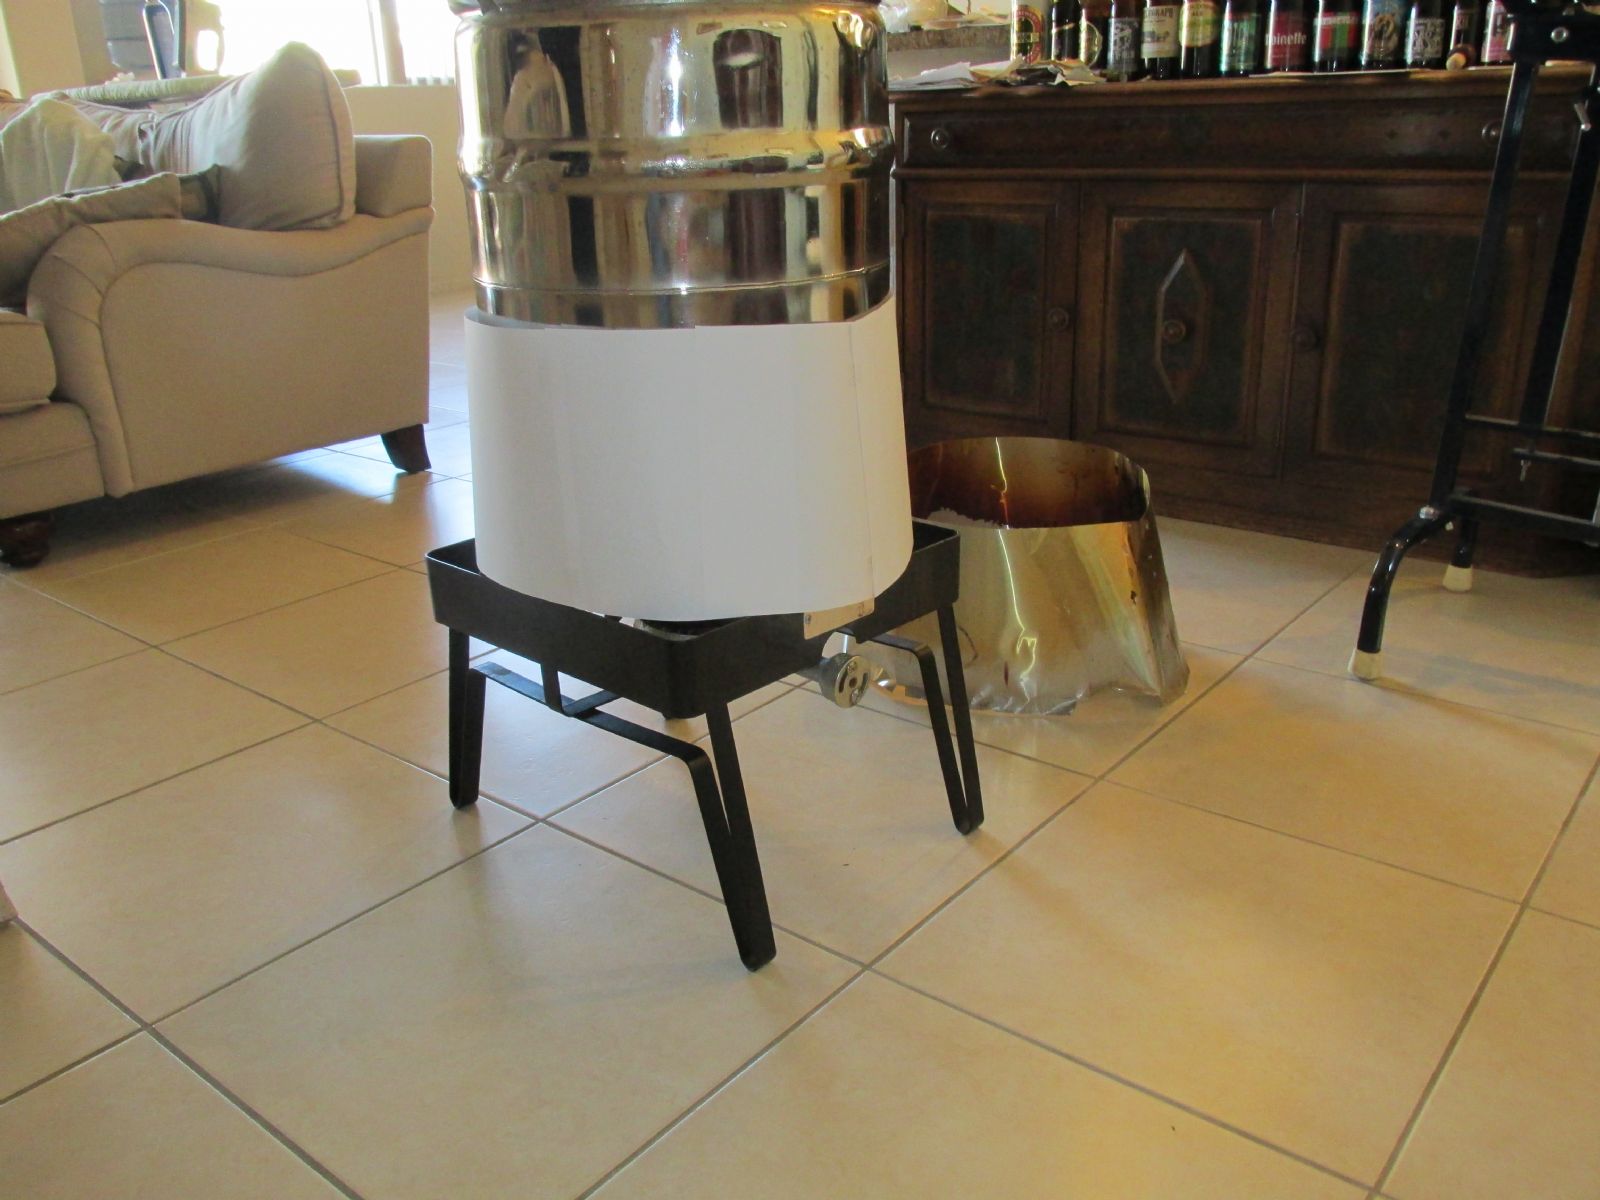
When you tape the two ends together and put it over the keg it will give you a pretty good idea of what your finished shroud will look like.
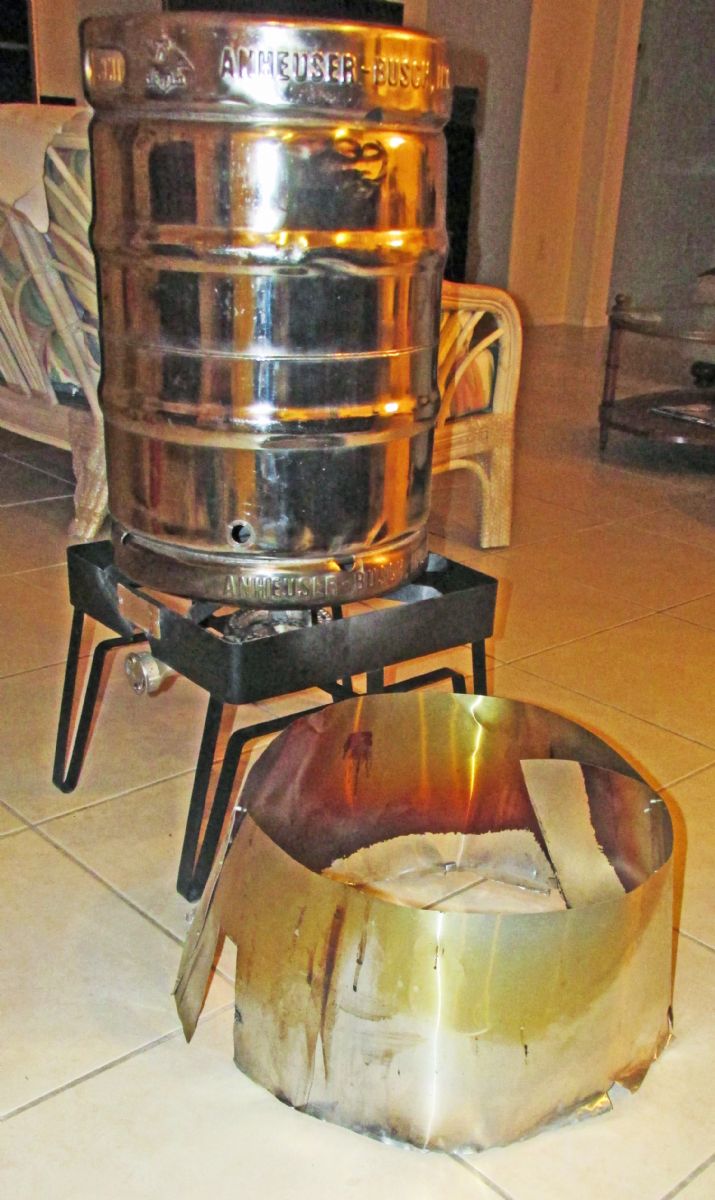
Actually making the shroud should be fairly straightforward. Fabricating it is a matter of learning how to work with sheet metal shears, the aluminum sheet metal, a drill, pop rivets and a pop rivet gun.
When purchasing the aluminum sheet metal at your local hardware store or other home improvement store, it will usually come in a roll and can be cut to the length you need.
Once you’re set on the shape, rivet your aluminum sheet/s together, and you’re done. Once complete, you'll need to cut out a little space where your keggle’s spigot is so that you can make a cut in the aluminum to accommodate it. The rivets will act as spacers around your keggle to allow for proper airflow. Feel free to do a test with and without your heat shroud to see how much faster you can bring the water in your kettle to a boil, but rest assured, you will notice a significant difference.

From The Blog
Tips for Craft Brewery Success
The best business secrets wikileaked from the private records of the most successful craft breweries in the United States.
Beer Names You Might Be Saying Wrong
Enlighten yourself, but please don't correct others. It's just one of those Catch-69 situations, like when somebody has ketchup on their face.
The Beer Quiz
What's your beer IQ? This test measures an individual’s beer knowledge through a series of questions of varying levels of difficulty: Normal, Hard, and Insane.
Homebrewing Techniques
Beat the Stuck Fermentation Monster
You've brewed the perfect wort. You bullseyed your strike temp, you had a most excellent cold break, your OG was right on the money...
How to Cork Belgian Beer Bottles
So you wanna up your bottling game, huh? Well, you've come to the right place.
Top 40 Ways to Improve Your Homebrew
Admit it: No matter if in a DeLorean, TARDIS, or a hot tub, we’ve all thought about what advice we might give our younger selves if we could go back in time.
DIY Projects
How to Polish a Keg
Shining up your keg will probably not improve the taste of your beer, but it looks cool and inspires epic brewing sessions!
Convert a Refrigerator Into a Fermentation Chamber
Decided to take a huge step in improving your homebrew and set up a temperature controlled fermentation system, have ya? Smart thinking.
How to Convert a Keg Into a Brew Kettle
Convert that old keg into a brewing kettle. The advantages of using a keg for homebrewing pretty much come down to quality and cost.
|
|