How to Convert a Keg Into a Brewing Kettle
By DANIEL J. LEONARD
WARNING: It is understood that any of the information listed below is for educational purposes only, and that the reader is responsible for any injury that may occur as a result of carrying out these procedures. We strongly recommend that all safety precautions be observed, and that all equipment is used as recommended by the manufacturer. Proceed at your own risk.
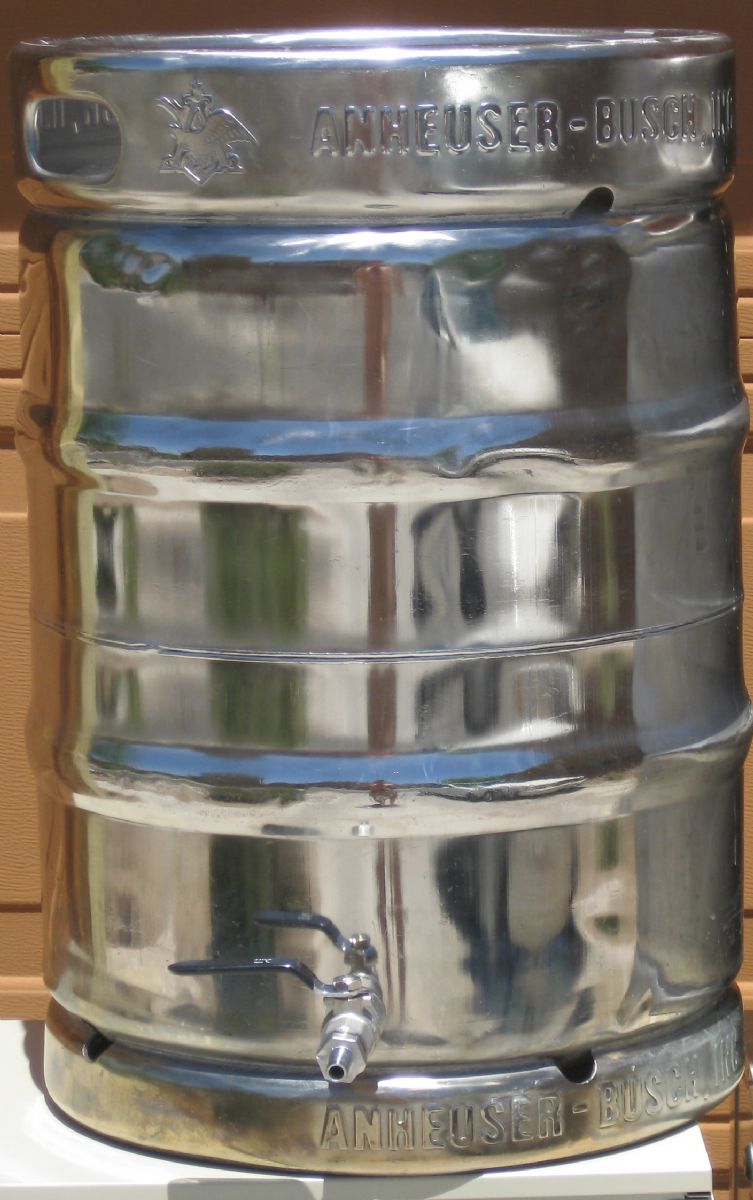
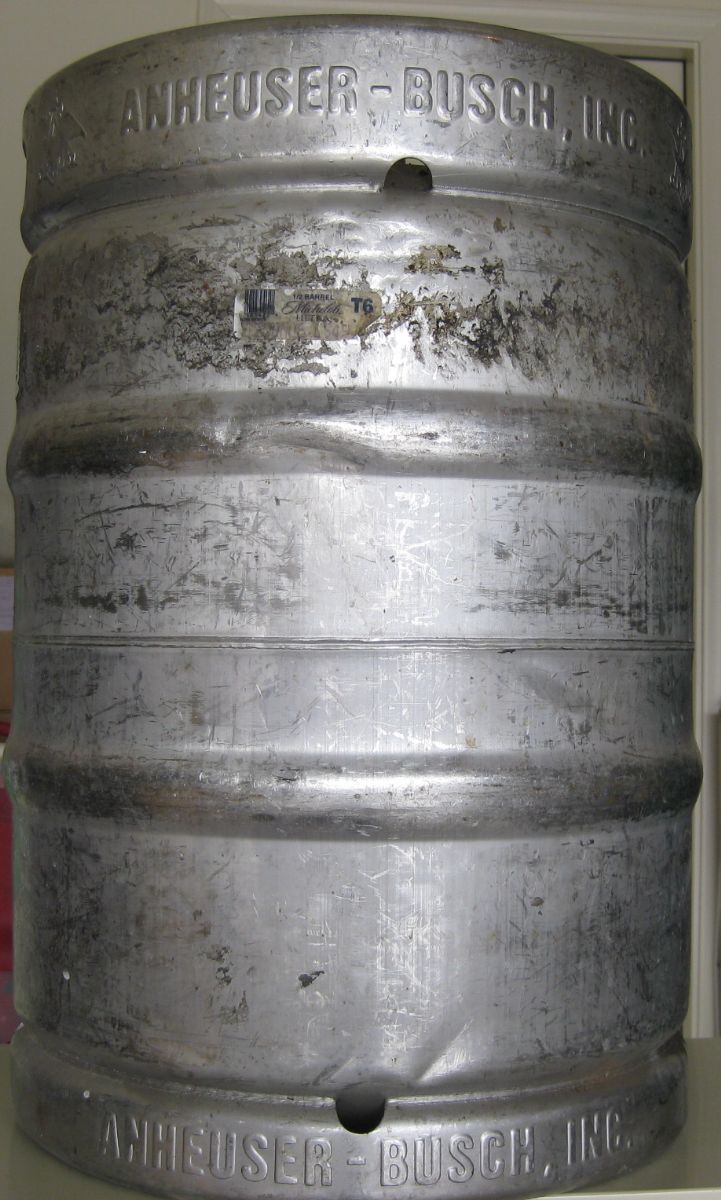
Keggles are kegs that have been converted into brewing kettles. A standard American keg can hold 15.5 US gallons, or 58.66 liters, and can be used to brew between 10-12 gallons of wort. The advantages of using a keg for brewing pretty much come down to quality and cost:
QUALITY: Kegs are made from stainless steel which is ideal for home brewing because stainless steel is resistant to rusting, corrosion, staining, denting, and under normal conditions stainless steel does not contribute a metallic taste to the brew. Stainless steel is also rather easy to clean. Not to mention that the shape of the keg itself is very much conducive to brewing.
COST: Stainless steel is relatively cheap compared to other choices such as copper, and a keggle is almost always cheaper than a store-bought stainless steel pot of the same capacity. For example, a 62 quart (15.5 gallons) stainless steel stock pot from a restaurant supply store can cost at least $120, and a 62 quart copper pot can cost at least $1,000 assuming you can find a copper pot in that size. A used keg of the same size can be had for as little as $25.
NOTE: If you want to save yourself the trouble of finding and modifying a keg yourself, you can purchase a basic pre-cut keg for about $129 + shipping and handling (about $20). If you do it yourself, you can get the cost down to about $30, assuming you have some of the required tools.
MATERIALS NEEDED/ RECOMMENDED: The following list of items is for a weldless, all stainless steel setup (don't mix metals) using the swivel method. "The swivel method" is a term that applies to how the keg is cut: The keg sits on top of a swivel, like clay on a pottery wheel, and the keg spins around while the person cutting sits still and controls the cut. This method ensures a more accurate, faster, circular cut as compared to using a dremel or cutting torch.
1. Angle Grinder or Circular Saw
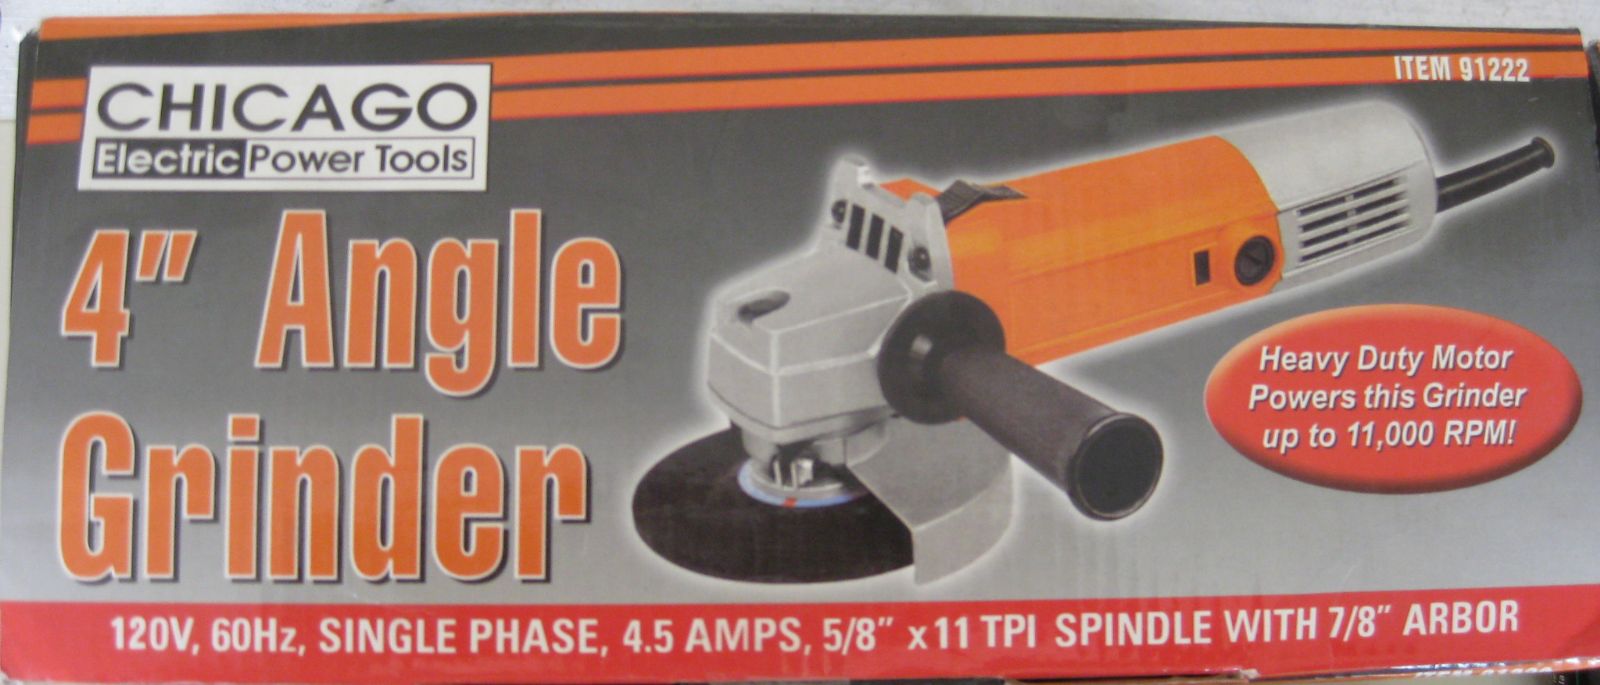
2. Grinding Discs/ Saw Blades
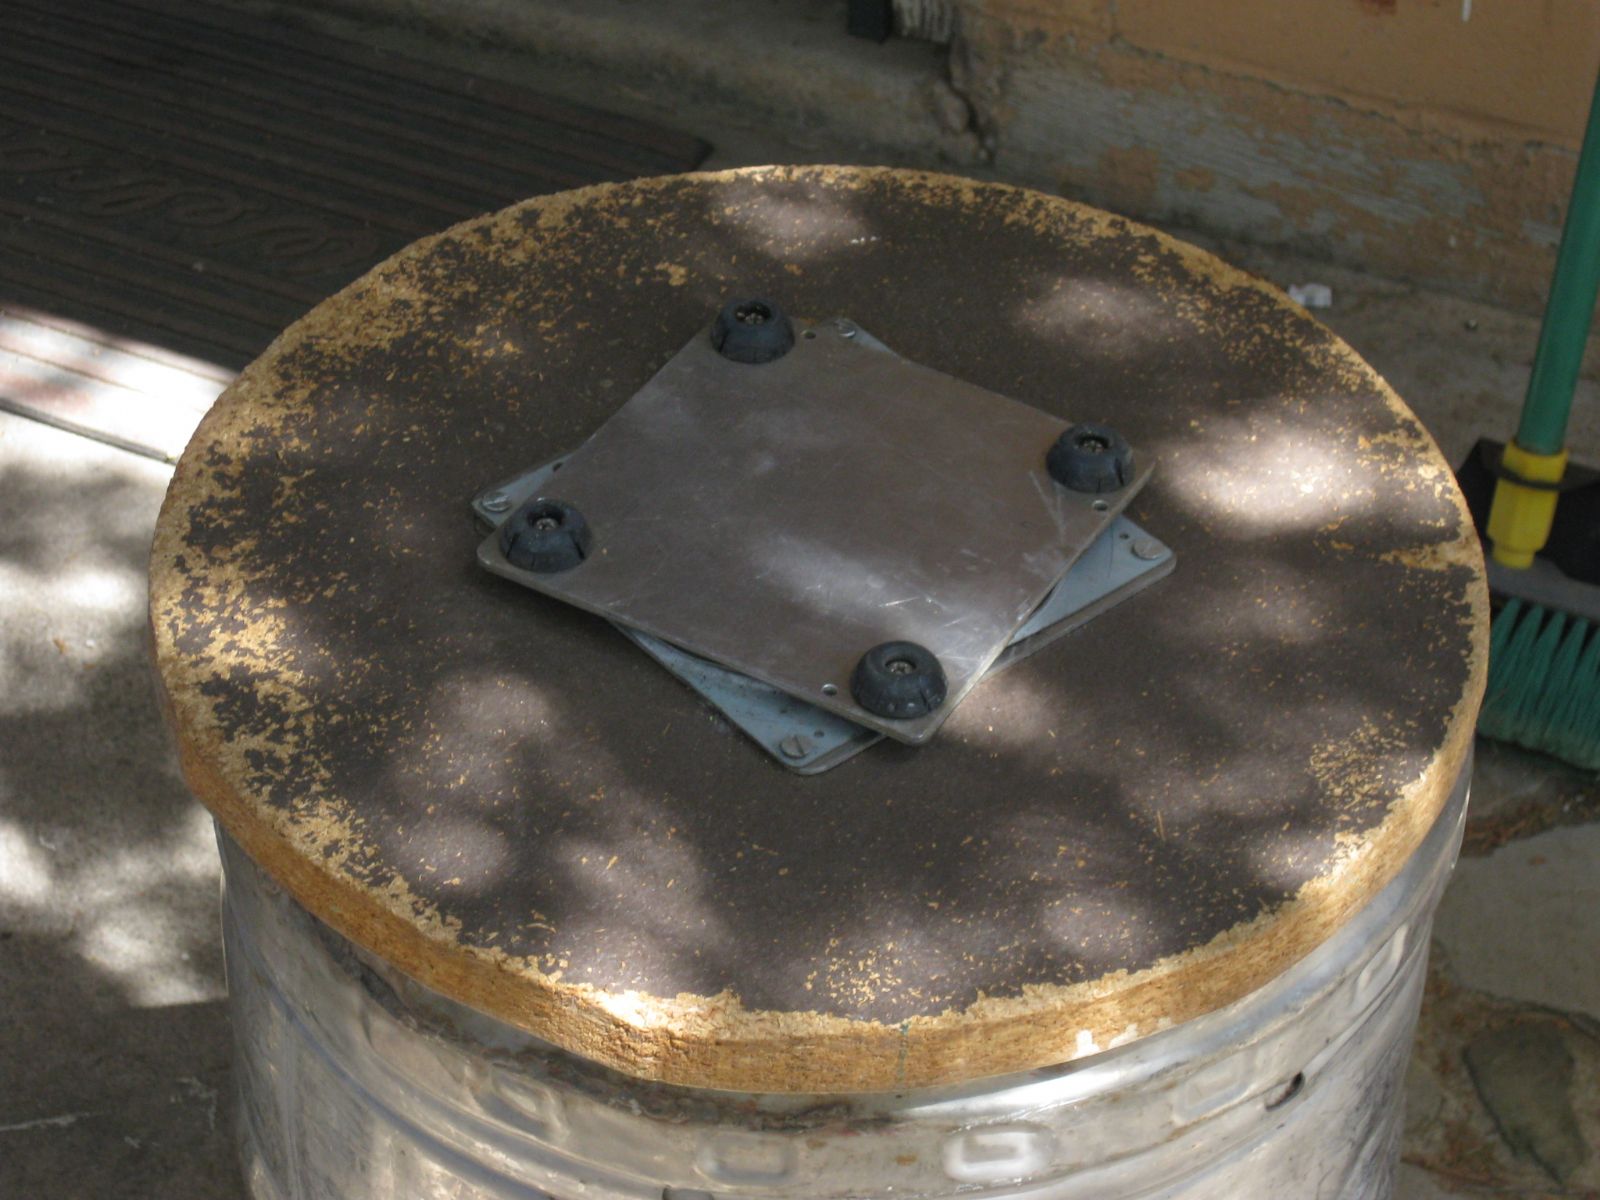
3. Swivel Disc (this one came from the bottom of a bar stool)
4. Drill
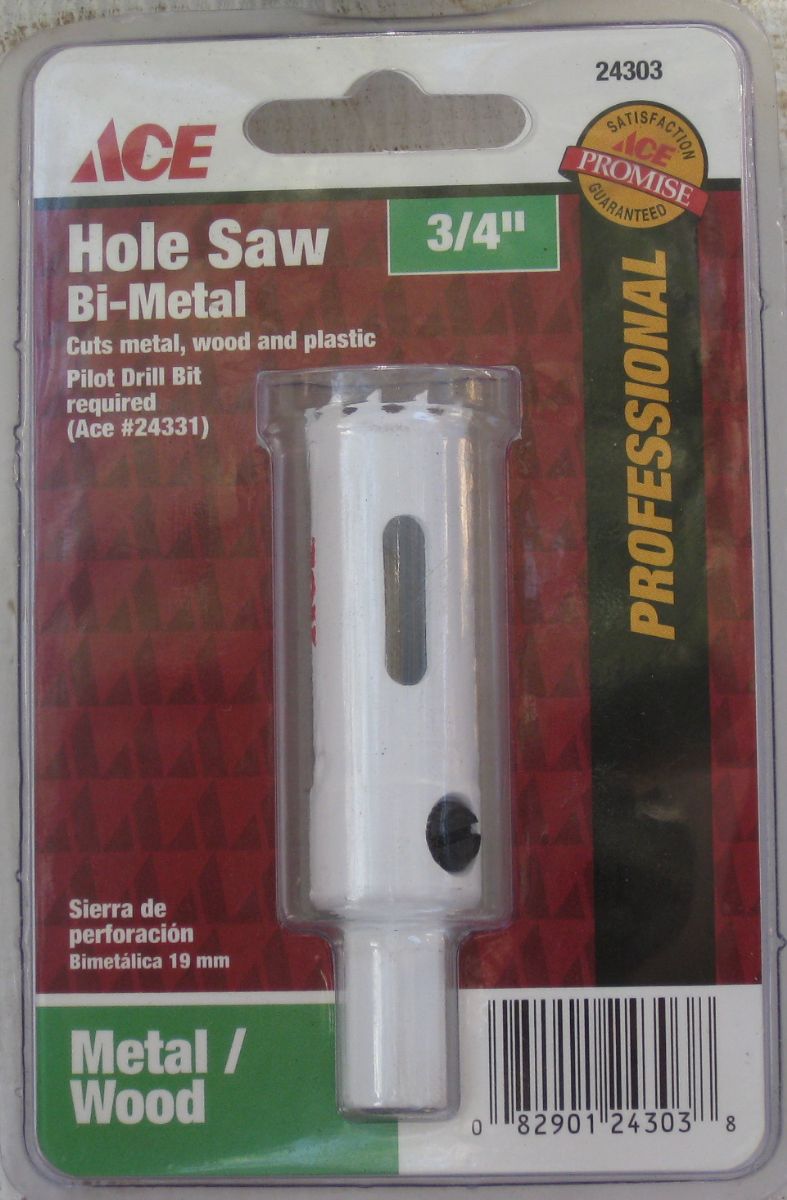
5. Hole Saw (3/4 inch)
6. Cutting Oil
7. Spigot (all stainless steel; see options and prices below
8. Rounded Metal File
9. Filter (stainless steel mash braid, Bazooka T, etc.), or false bottom kit. For the sake of this tutorial, we use a simple stainless steel mash braid filter.
10. Gloves. You will be cutting through stainless steel with a power tool, so unless your skin is made of adamantium, we recommend safety gloves.
11. Safety glasses. Glowing sparks of steel will be looking for a nice place to land, and what place would be nicer than your pretty little eyes?
.JPG)
13. And, a keg... (yep).
Sidenote: If you are thinking about polishing your keg, it is recommended to do so before cutting the keg because when polishing a keg, bits of polish will fly around and can land inside your keg and may be difficult to see and completely remove. You could tape the inside of your keg to prevent unwanted objects from getting in your keg, but again it's just easier to polish before cutting to avoid the extra worry.
PROCEDURE:
1. Locate a Keg: The two most common places to find and purchase kegs are from a brewery, or craigslist. Breweries will decommission kegs after a certain number of uses, or if the keg has been dented or otherwise damaged. Contact your local brewery to inquire about purchasing such a keg. You can also find used kegs on craigslist. The kegs found on craigslist are usually kegs that someone acquired from a liquor store and paid a deposit (usually around $30) as an incentive to return the keg, or a keg someone left behind at a party. The keg itself is worth far more than $30, so it's your call how you feel about this practice.
2. Depressurize the Keg: This is done by pressing the ball valve of the keg down until all of the pressure from the keg is released. This can be done with the back end of a screwdriver and a cloth. The cloth is there to prevent old beer from spraying you in the face once you begin to press down on the ball valve.
3. Remove the Ring Clip (retainer ring): This is done by prying the edge of the ring clip up until it pops out of place which can be done with a screwdriver or pointed file. The most common problem with removing the ring clip is that the clip will curl back in place if you don't prevent it from doing so. I've found that prying the clip up with a file and then sliding a small flathead screwdriver under the clip until the clip is fully removed works best.
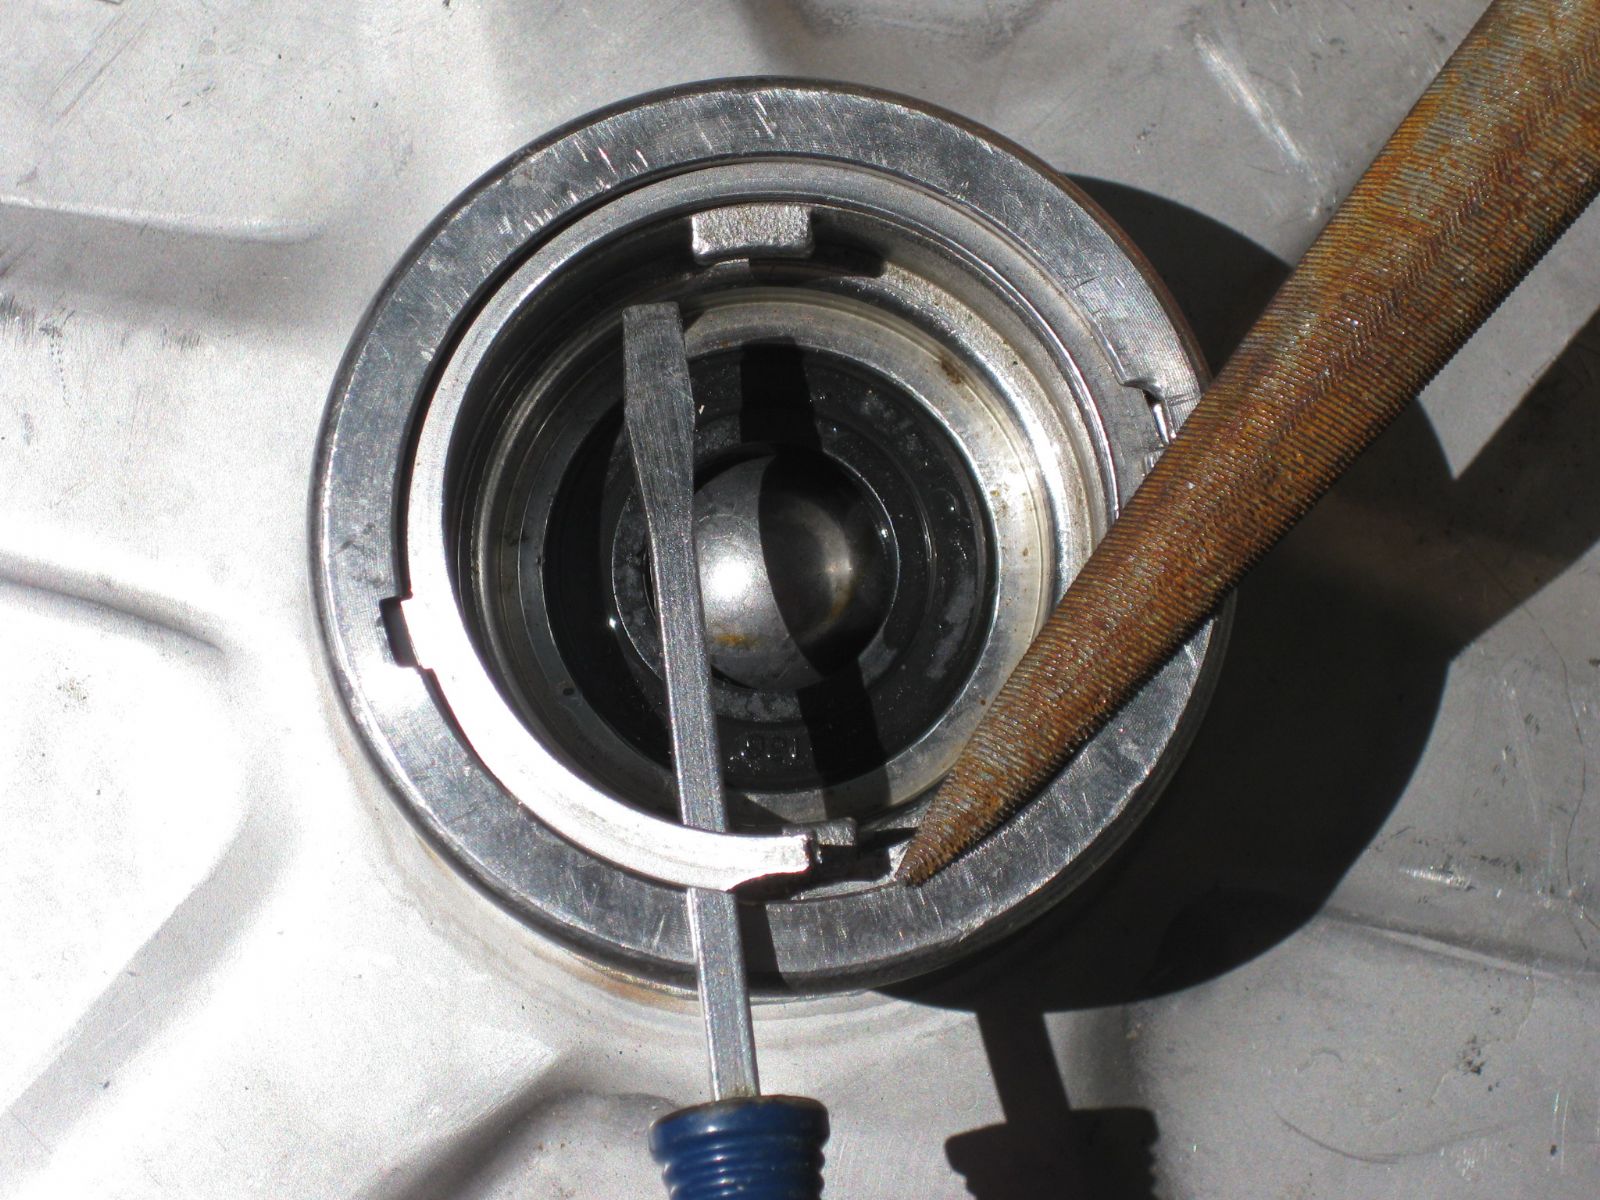
4. Remove the Keg Spear:
A) Position the head of a flathead screwdriver against the right side of the barb of the keg stem, and tap the end of the screwdriver with a hammer, turning the keg spear counterclockwise. This will unlock the keg stem so that you can remove it from the keg.
.jpg) .
.
B) Remove the keg spear from the keg, but keep the spear for a later step in this procedure.
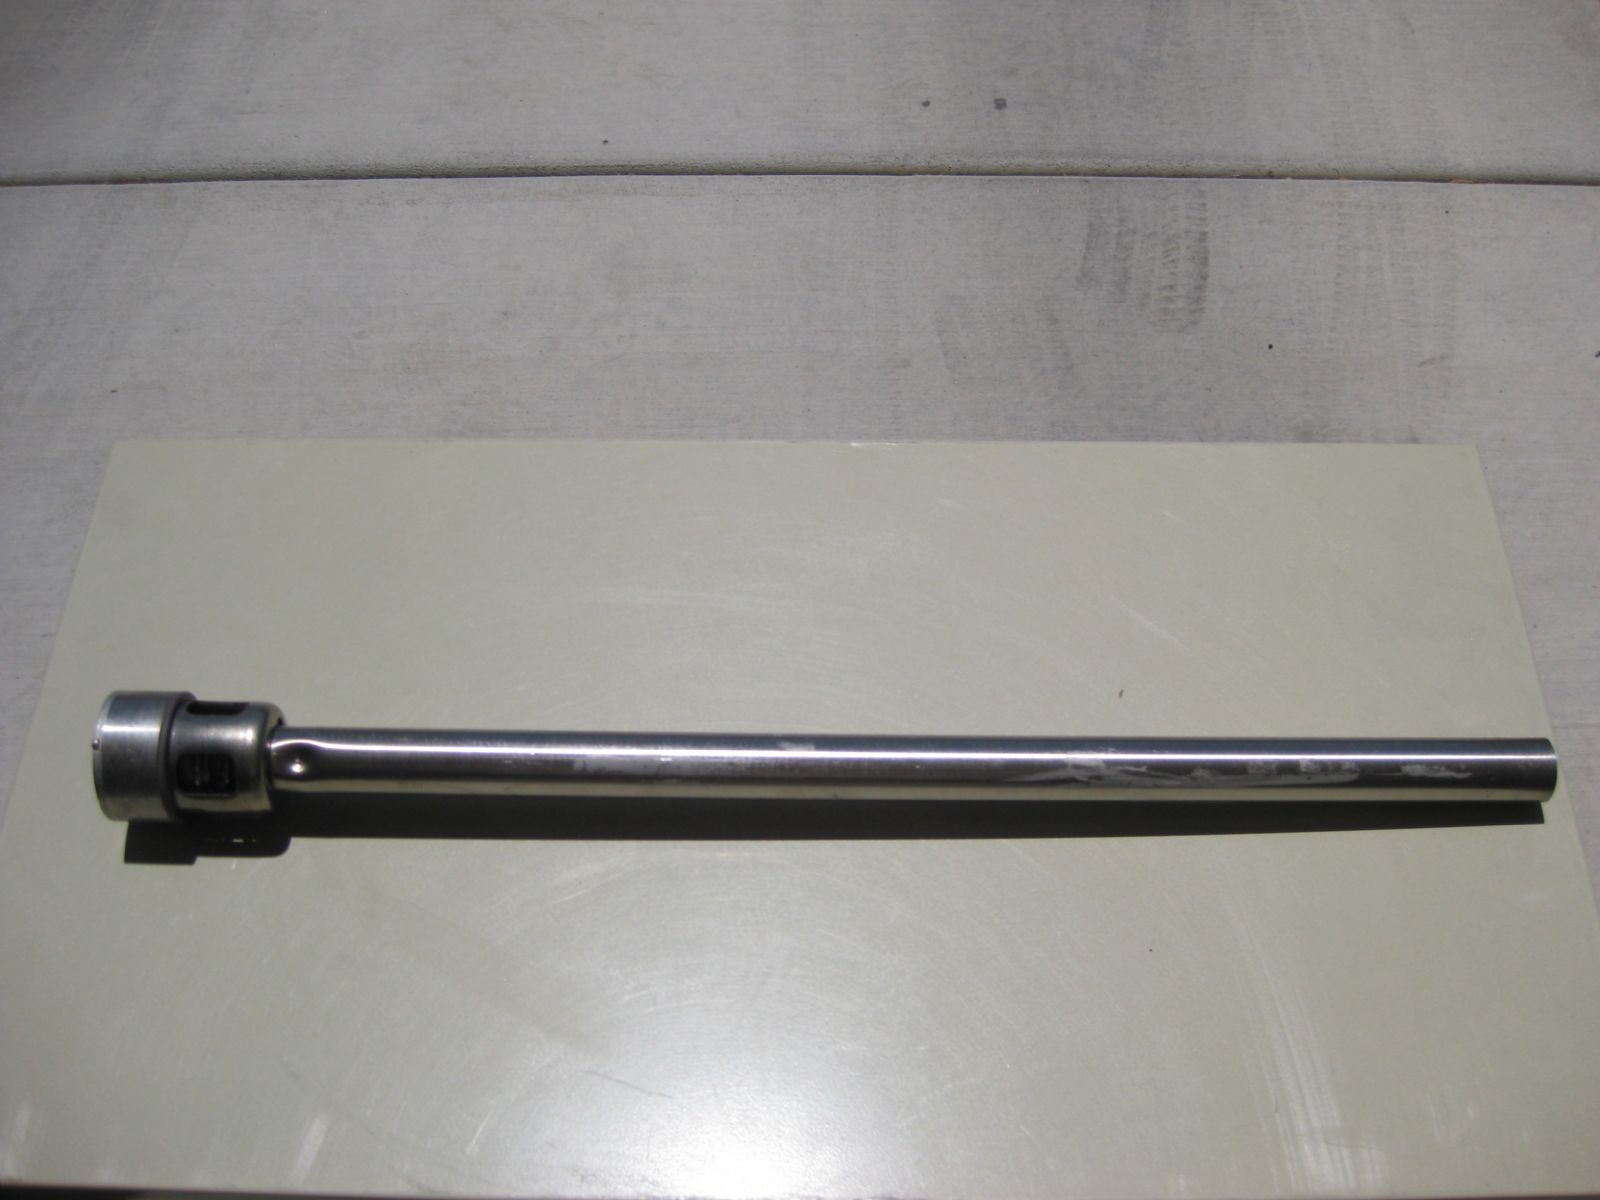
(Above: This is what the keg spear looks like.)
5. Tape a bar stool swivel around the bottom of the keg. You will be using the swivel as a sort of pottery wheel so that when you are cutting your keg, the keg will spin in a circle while you hold your cutting saw in place. This helps create a more perfect circle for your kettle and lid.
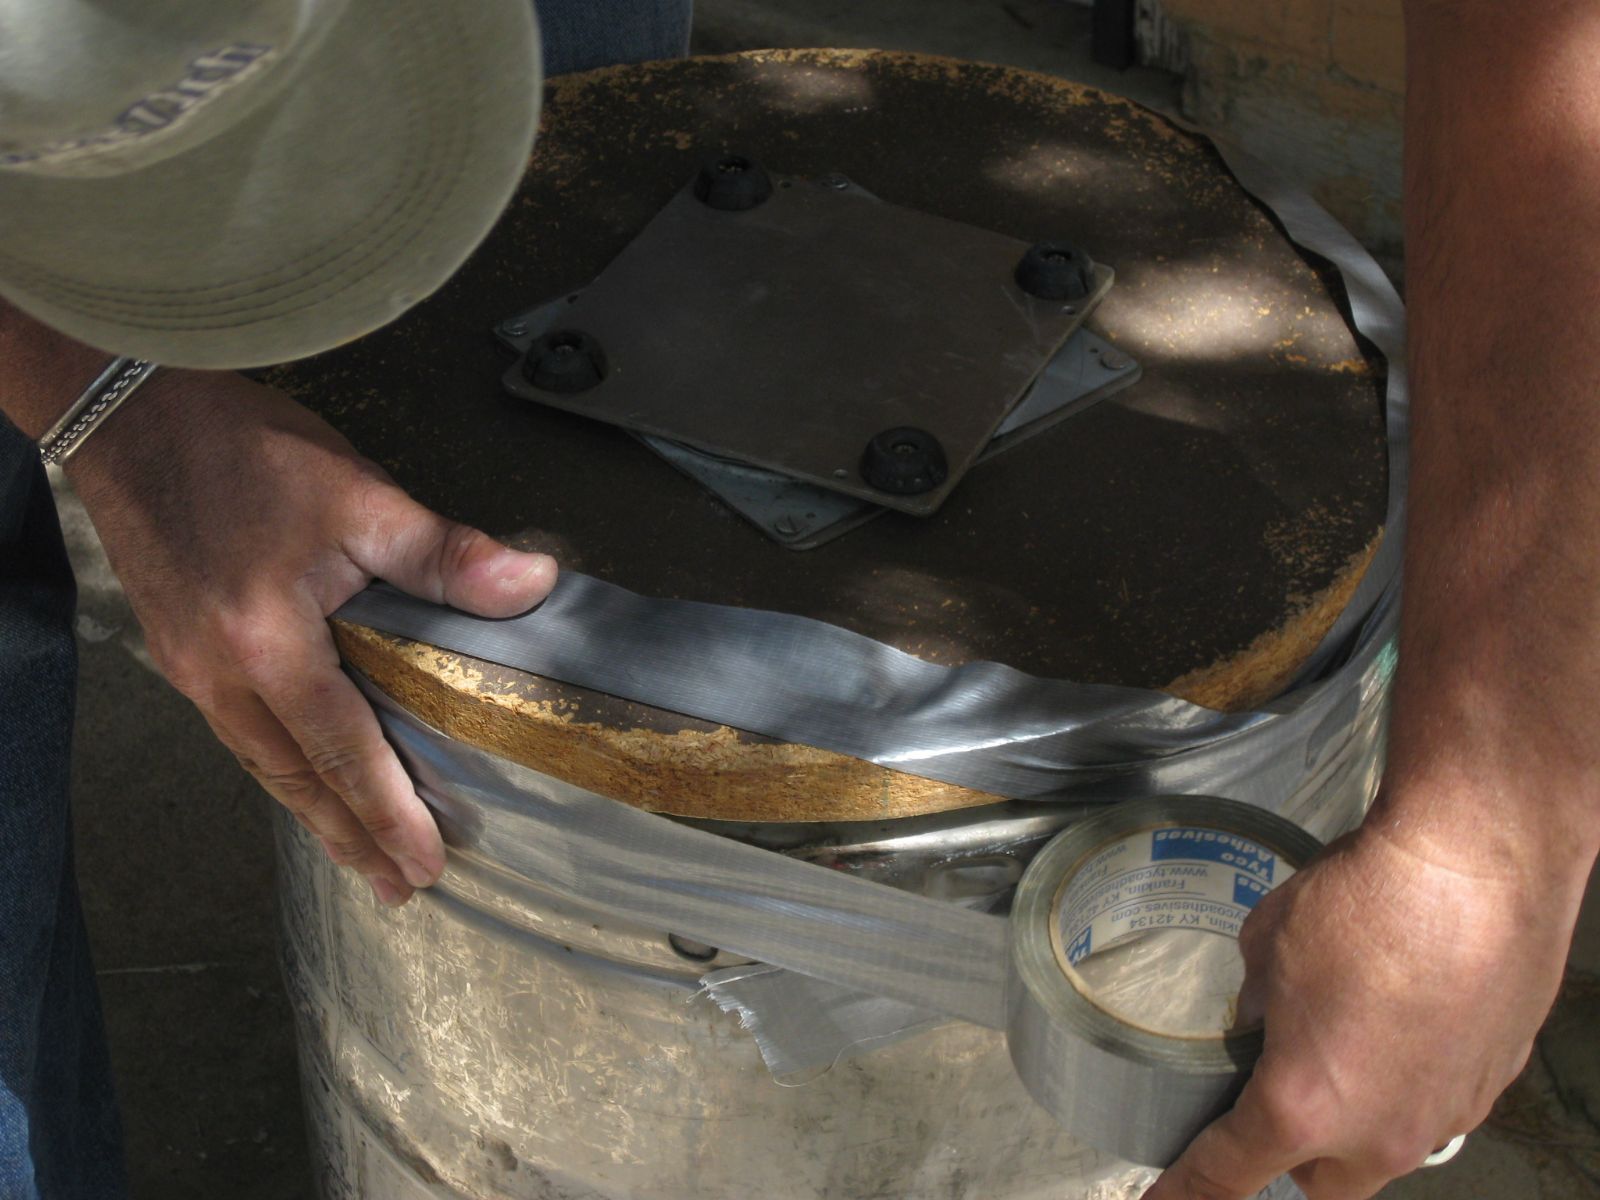
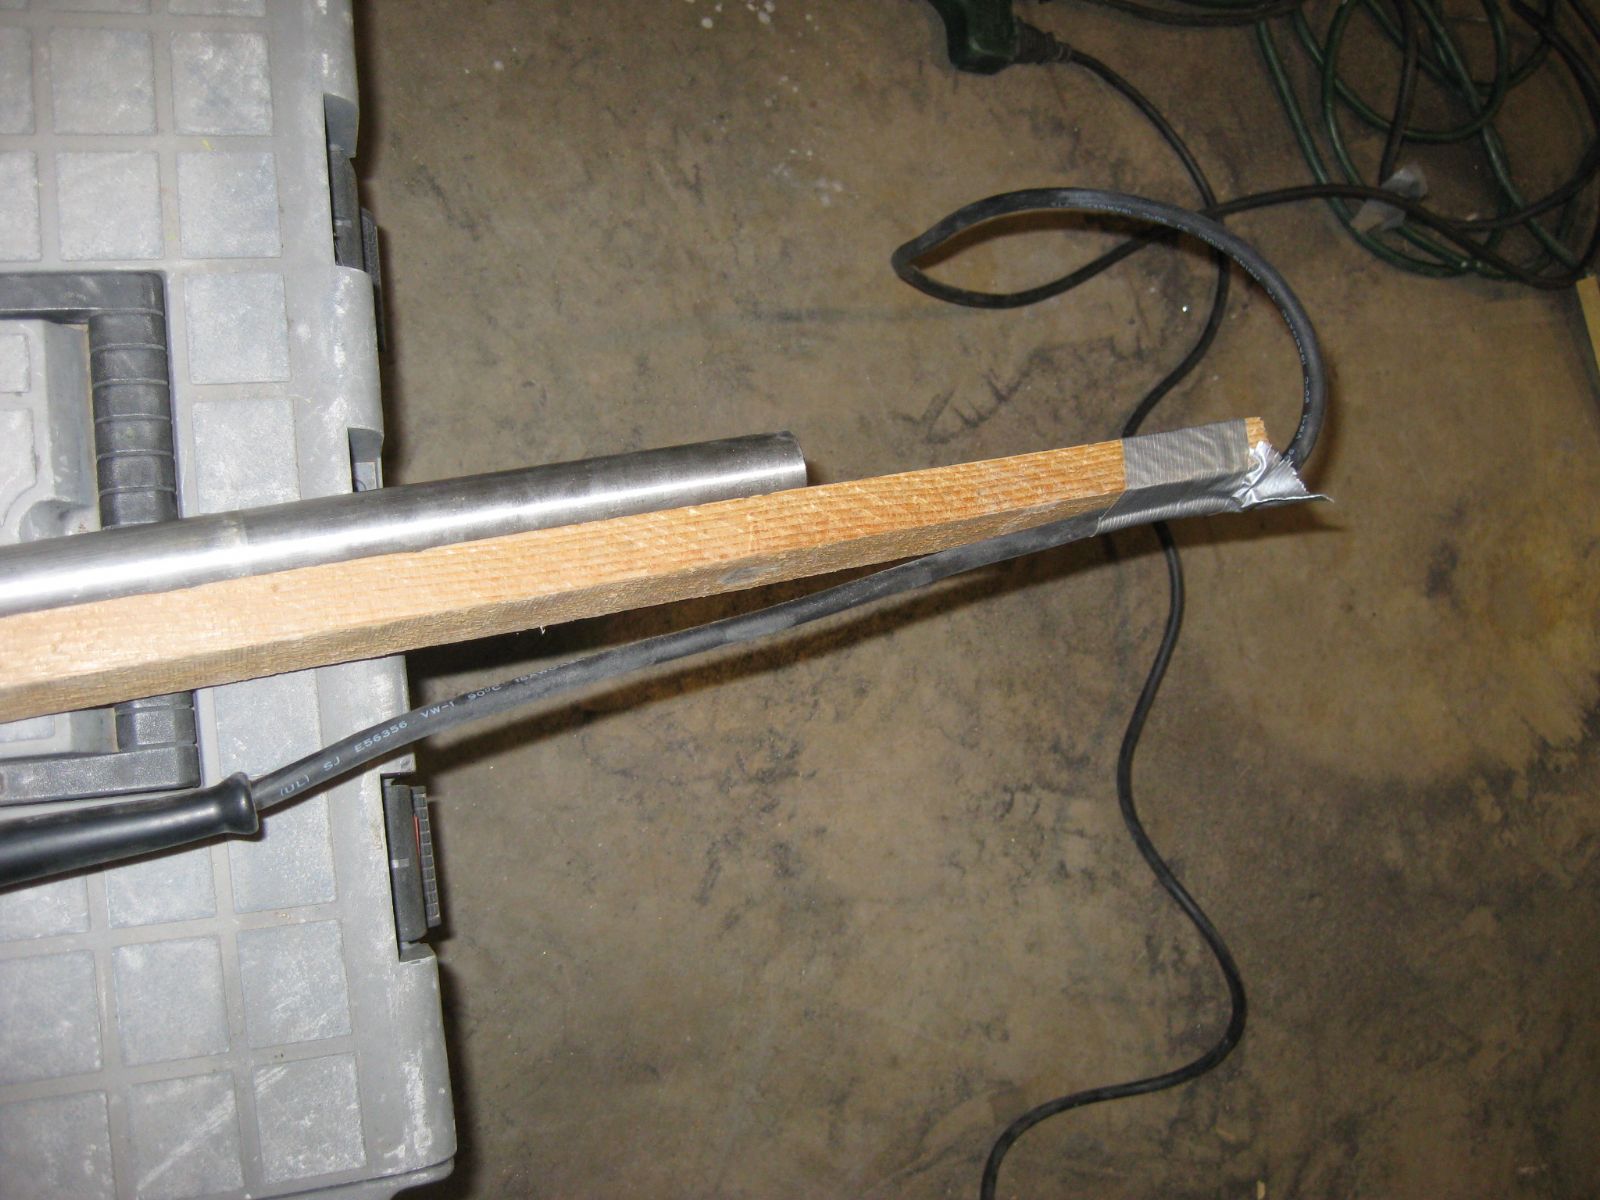
6. Tape your cutting saw to a narrow piece of wood and around the keg stem with the head of stem aligned with your cutting saw. The keg spear will be placed in the mouth of the keg to act as a guide when you are cutting the keg.
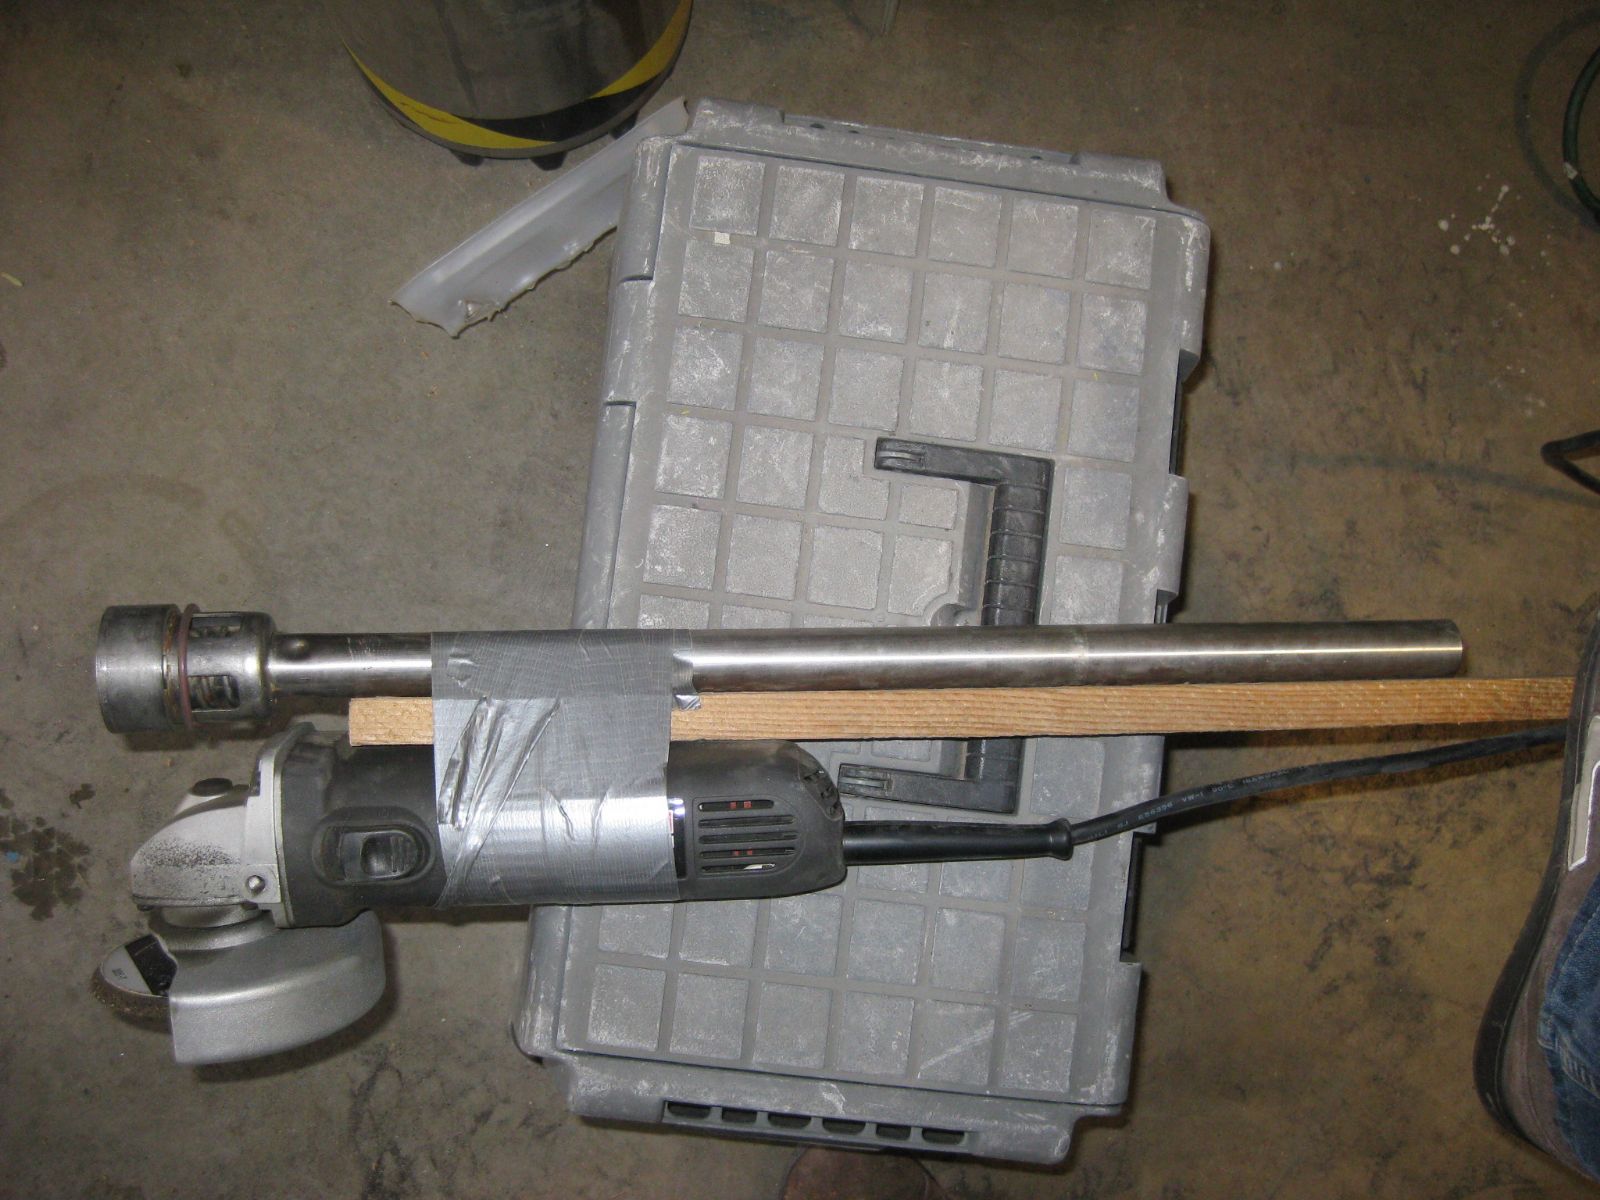
7. Tape the cord of your cutting saw to the end of the piece of wood so that it is out of the way when you are cutting. The piece of wood also acts as a spacer to increase the diameter of the hole being cut.
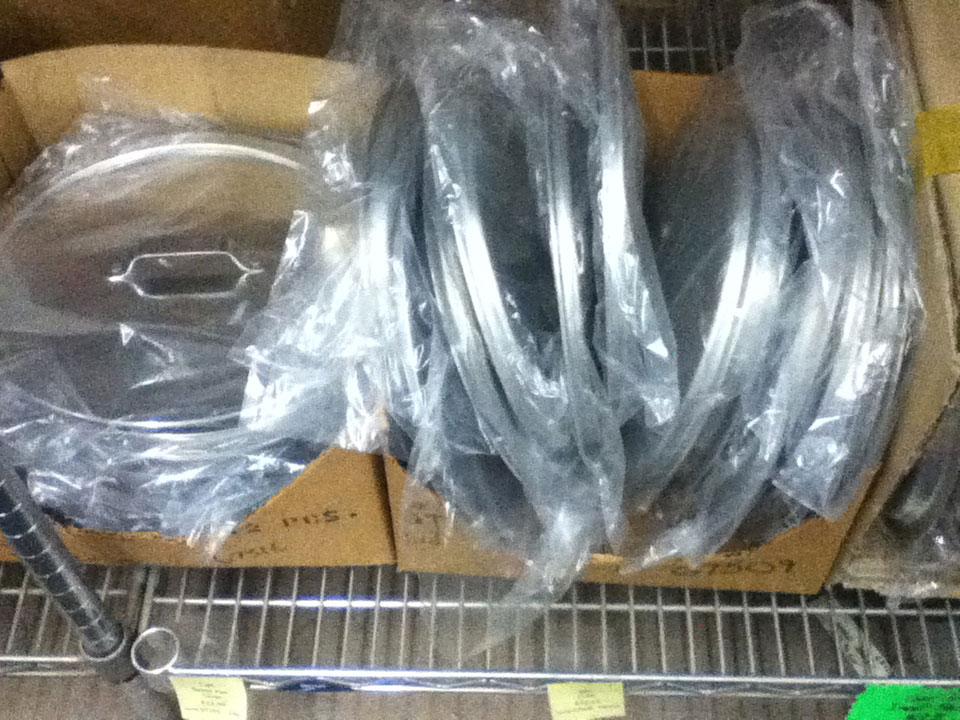
8. Measure a diameter of 10 inches (or whatever diameter your lid size is), and trace the circumference using a string looped around the mouth of the keg with a marker or pencil attached to the end of the string. If you do not already have a lid, you can buy one from a discount restaurant supply store; lids are sold in many diameter sizes, usually in increments of 1/2 an inch (i.e. 10 inches, 10.5 inches, 11 inches, etc.). I would recommend a lid size no smaller than 10 inches and not wider than 12 inches.
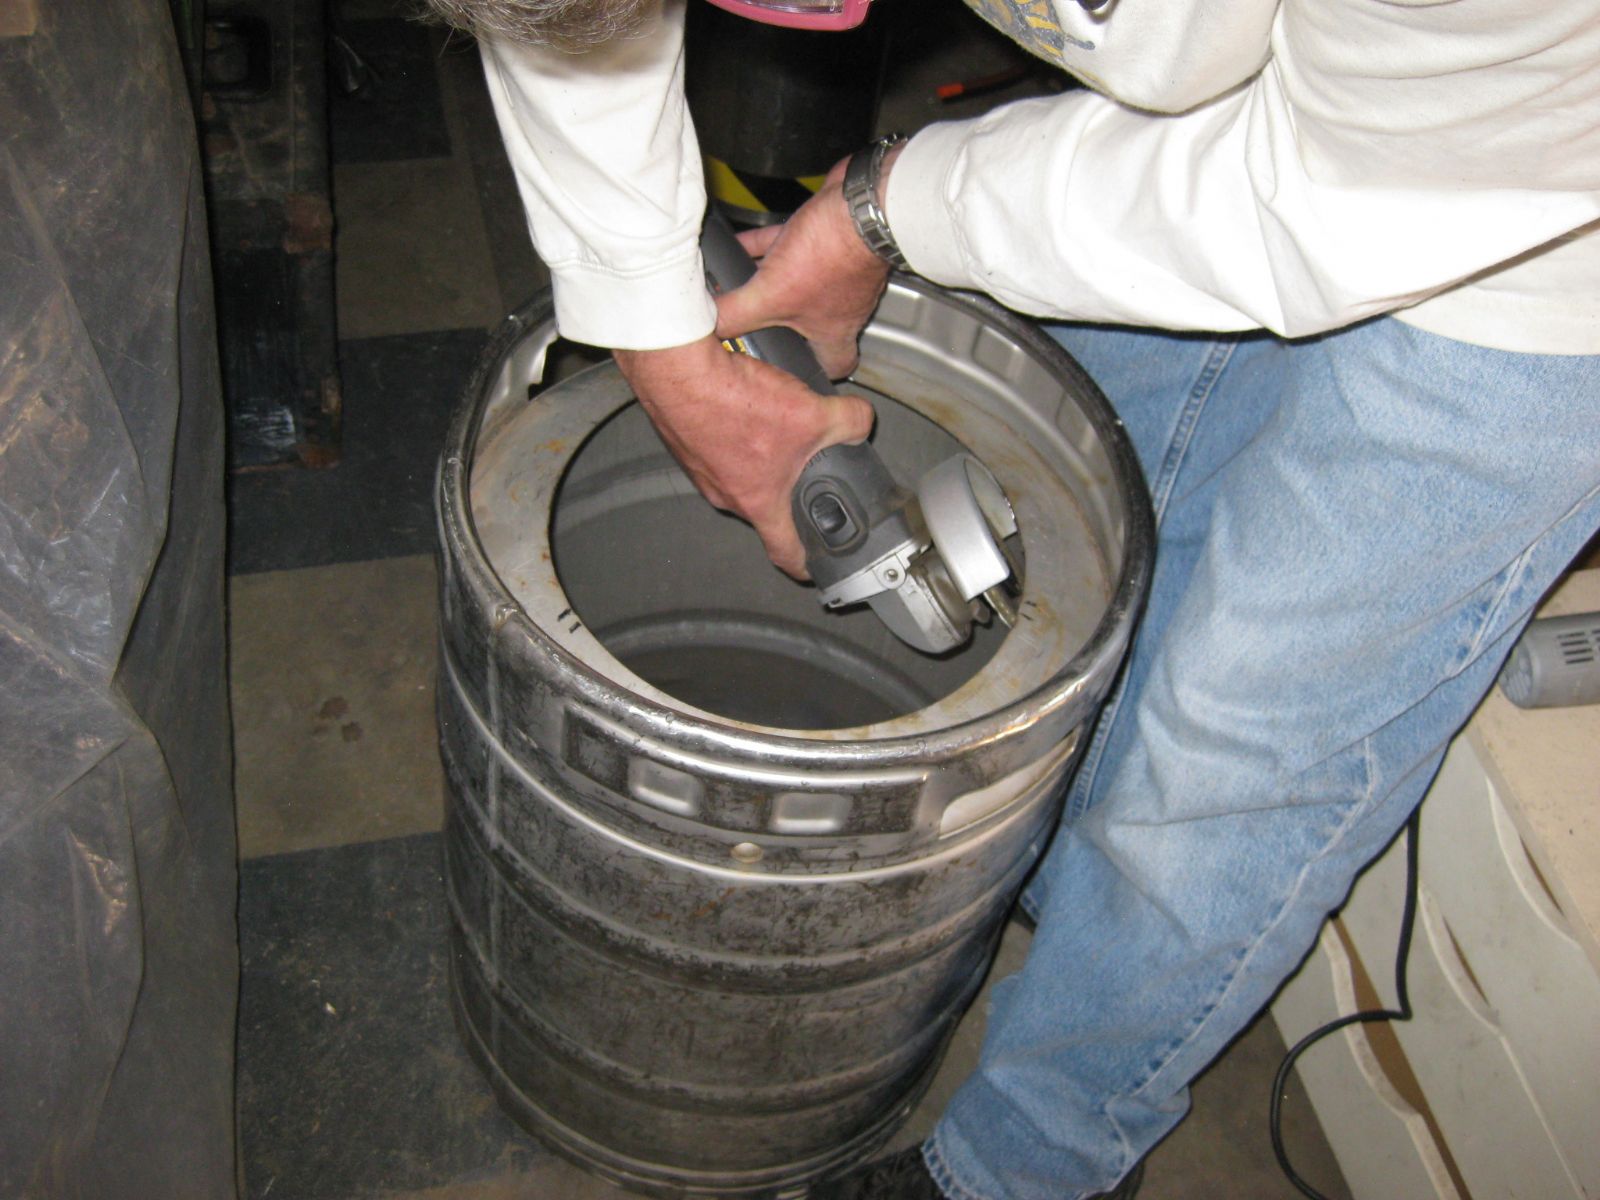
9. Once your keg has been marked, put on your safety gloves and safety glasses. As you are working with metal, rest assured there will be bits of glowing metal shavings flying off the end of your saw which you do not want to get in your eyes.
10. Fit the end of the keg spear inside the open hole of the keg, lining up the blade to the circle you've traced.
11. Begin cutting. Once you begin to cut, you will notice that the keg will begin to spin on the swivel. For this reason, it is best to have two people when cutting a keg using this method: One person to control the saw and the other person to control the speed at which the keg will spin. Using the swivel method allows for a more accurate, controlled cut, leaving your keg with clean circular opening.
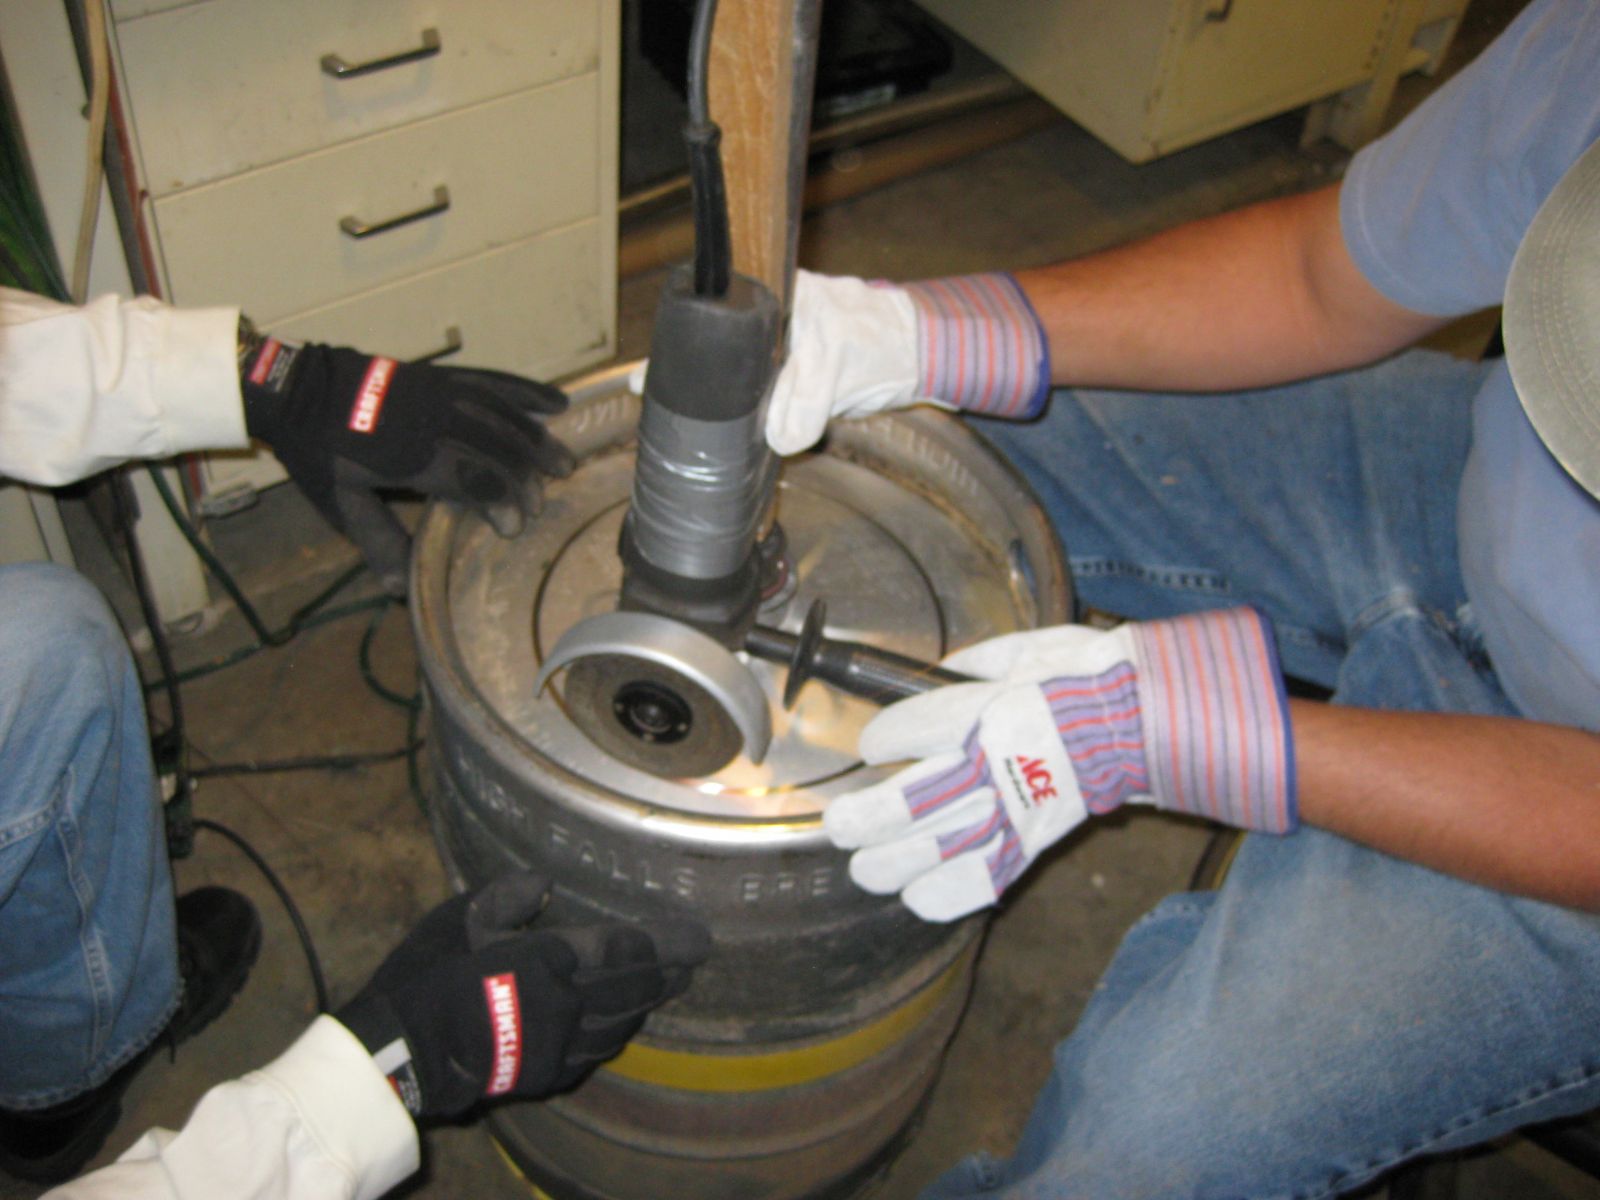
12. Once your hole is cut, use your saw to grind off the metal burrs around the inside and out of the circumference of the hole until smooth to the touch. You can later use sand paper to achieve an even smoother edge.
13. Locate a spot between the existing vent holes (see cautionary note below) that encircle the steel lip at bottom of the keg, measure 3 3/4 inches from the bottom of your keg and mark this point with a marker or pencil.
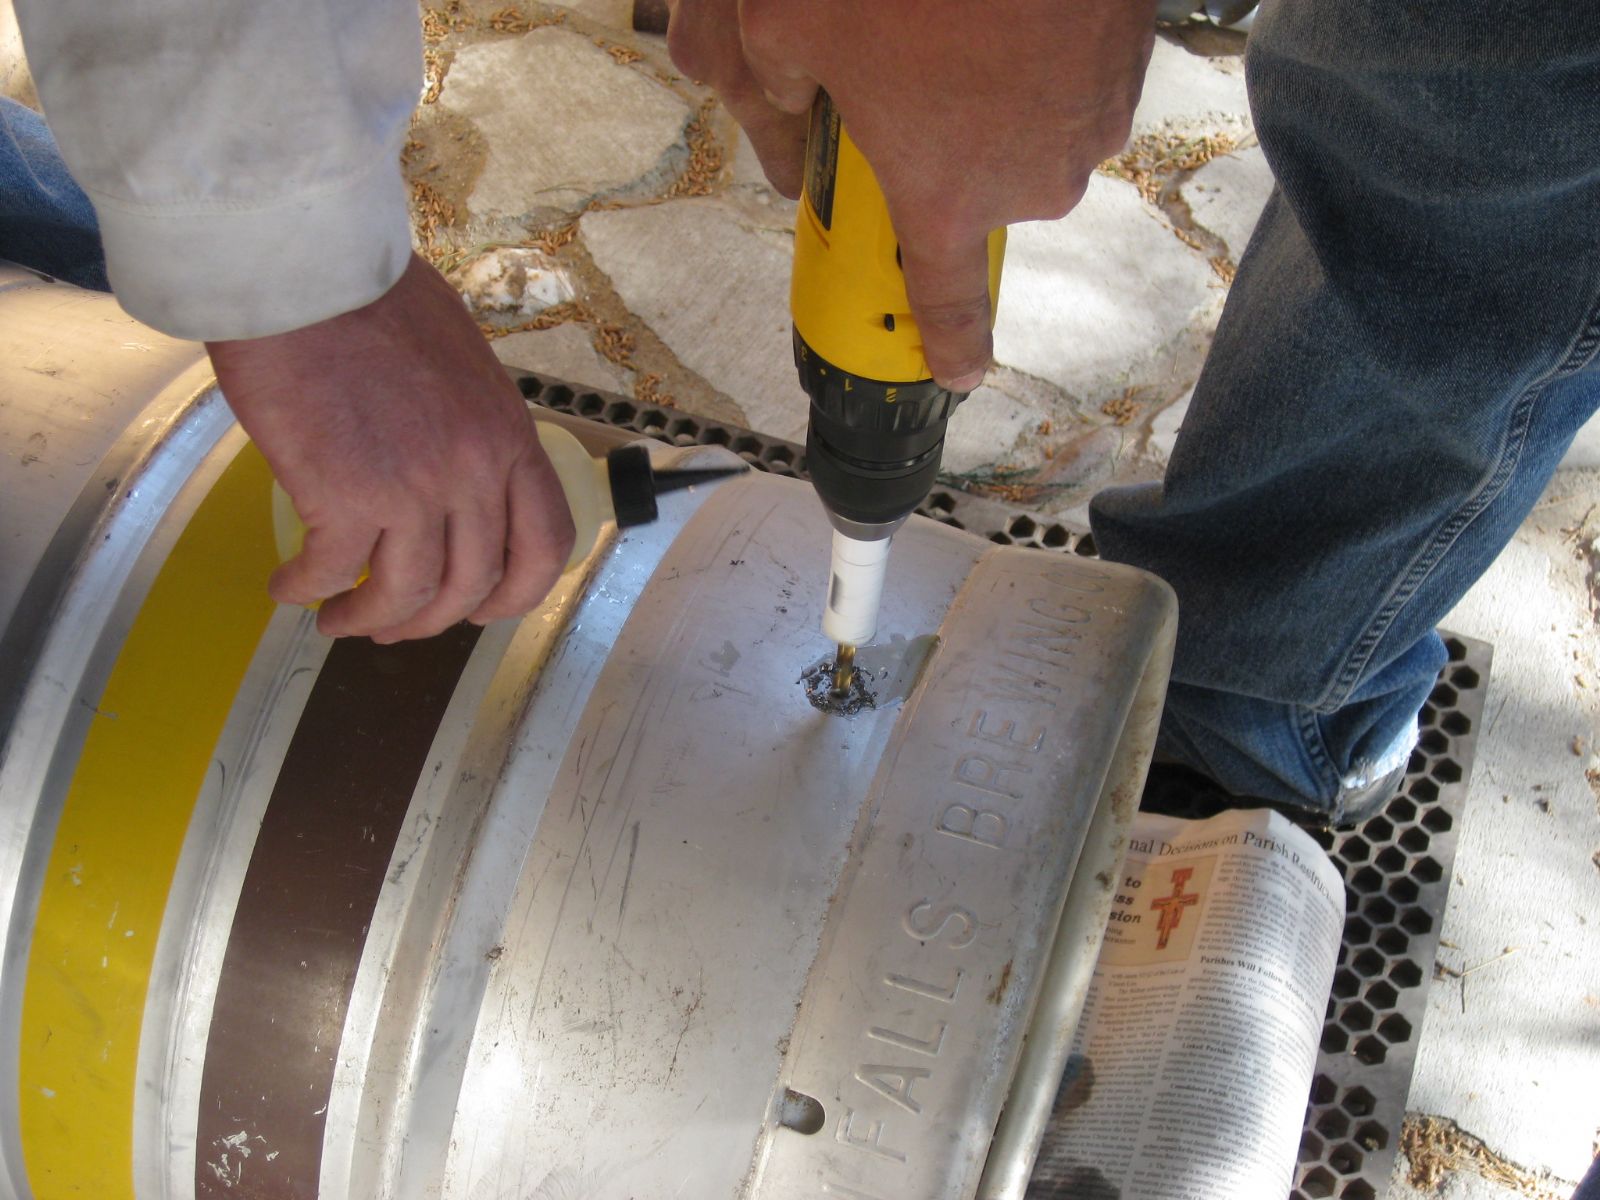
Begin drilling with a 3/4" hole saw, or step-drill bit for a 3/4" hole (if using a step drill, it's smart to check that your fitting fits as you move up to the next diameter on the drill bit). In either case, it is recommended to go slow and to continually apply cutting oil as you drill so as to extend the life of your tools.
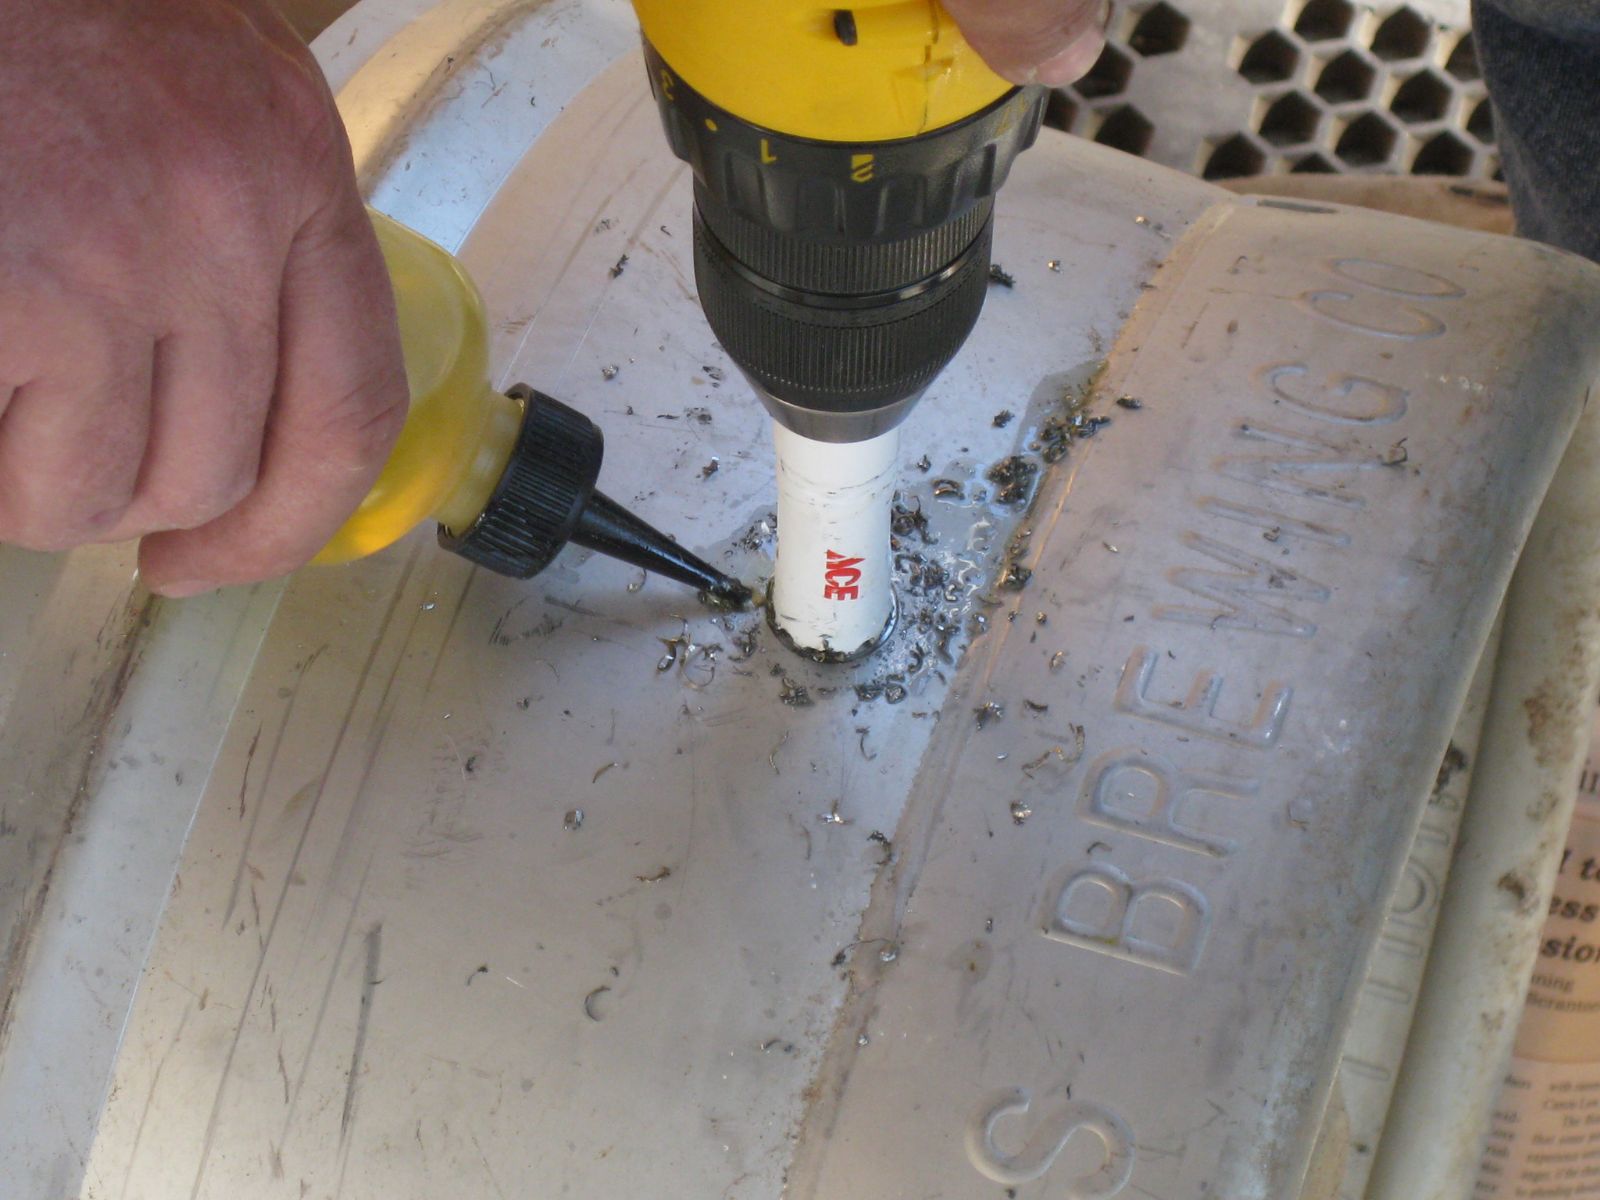
CAUTION: If your keg does not have existing vent hole/s that encircle the bottom collar of the keg, it's highly recommended that you drill at least one hole so as to avoid gas build-up in the enclosed rim and the eventual exploding keg. No joke, this is serious bad news if there is not at least one vent hole in the bottom rim of the keg (there are usually four holes). If the bottom rim of your keg explodes, it will be loud, probably destroy your burner, knock the keg over and spill out however many gallons of boiling hot wort you have brewing. Use your imagination as to the potential injuries you and anyone around the exploding keg could incur.
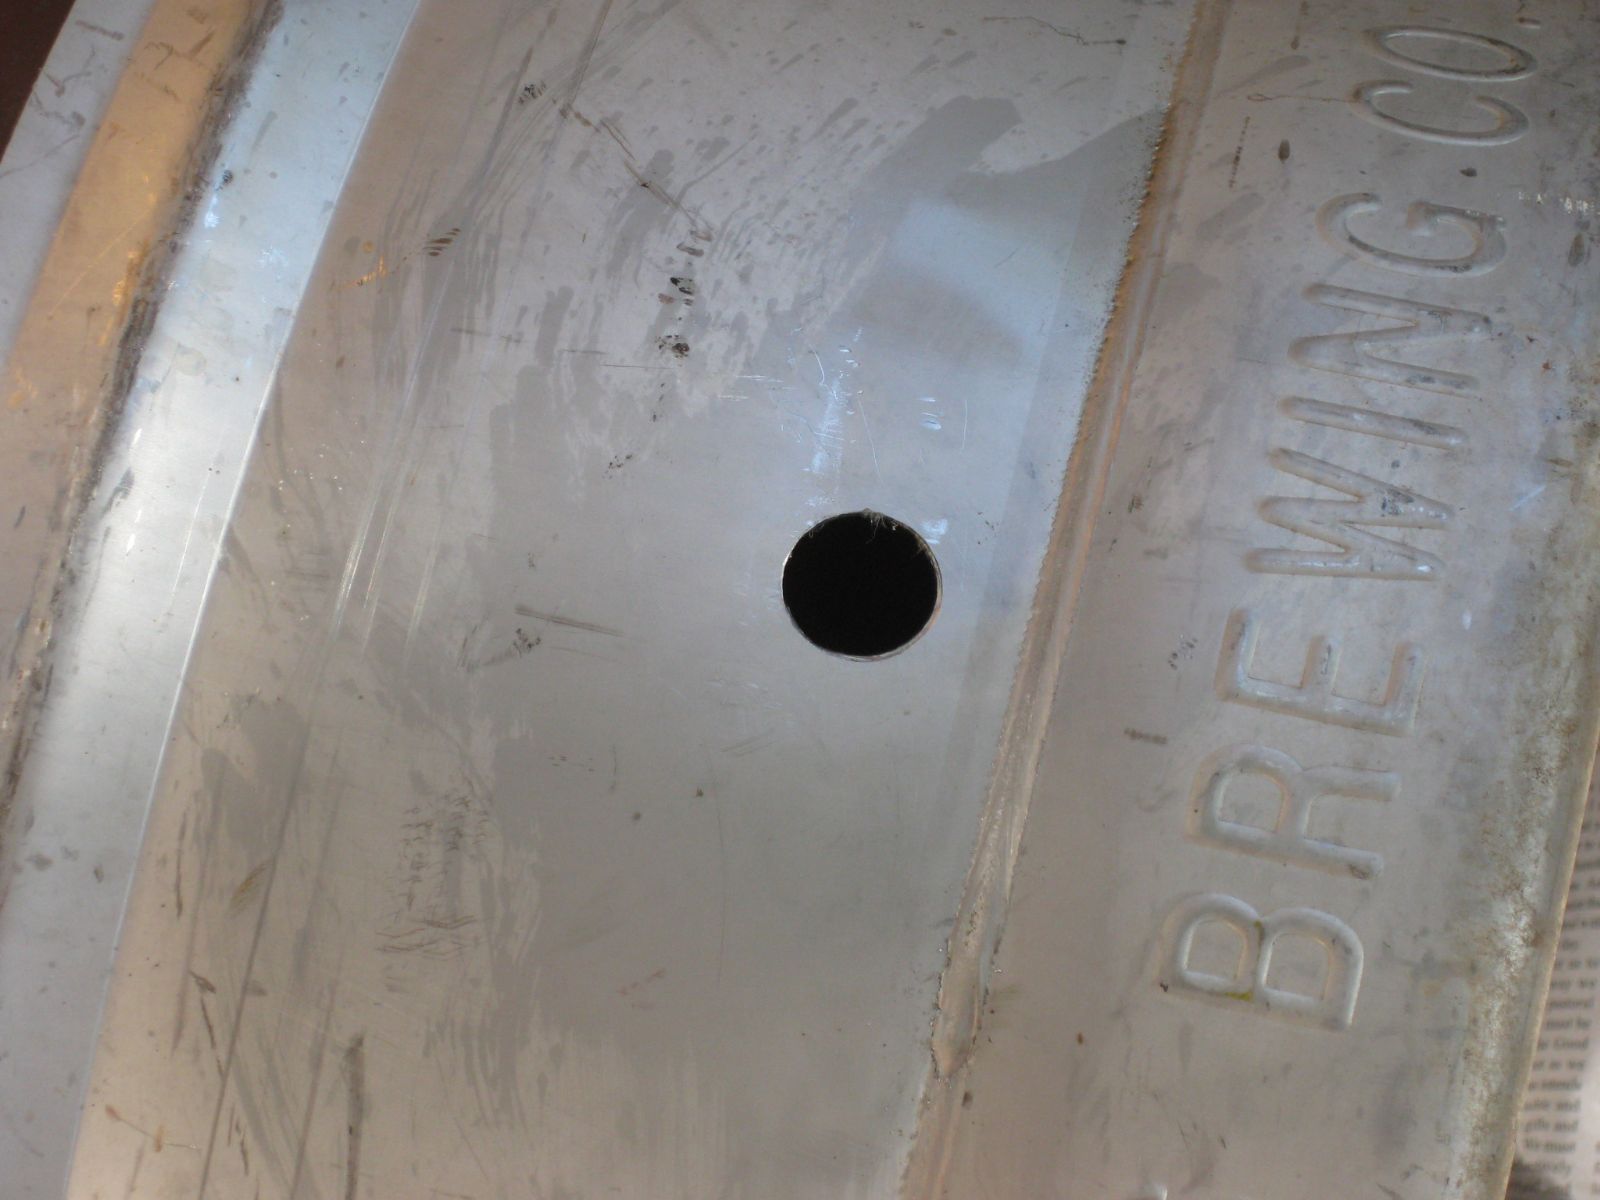
14. Once the hole is drilled, use a rounded metal file to ensure that your 1/2 inch ball valve fitting can be threaded properly into the hole. Then sand the inner and outer circumference of the hole, removing any metal burrs, until smooth to the touch.
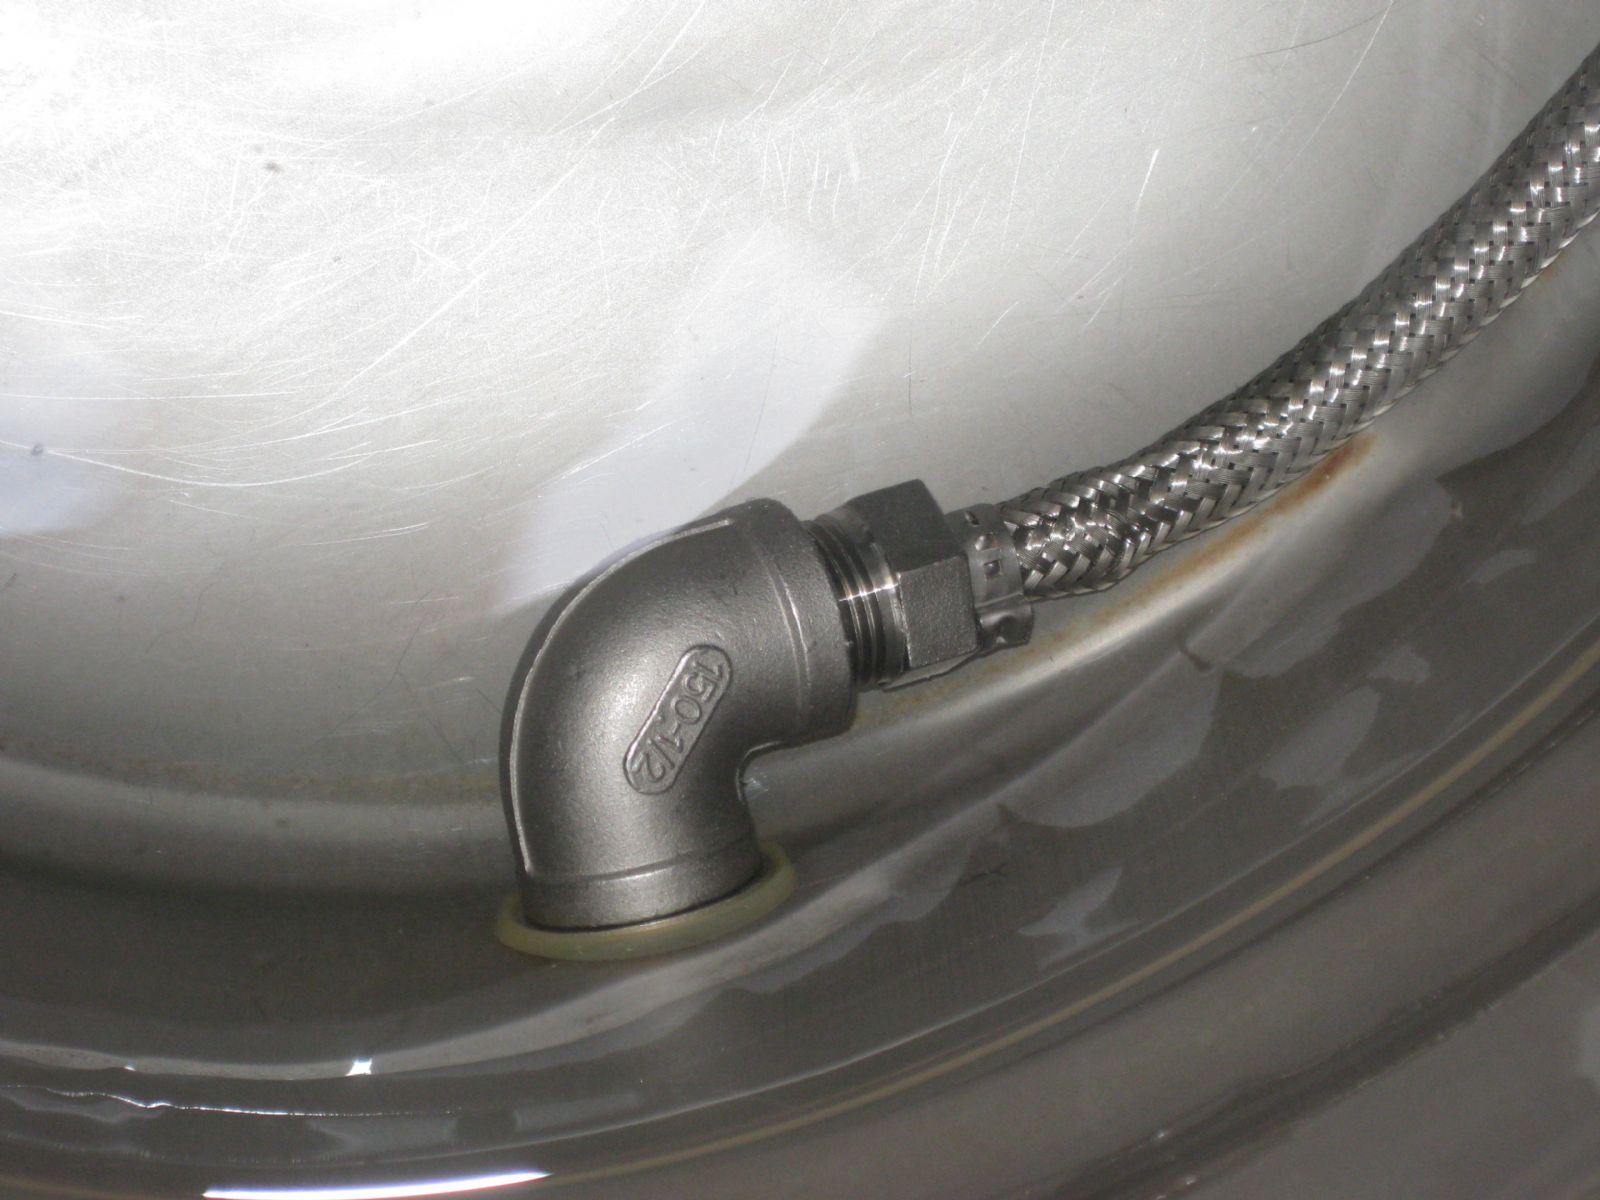
15. Attach a stainless steel filter to the inside of your keg (cost: about $16.99 plus the stainless steel 90 degree elbow fitting for about $3.75). A stainless steel mash braid filter is used to prevent hops and other sediment from transferring into your fermenter bucket. There are other options including a Bazooka T filter setup or using a false bottom with a dip tube.
By the way, we recommend installing a weldless ball valve setup because it's easier and cleaner looking than spot welding the fittings together; not to mention easier to clean and replace pieces if something breaks or gets burned.
16. Attach a 1/2" stainless steel ball valve spigot to the outside of the keg. The spigot below is a two piece ball valve fitted with a 1/2" hose barb with a 3/8" tip.
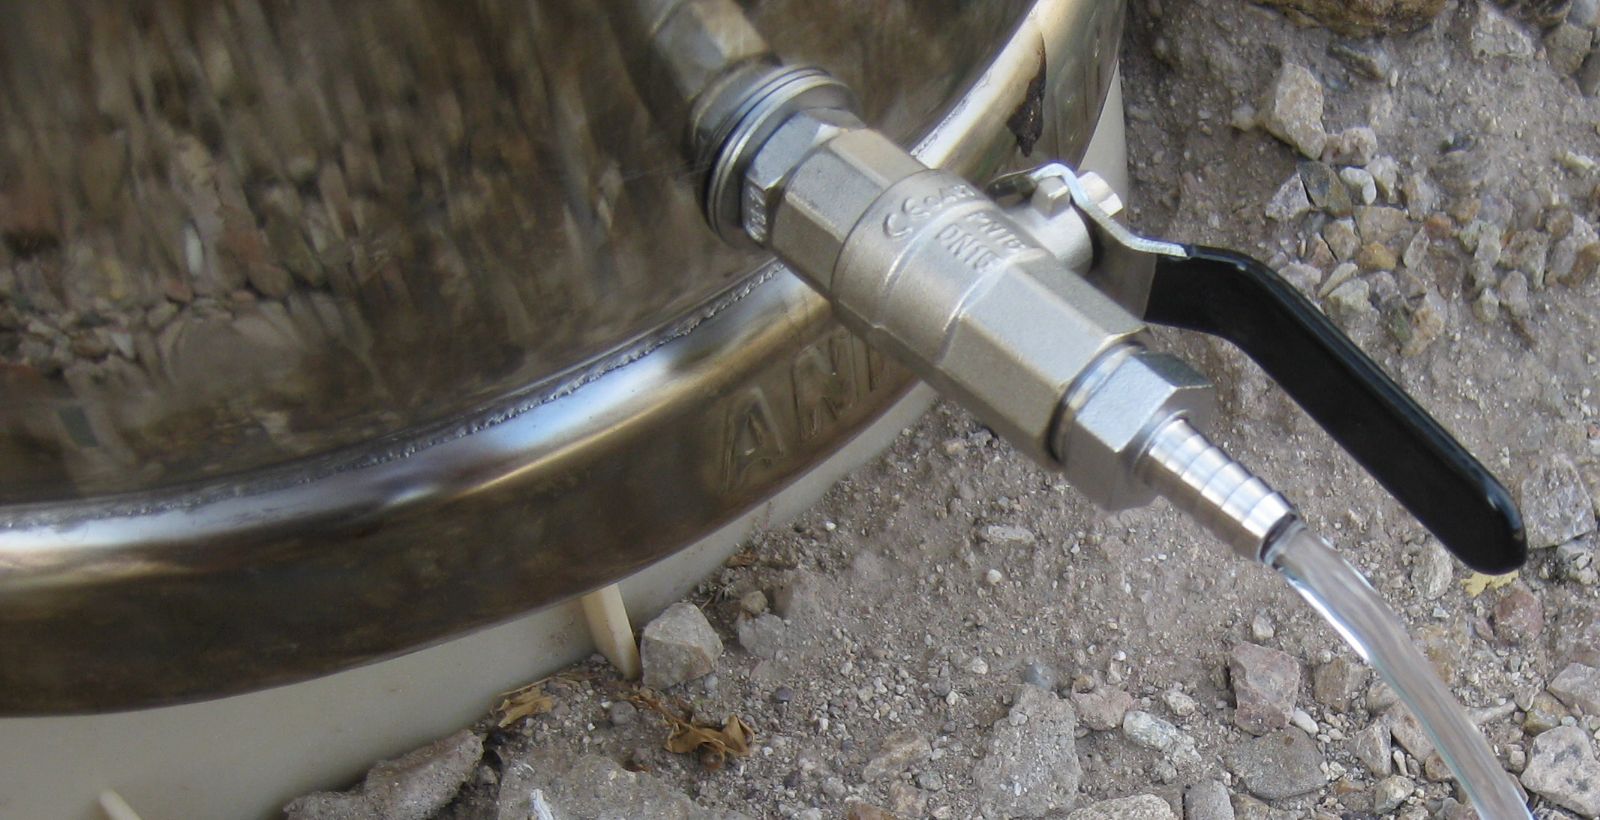
You can also attach a 1/2" three piece ball valve setup for a little more money (about $30 in total verses about $24 for the two piece setup). It's argued that the three piece valve is easier to clean than the two piece. I've used both and don't notice that much of a difference in terms of ease of cleaning, however I do prefer the 1/2" hose barb with a 1/2" tip over the 1/2" hose barb with a 3/8" tip because of faster liquid transfer when collecting the wort, etc.
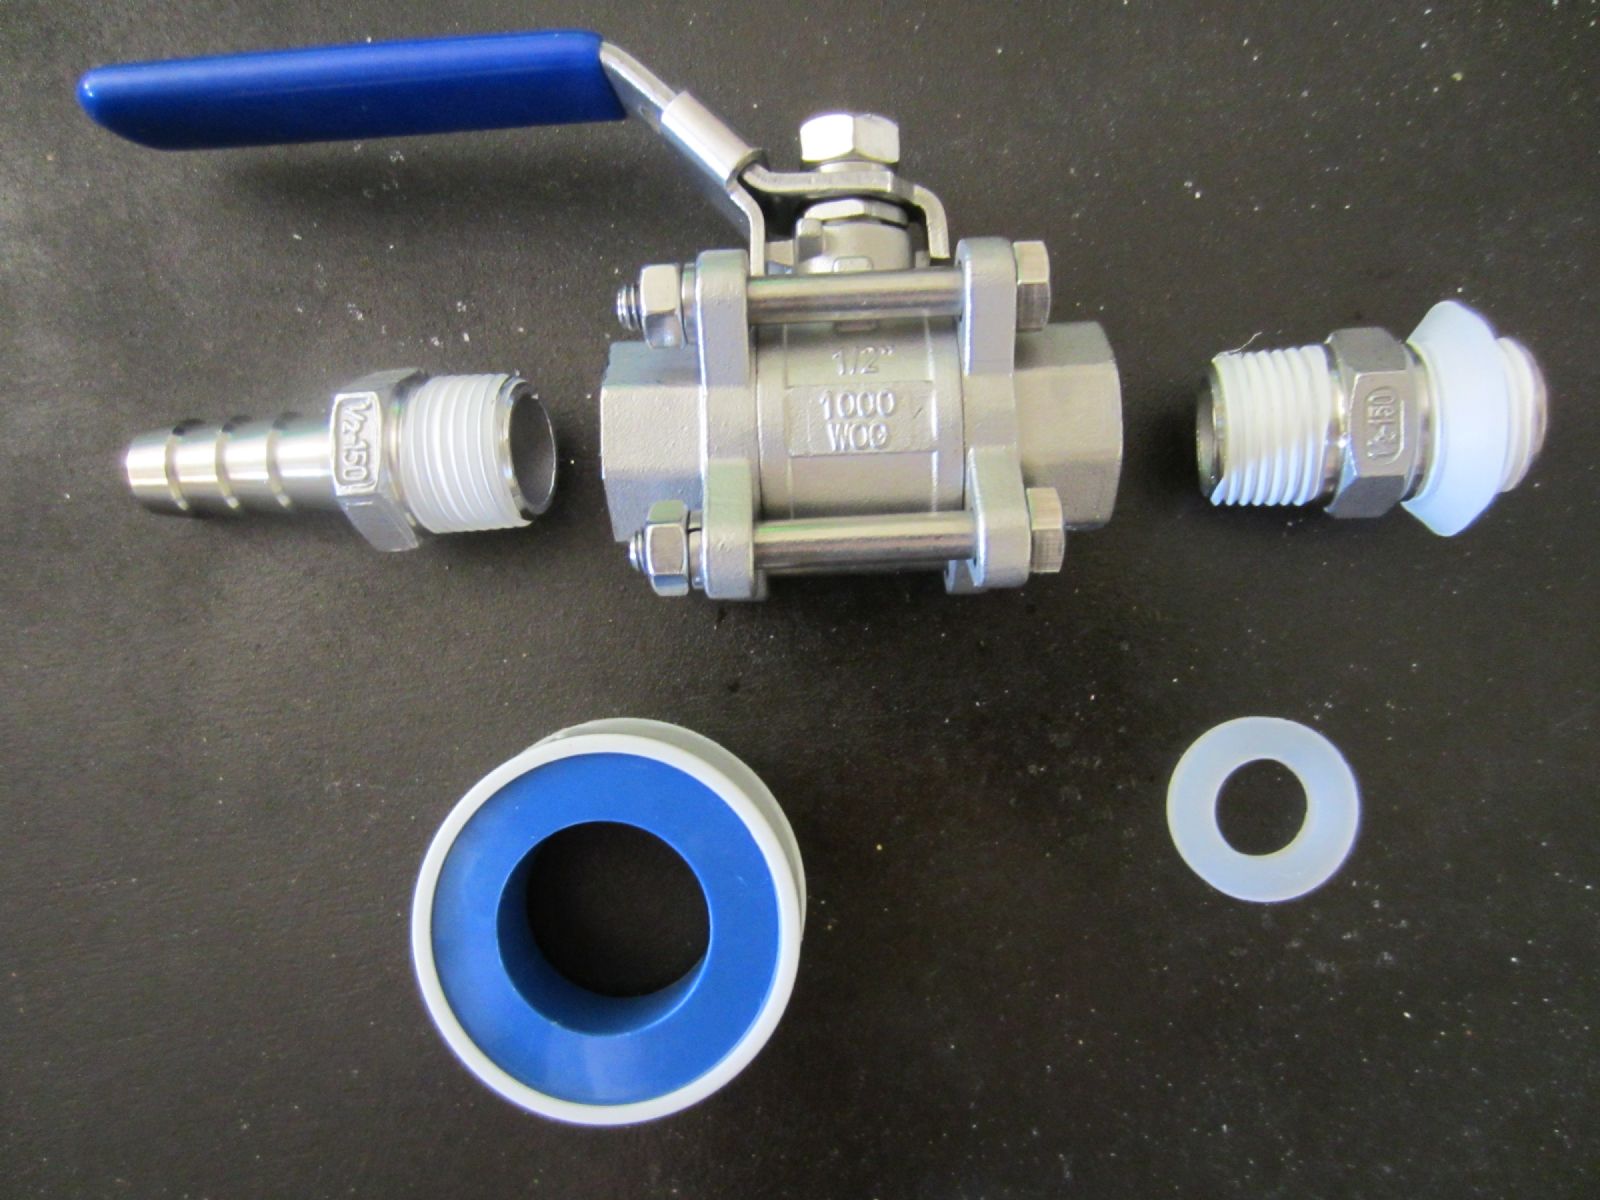
Here are the individual pieces you'd need for this setup (from left to right starting at the top, and prices are what were listed at barginfittings.com as of 11/06/14):
1. 1/2" NPT x 1/2" Hose Barb -304 Stainless (The thread is already wrapped with teflon tape; $4.15)
2. Stainless steel 3 - piece ball valve - FULL PORT [$17.99]
3. 1/2" NPT Hex nipple Stainless (The threads are already wrapped with teflon tape and a silicone gasket is placed on one end; $5.00)
4. Plumber's Tape [$1.50] It is strongly recommended that you wrap all male threaded ends with plumber's tape (PTFE tape/thread seal tape) to avoid galling (or bonding) the pieces together; "galling" is like an STD that metal parts can get.
5. 1/2" Camlock silicone gasket [2 gaskets; $.75 each]
There are several places where you can buy these pieces, but many homebrewers have found barginfittings.com to have the lowest prices.
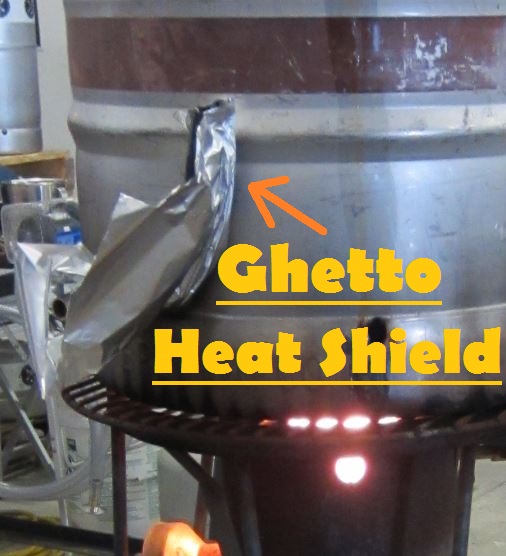
Here's one last nice tip for you: Strongly consider buying or making a heat shield to place under your ball valve to protect it from the burning flame. Now the stainless steel on your ball valve isn't going to melt, but the plastic coating on the handle can, not to mention any wort inside the valve can get scorched which is a pain to clean and will leave little black floaties in your wort. The only place we've seen that sells this type of heat shield is at BrewHardware.com. I ended up having to replace my ball valve setup because I had it positioned upside down right over the heat of the flame, which burnt the heck out of plastic handle and charred the inside of the ball valve assembly; the burning plastic smell was my clue (see below).

(Nice crusty, burnt up two piece ball valve set for sale.)
So learn from my mistake and save yourself the hassle and money of buying a new ball valve setup.
Want to save some money and time either buying or making a heat shield? We've got you covered. Introducing the...
Ghetto Heat Shield: For a quick and easy ghetto heat shield option, simply wrap some aluminum foil around your ball valve in order to protect the plastic coated handle from melting. Presto. Just to be safe, try to position the aluminum foil so that it doesn't come directly in contact with the plastic coated handle.
Kettle Lid: Some homebrewers recommend measuring the diameter of the hole you cut into the top of your kettle, and then seeing if you can find that size of a lid at a second hand shop, but we prefer the more efficient approach of visiting a discount restaurant supply store with the diameter size and purchasing a brand new correctly fitting lid for about $10.
Happy kettle making!
Like this tutorial? Questions, comments, free beer? Feel free to drop me a line at dan@beersyndicate.com, or follow us on Twitter at twitter.com/beersyndicate.
From The Blog
Tips for Craft Brewery Success
The best business secrets wikileaked from the private records of the most successful craft breweries in the United States.
Beer Names You Might Be Saying Wrong
Enlighten yourself, but please don't correct others. It's just one of those Catch-69 situations, like when somebody has ketchup on their face.
The Beer Quiz
What's your beer IQ? This test measures an individual’s beer knowledge through a series of questions of varying levels of difficulty: Normal, Hard, and Insane.
Homebrewing Techniques
Beat the Stuck Fermentation Monster
You've brewed the perfect wort. You bullseyed your strike temp, you had a most excellent cold break, your OG was right on the money...
How to Cork Belgian Beer Bottles
So you wanna up your bottling game, huh? Well, you've come to the right place.
Top 40 Ways to Improve Your Homebrew
Admit it: No matter if in a DeLorean, TARDIS, or a hot tub, we’ve all thought about what advice we might give our younger selves if we could go back in time.
DIY Projects
How to Polish a Keg
Shining up your keg will probably not improve the taste of your beer, but it looks cool and inspires epic brewing sessions!
Convert a Refrigerator Into a Fermentation Chamber
Decided to take a huge step in improving your homebrew and set up a temperature controlled fermentation system, have ya? Smart thinking.
How to Convert a Keg Into a Brew Kettle
Convert that old keg into a brewing kettle. The advantages of using a keg for homebrewing pretty much come down to quality and cost.
|
|