How to Make an Immersion Wort Chiller
By DANIEL J. LEONARD
Making and using an immersion wort chiller is one of the most cost-effective ways to improve the quality of your beer. The chiller costs about $25-$35 to make (depending on the cost of copper tubing in your area), and requires very little technical ability.
As far as improving the quality of beer goes, wort chillers are very useful when brewing a full 5 gallon or more batch of wort because they help achieve a good cold break after the boil, and a good cold break helps to improve the clarity of beer by causing proteins to flocculate to the bottom of the wort, preventing what is known as chill haze.
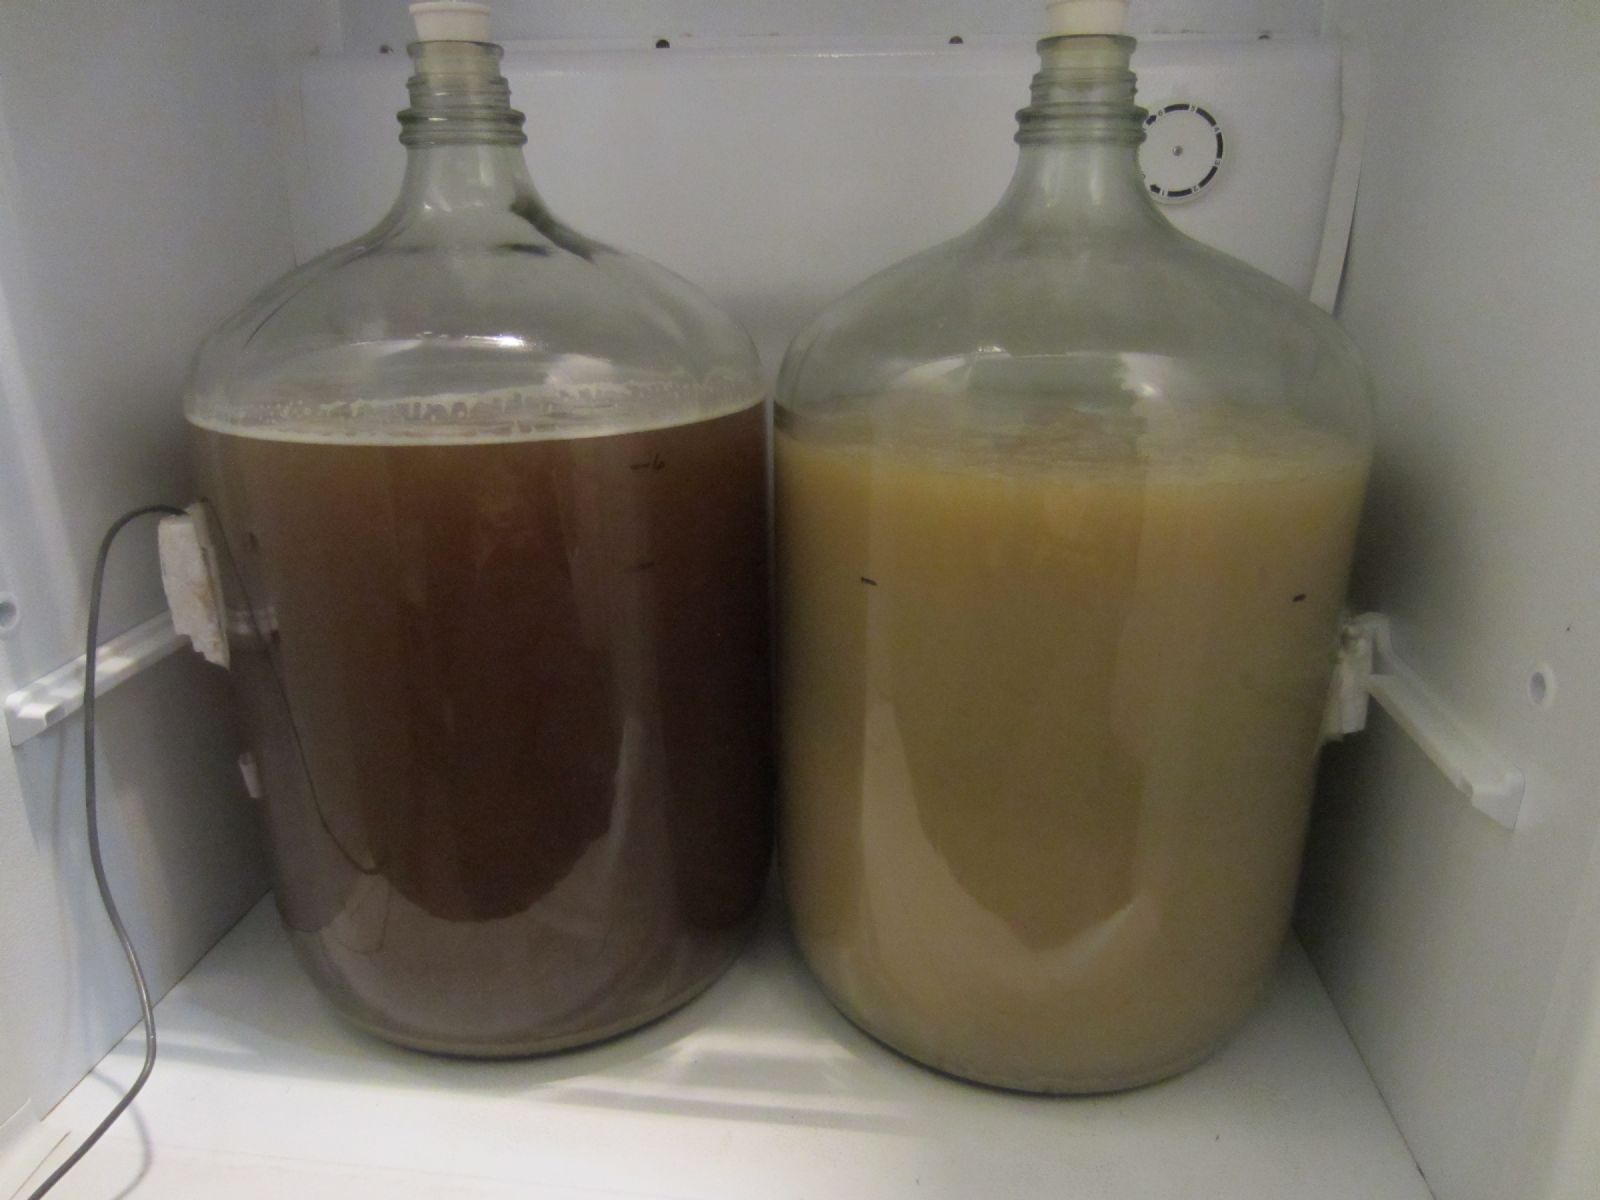
[The beer on the left was clarified using a wort chiller, while the cloudy tan been on the right was not.]
In addition, a good cold break can potentially increase the stability/ shelf-life of the beer. Moreover, the faster you can get your beer from boiling temperature to pitching temperature, the better cold break you will get and the less opportunity you'll leave for unwanted bacteria to set up camp in your wort.
An immersion style wort chiller works as a heat exchanger by physically placing the copper coil into a brew kettle at the end of the boil, and then slowly running cold water through one of the hoses attached to the copper coil. As the water passes through the copper coil, it cools the coil which in turn cools the wort. Finally, the water passes out of the other end of the copper coil and the hose attached to it, allowing the heat absorbed by the water from the wort to dissipate. Most brewers will connect a short garden hose to the adapter connected to the pvc tubing on the wort chiller where the hot water is coming out in order to direct the hot water further away from the brew kettle.
A word of caution: when I say hot water comes out of garden hose connected to the wort chiller, believe me, that water is hot, scalding hot, so be careful especially right after you’ve just finished boiling, have immersed the wort chiller and began running water through the chiller.
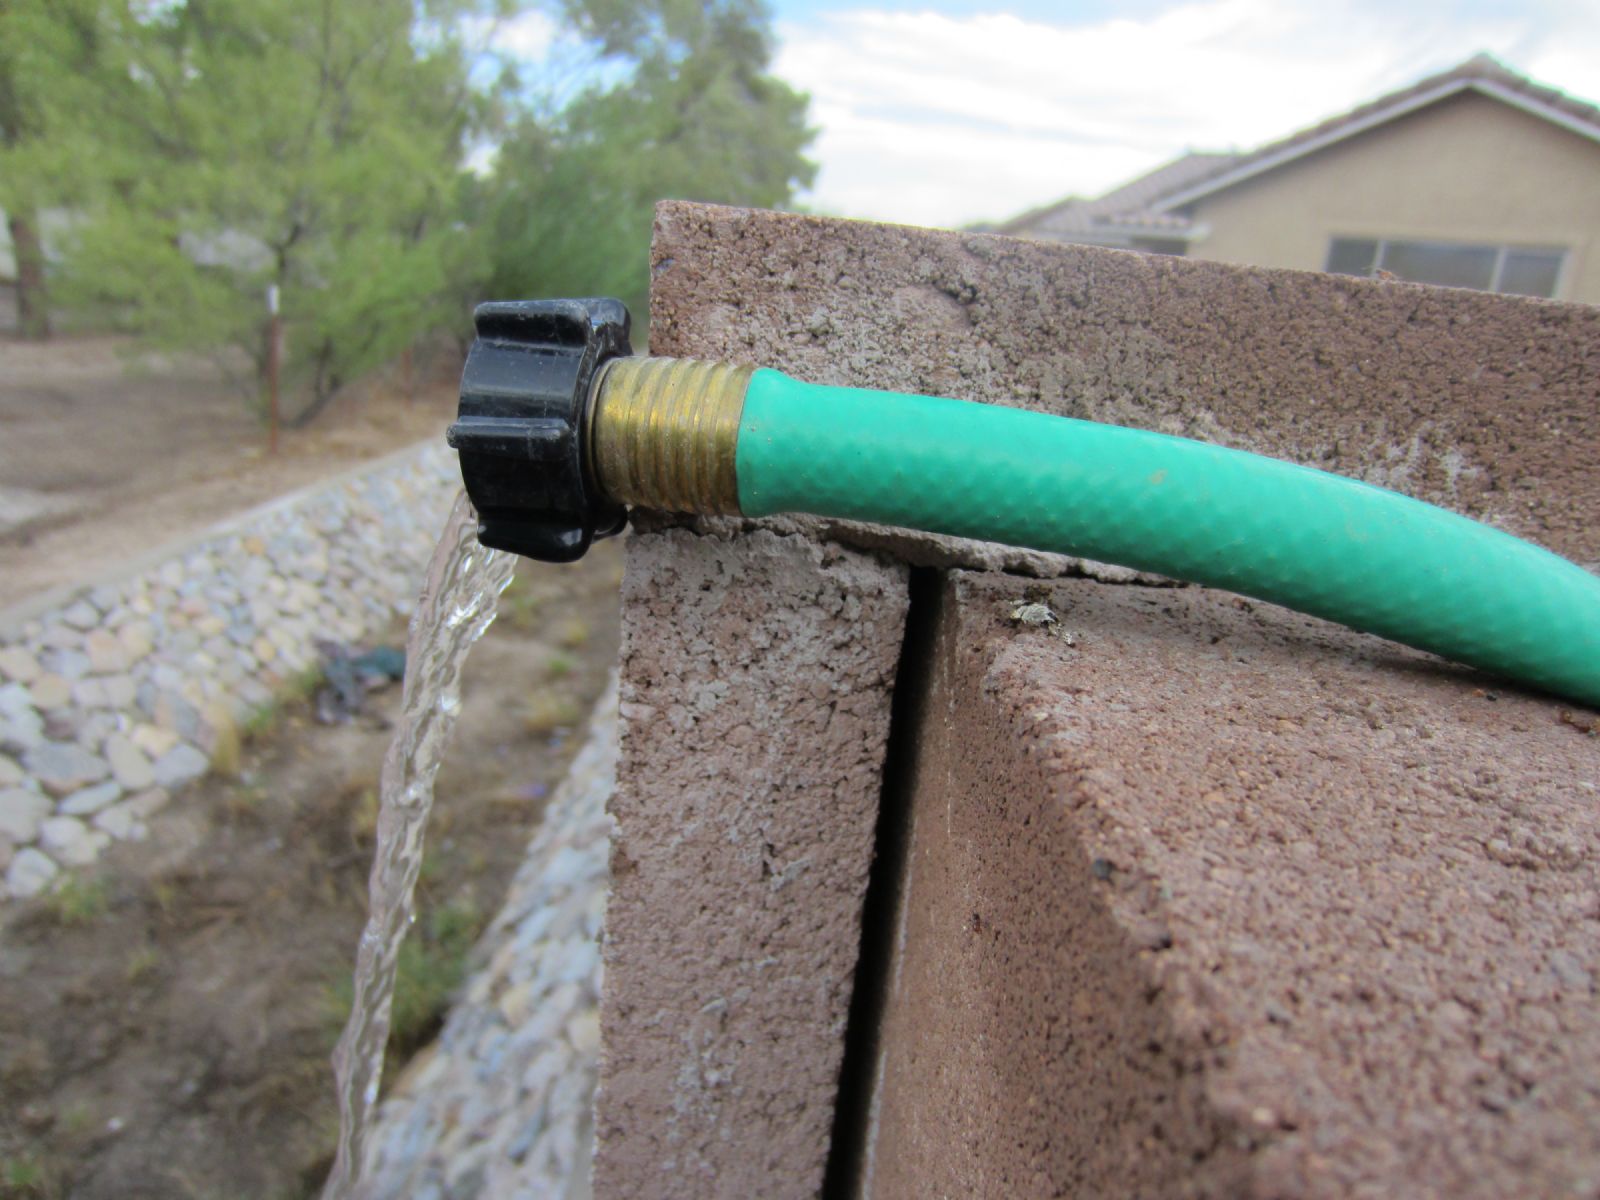
[It's best to drain the hot water end of the garden hose in a safe place where you or others won't get burned.]
It’s also useful to remember that the colder the water used to run through the coil, the faster the wort will be chilled. Many brewers simply attach one of the hoses from the wort chiller to a garden hose or to the kitchen faucet (with an adapter) to allow cool water to pass into the chiller. However, others will attach a pump to one of the hoses and place the pump in a bucket filled with ice and water, while others will add an extra step and recirculate the water back into the ice water bucket in order to save water. There are plenty of designs out there, so feel free to get as creative as you like, but this tutorial will get you started with a basic model.
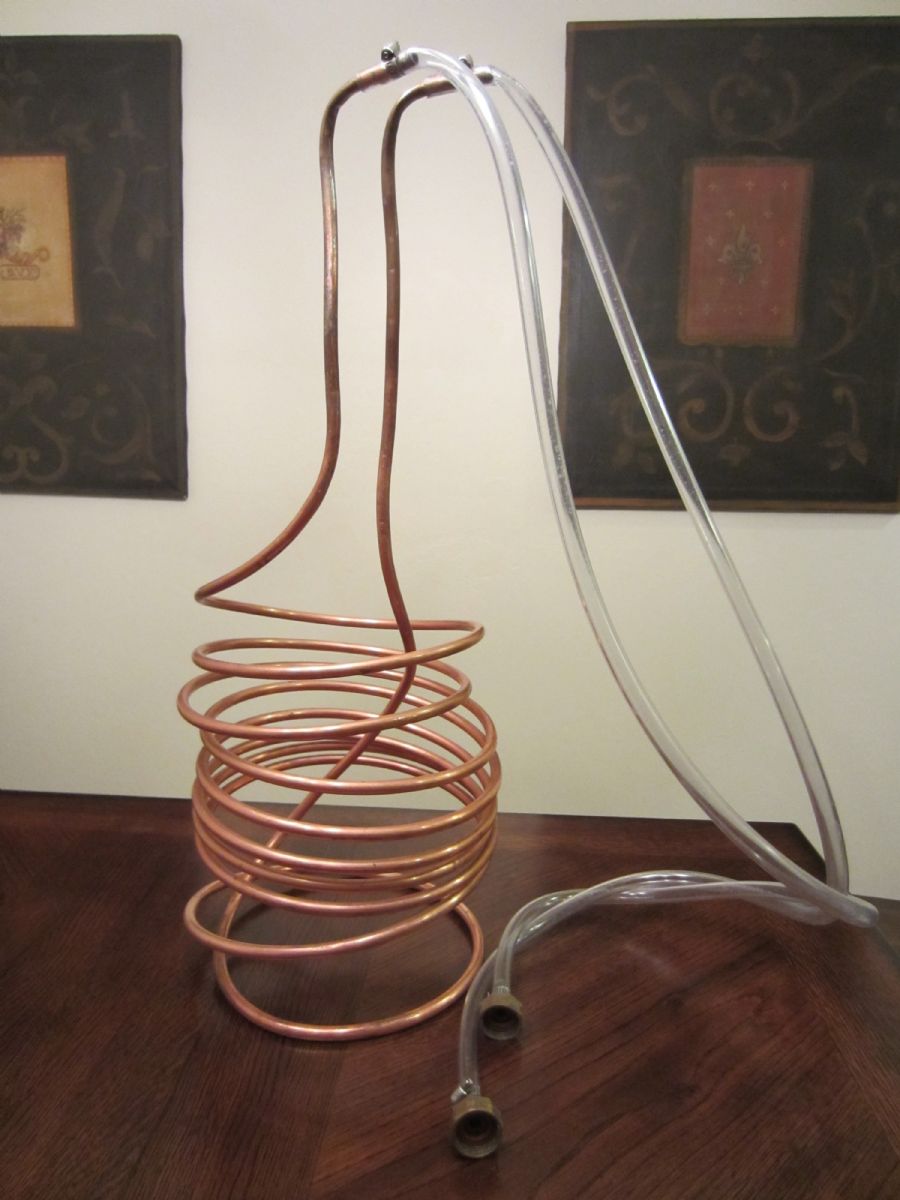
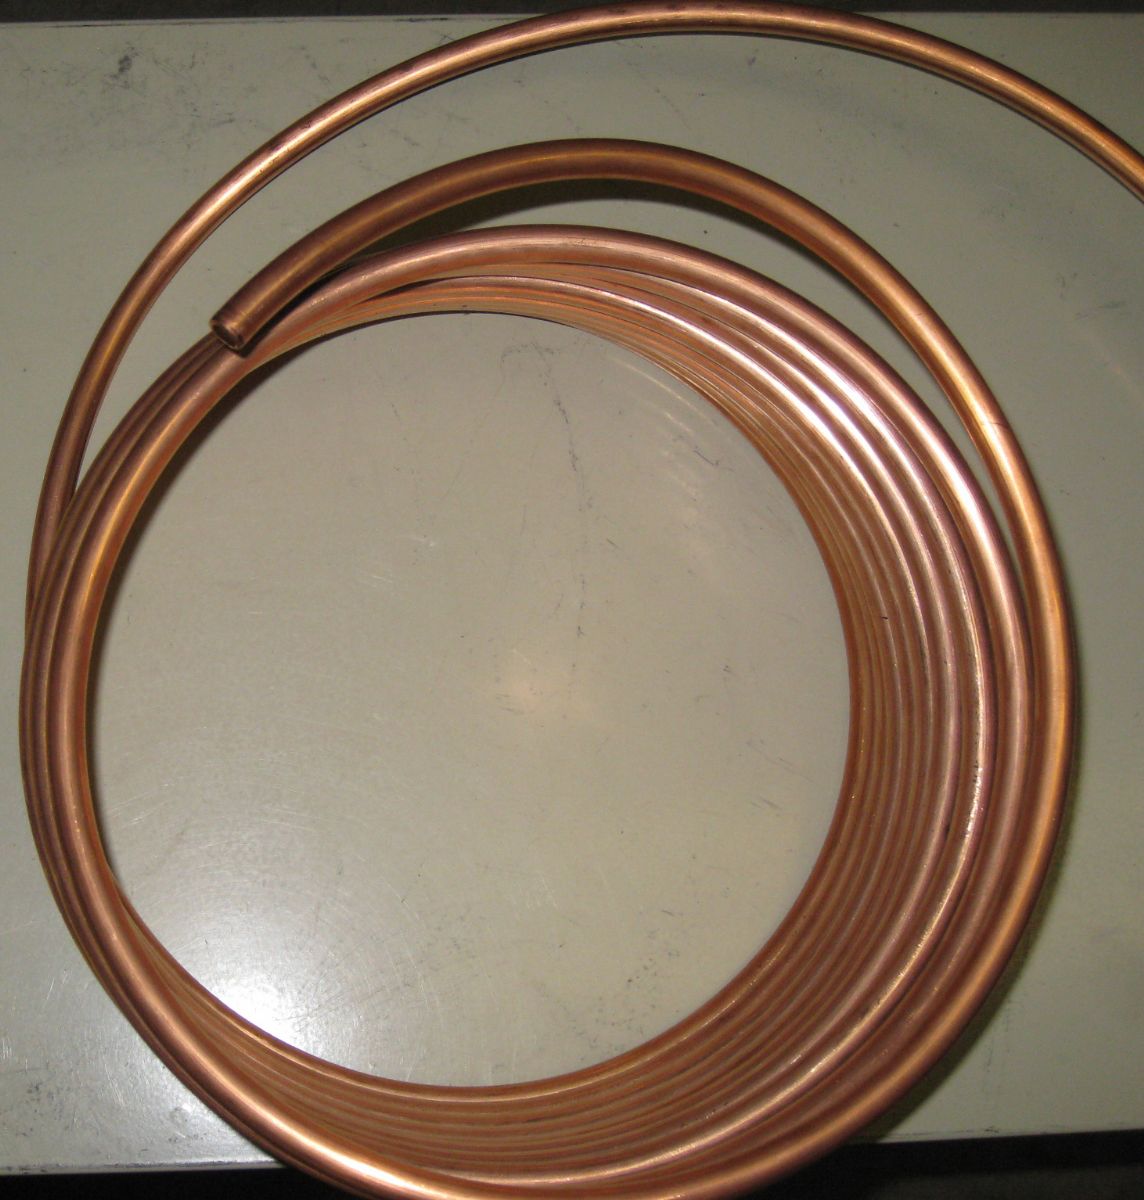
When building an immersion style wort chiller, the primary considerations are the length and diameter of the copper coil you are going to be using. The longer the coil, the greater the heat exchange due to the increased total surface area of the coil, and therefore the faster you can chill the wort. Most wort chillers are built using either 25 or 50 feet of coiled copper, however the more copper used, the more your costs start to add up, and in this case the copper just happens to be the most expensive part of the wort chiller. Also, depending on the diameter of the coil, water will travel either faster or slower through it with varied results. In other words, if you choose a wider diameter, say 5/8, the water may travel too quickly through the coil thereby decreasing maximum heat exchange efficiency, and if the diameter is too small, say 1/8, the water may travel too slowly causing the wort to cool slower than desired. With all this in mind, I choose to compromise and go with a 25 foot coil with a 3/8 diameter.
MATERIALS NEEDED/ RECOMMENDED:
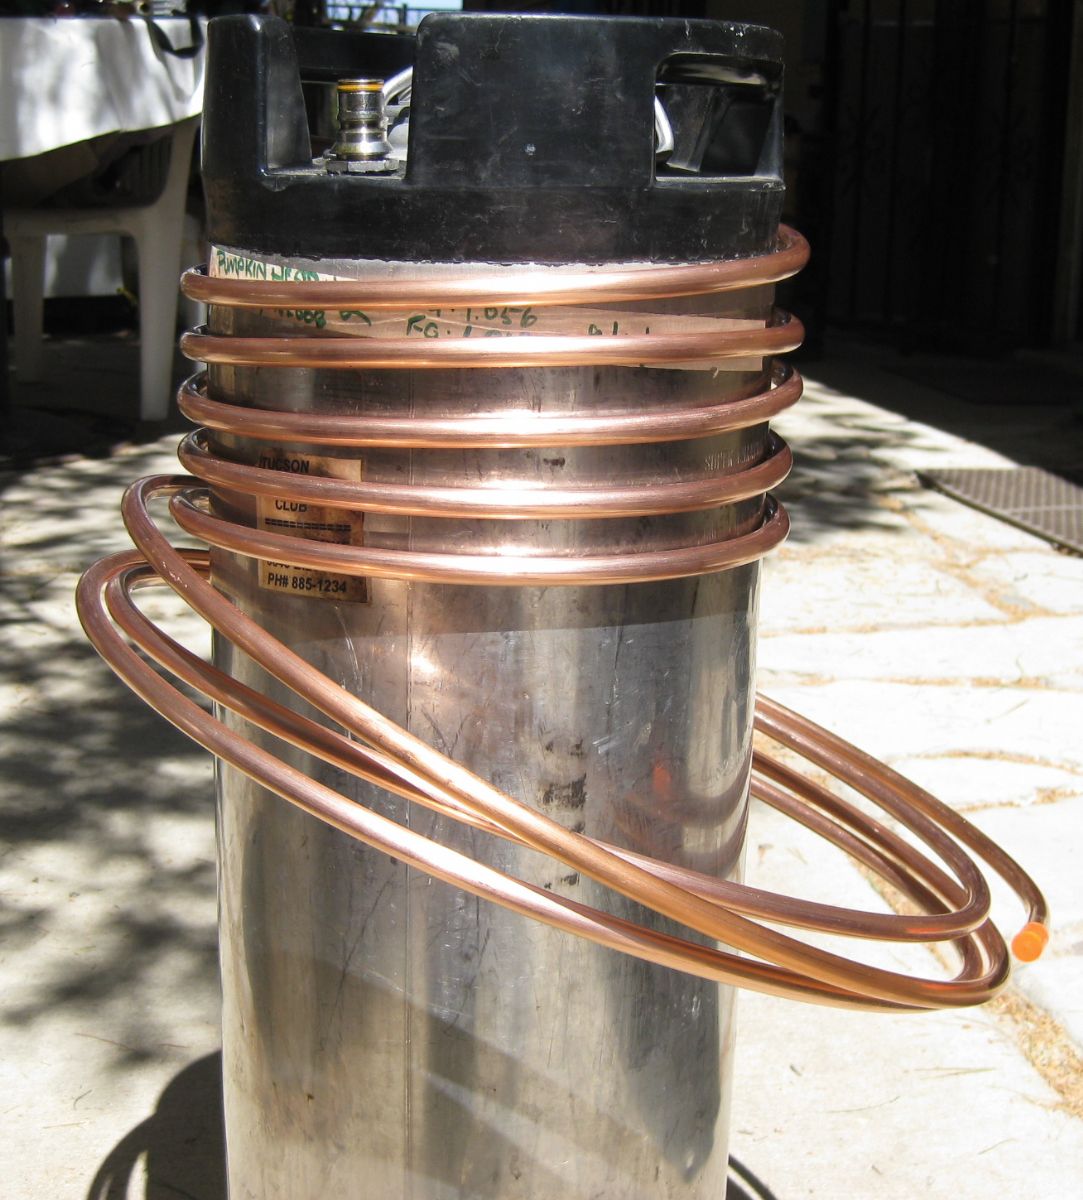
1 copper coil (25 feet, 3/8 diameter)
[We purchased 50' of 3/8" coiled copper from the Home Depot for $50, however shop around for the best price.]
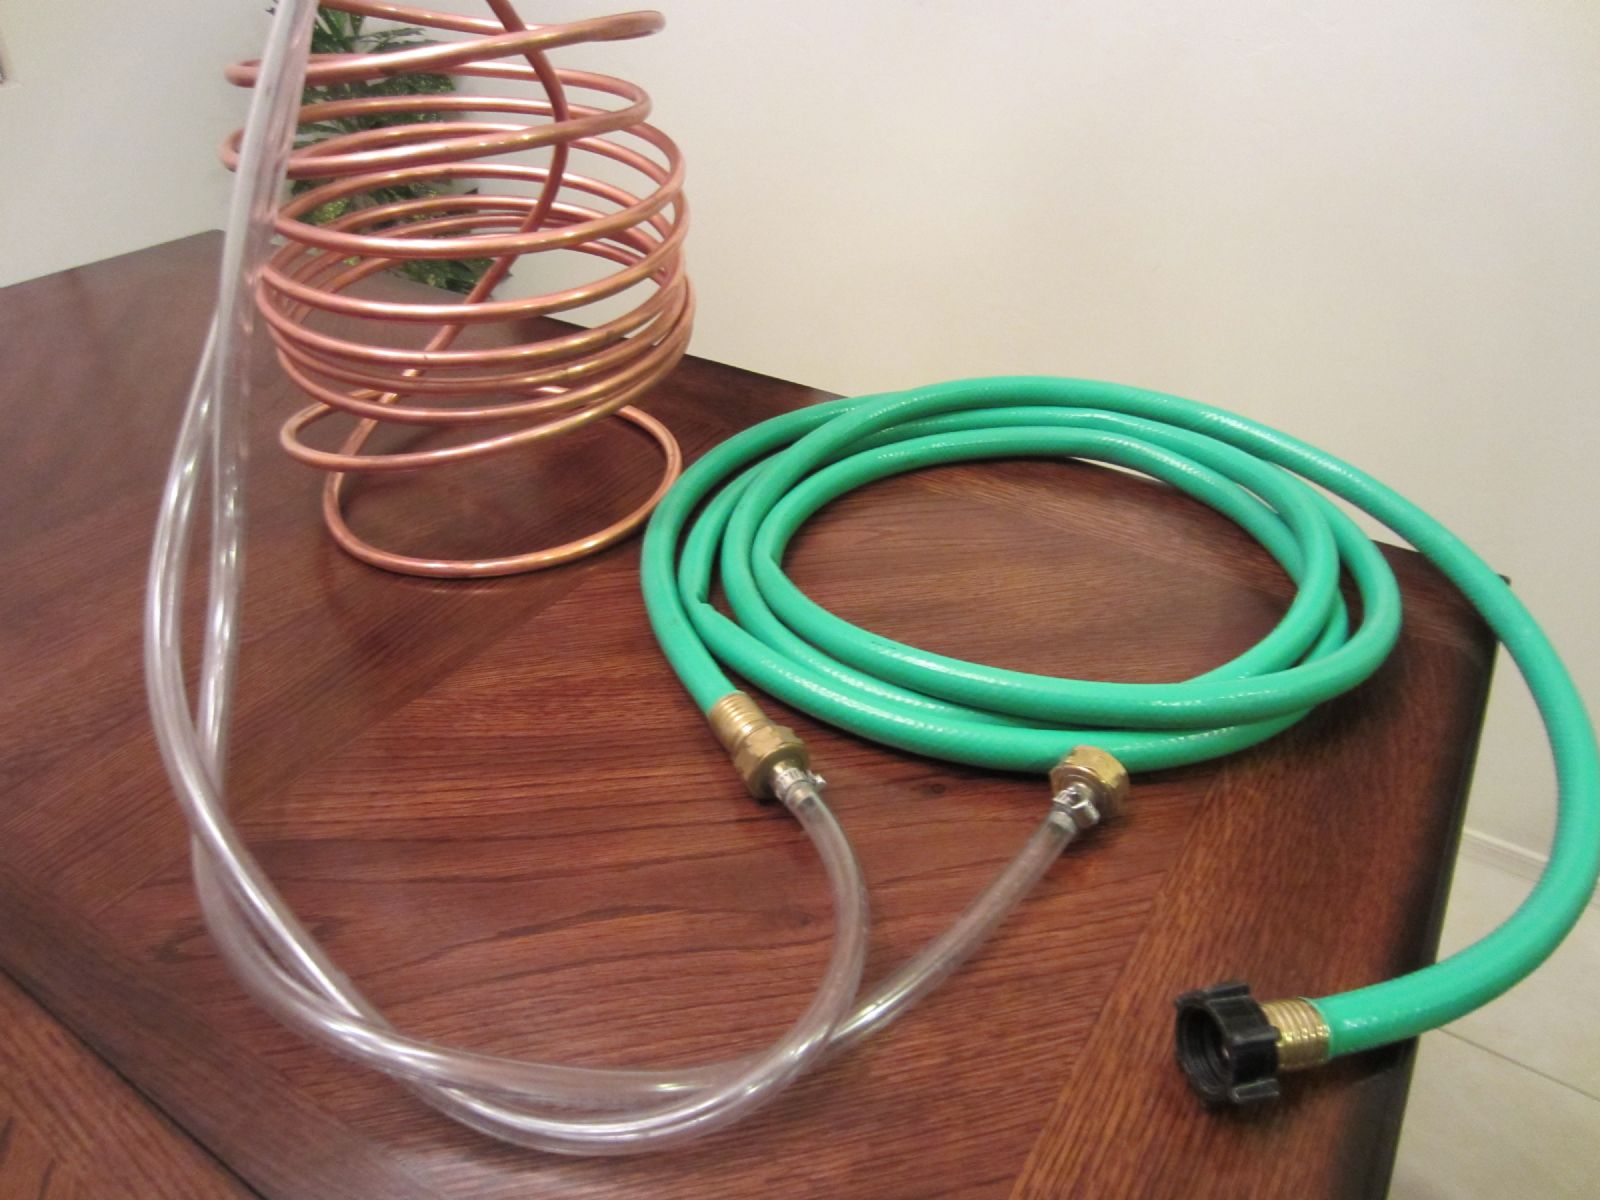
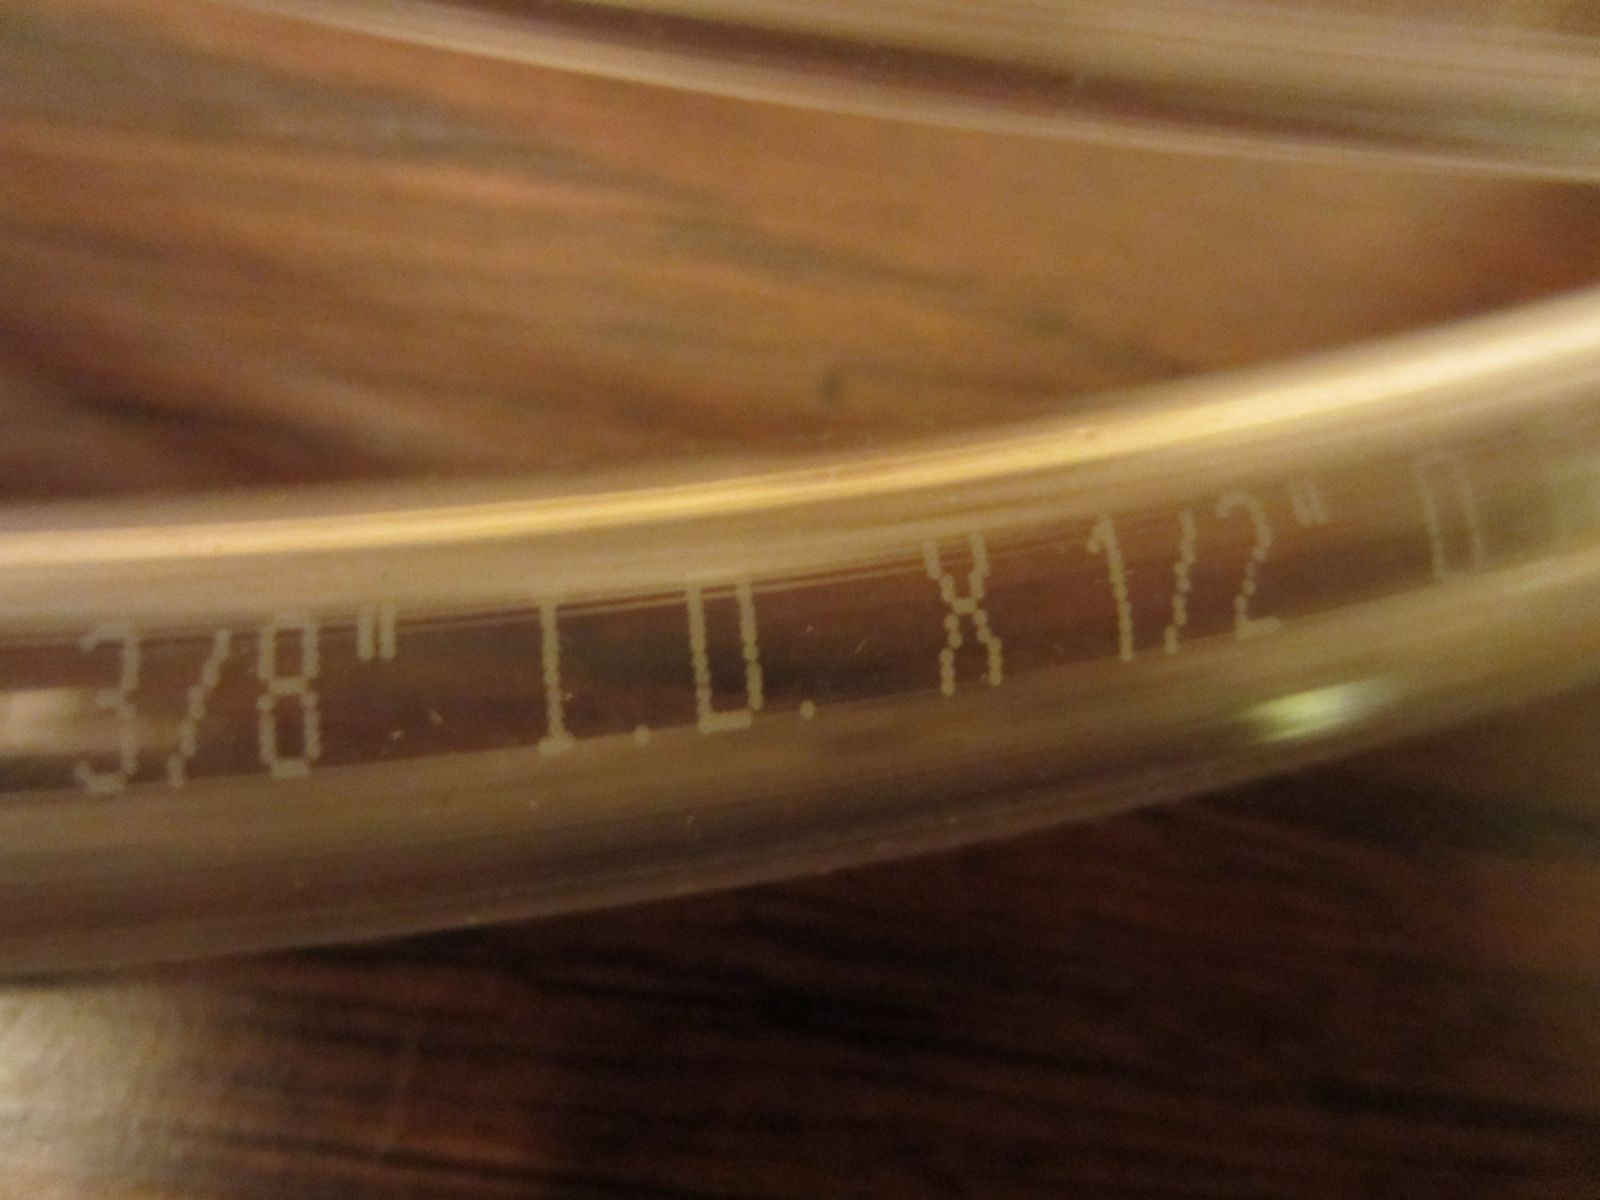
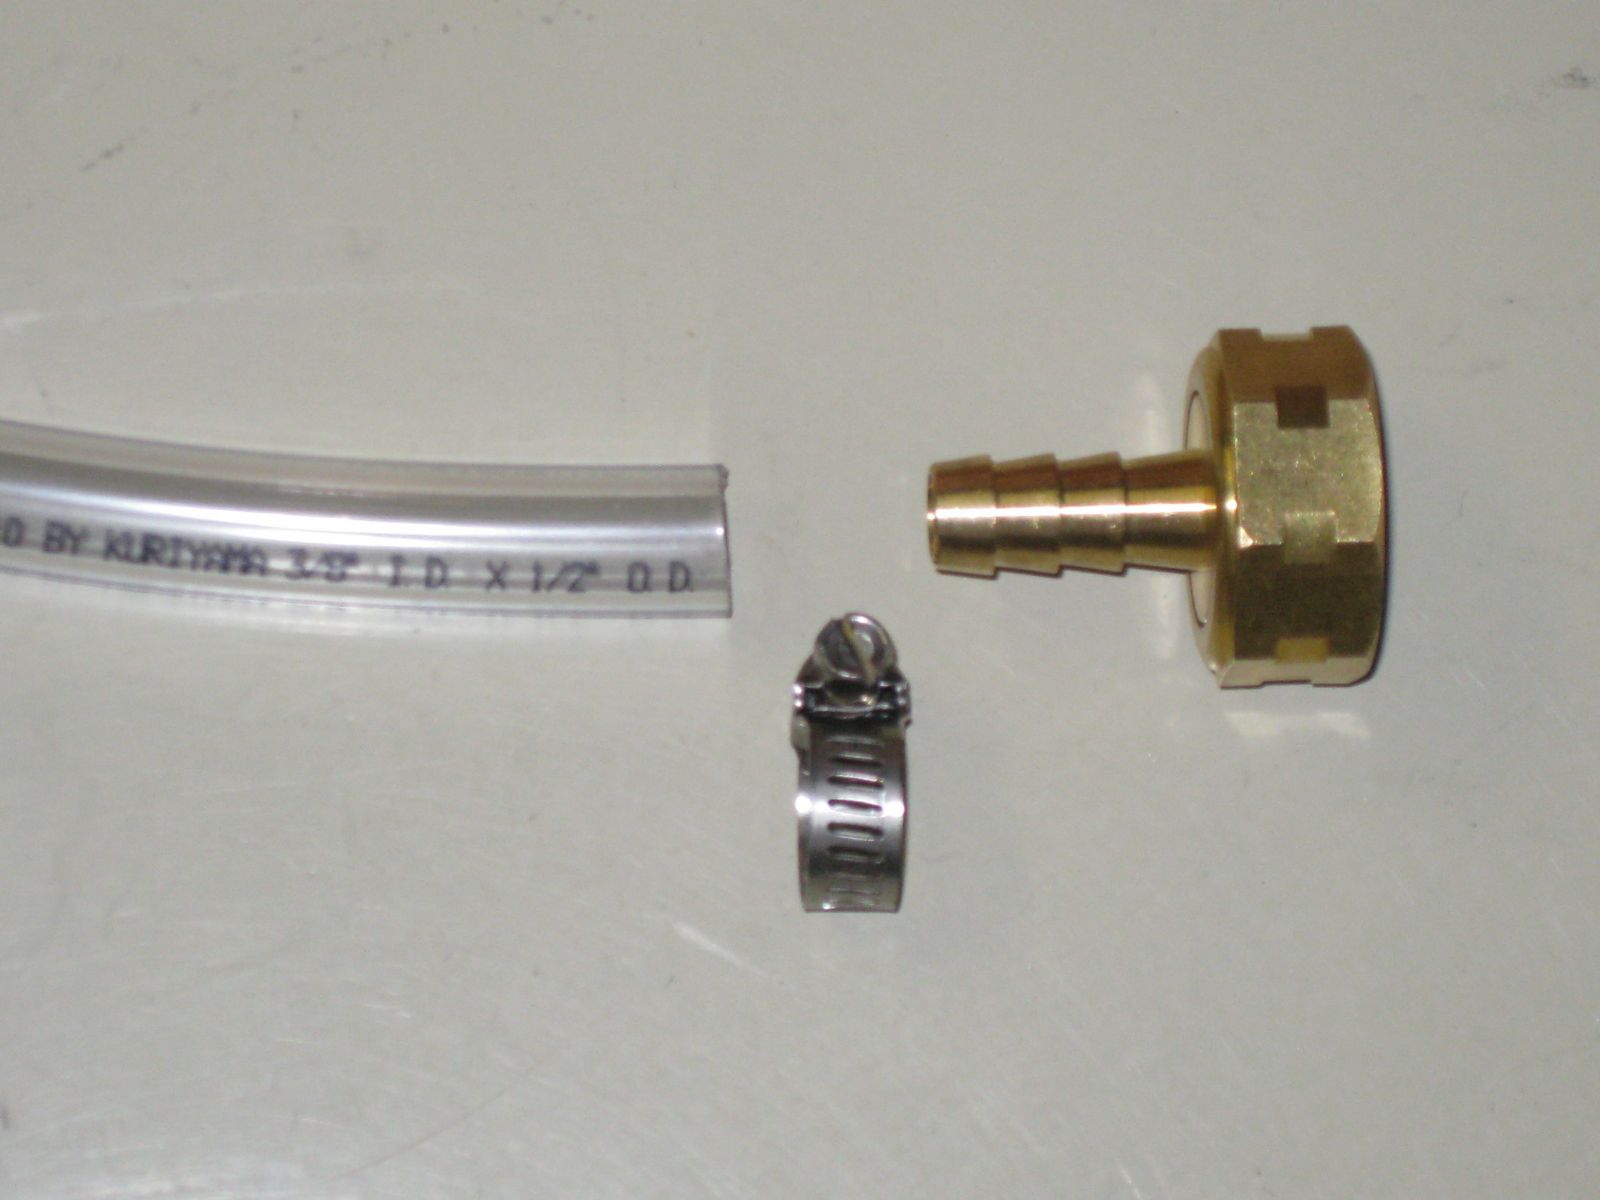
6 feet of pvc tubing (½ inch O.D., 3/8 inch I.D.)
1 garden hose (6 feet)
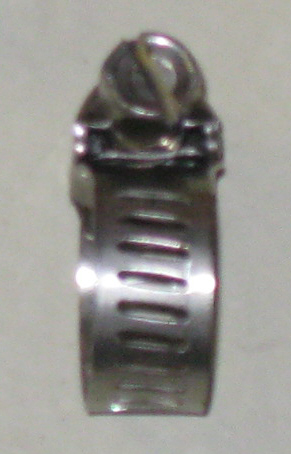
4 hose clamps
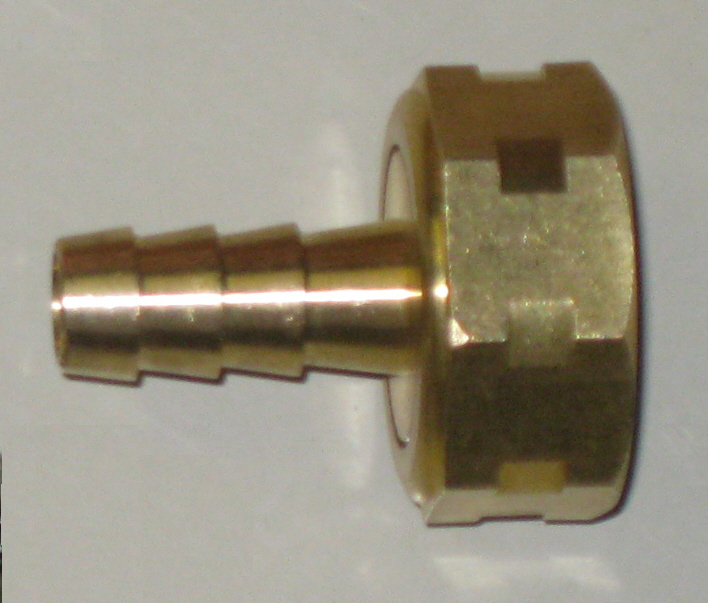
2 hose adapters
1 tube bender
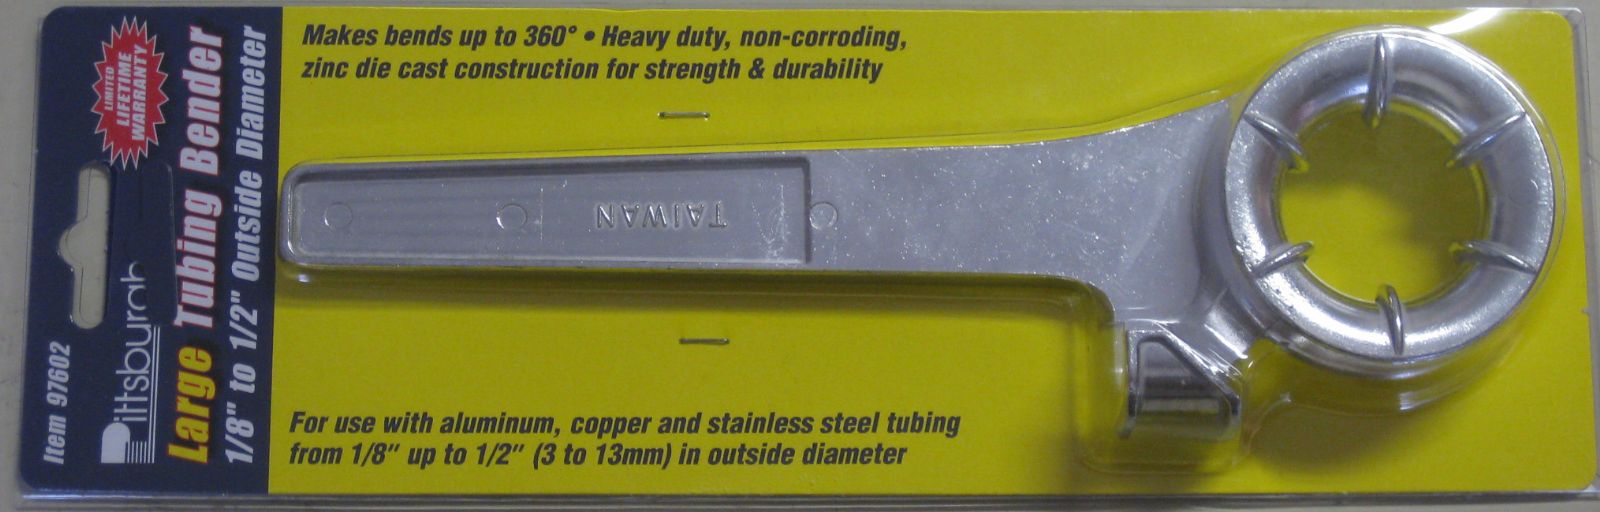
You can purchase a copper coil, garden hose, and tube bender from most any hardware store. Tube benders come in two common varieties: one has a handle and a metal circle at the end around which you bend the copper coil (like the one shown in the picture above), and the other is a spring bender that wraps around the coil and braces the coil as you bend it. I would recommend the spring type because it will decrease the chance of making creases on your coil. The rest of the items you can buy at your local HBS.
TIP! Sometimes you can only purchase a 50 foot coil even if you only wanted 25 feet. In this case, you can make two 25 foot wort chillers and sell one, or split the cost with a friend. Remember, if you don’t have a tube cutter, you can have the coil cut for you from wherever you bought the coil. Otherwise, you can just have one nice 50 foot long chiller.
PROCEDURE:
1.Take your copper coil and shape it so that the coil is about 9 ½ inches in diameter, leaving about 15-16 inches uncoiled at either end. Remember, the chiller must fit into whatever vessel you’re using to boil the wort, so measure that vessel and shape your copper coil accordingly. Most people will use a Corney keg (short for "Cornelius" keg, a.k.a. soda keg), and wrap the coil around it to form the desired shape. You can usually find a Corney keg at your local homebrew shop which you may be able to use for about 5 minutes, free of charge, to shape your coil. Short of this, consider borrowing a Corney keg from a fellow brewer, or if you think you’re going to be kegging in the future, you can just buy your own Corney keg and kill two birds with one stone. If you don’t have access to a Corney keg, find some other cylindrical object to wrap the coil around that will get you the diameter you’re looking for.
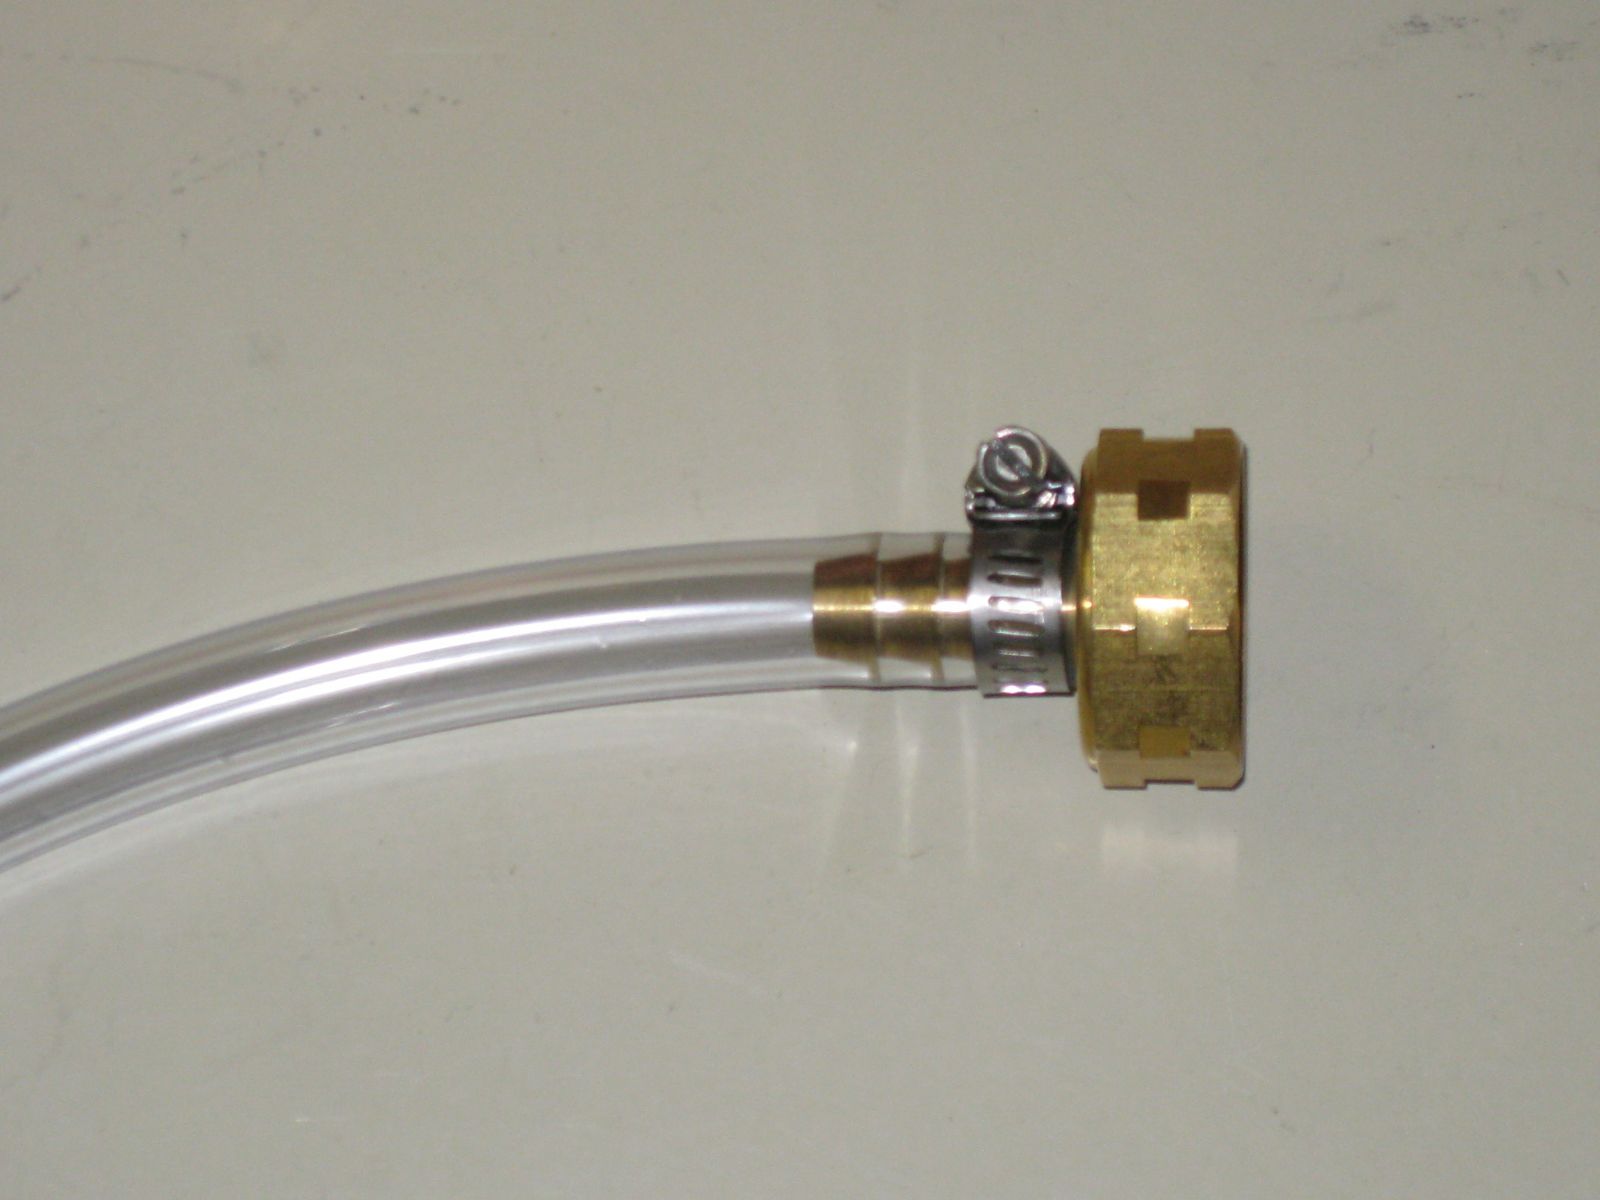
2. Cut your 6 foot hose in half. Loosely fit one hose clamp over the end of one of the hoses, then connect the hose with the hose clamp around it to one end of the copper coil. Secure the hose with a hose clamp to the one end of the copper coil by tightening the hose clamp with a screw driver. Repeat this process with the other hose so that both hoses are secured around either end of the copper coil.
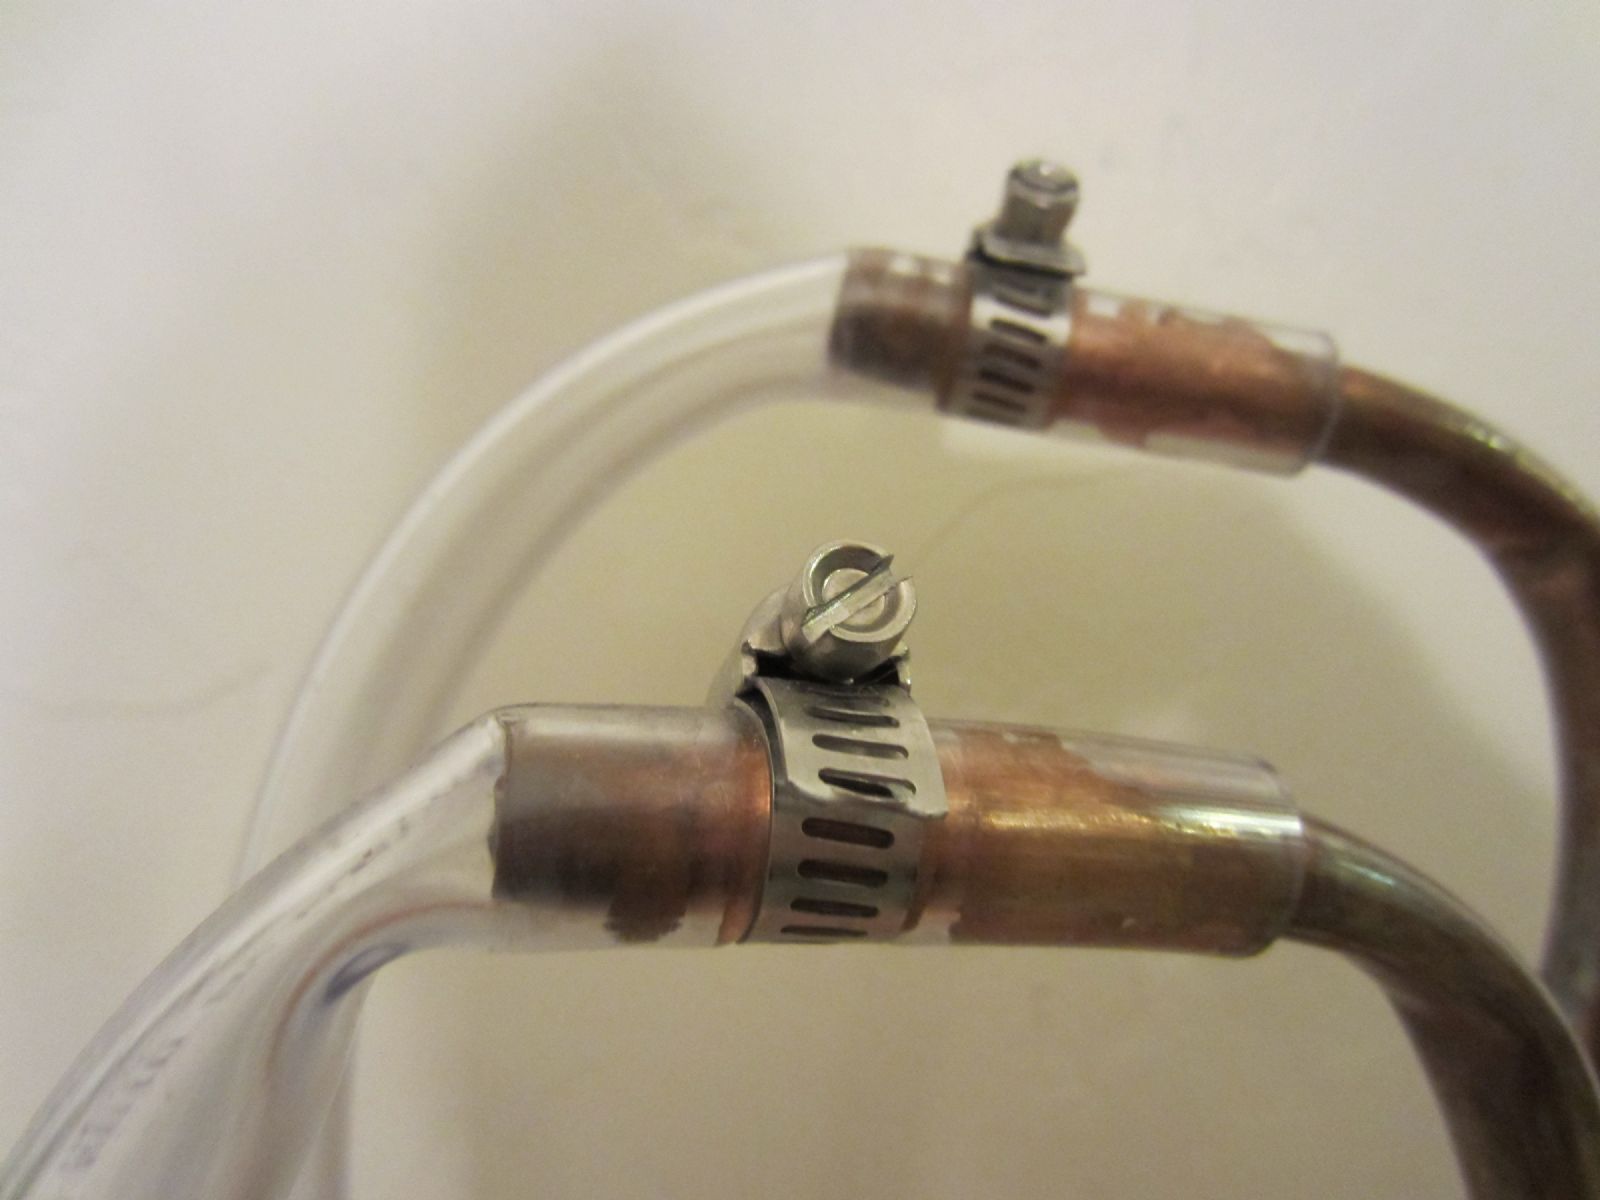
3. Loosely fit one hose clamp over the other end of one of the hoses, then connect the hose with the hose clamp around it to one of the hose adapters. Secure the hose with a hose clamp to the hose adapter by tightening the hose clamp with a screw driver. Repeat this process with the other hose end so that both hoses have hose adapters fitted to them, secured with a hose clamp.
TIP! Remember to test your wort chiller prior to using by connecting one end to a garden hose and checking for leaks near the four hose clamps, but most importantly check the hose clamps on the copper coil. If you find leaks, simply tighten the clamps with a flat head screwdriver until leaking stops. Needless to say, you don’t want to find out you should have tightened the clamps when you’re trying to chill the wort as water from your garden hose finds its way into your wort creating a contamination risk.
Like this tutorial? Questions, comments, free beer? Feel free to drop me a line at dan@beersyndicate.com, or follow us on Twitter at twitter.com/beersyndicate.
From The Blog
Tips for Craft Brewery Success
The best business secrets wikileaked from the private records of the most successful craft breweries in the United States.
Beer Names You Might Be Saying Wrong
Enlighten yourself, but please don't correct others. It's just one of those Catch-69 situations, like when somebody has ketchup on their face.
The Beer Quiz
What's your beer IQ? This test measures an individual’s beer knowledge through a series of questions of varying levels of difficulty: Normal, Hard, and Insane.
Homebrewing Techniques
Beat the Stuck Fermentation Monster
You've brewed the perfect wort. You bullseyed your strike temp, you had a most excellent cold break, your OG was right on the money...
How to Cork Belgian Beer Bottles
So you wanna up your bottling game, huh? Well, you've come to the right place.
Top 40 Ways to Improve Your Homebrew
Admit it: No matter if in a DeLorean, TARDIS, or a hot tub, we’ve all thought about what advice we might give our younger selves if we could go back in time.
DIY Projects
How to Polish a Keg
Shining up your keg will probably not improve the taste of your beer, but it looks cool and inspires epic brewing sessions!
Convert a Refrigerator Into a Fermentation Chamber
Decided to take a huge step in improving your homebrew and set up a temperature controlled fermentation system, have ya? Smart thinking.
How to Convert a Keg Into a Brew Kettle
Convert that old keg into a brewing kettle. The advantages of using a keg for homebrewing pretty much come down to quality and cost.
|
|