How to Make Great Hard Cider
By DANIEL J. LEONARD
.JPG)
If you haven’t yet tried your hand at making hard cider, here are a few reasons to get started as a.s.a.p. as possible:
1) It’s easy. Super easy. If you can pour juice into a bucket, you’re about 90% of the way there.
2) It’s cheap--- definitely cheaper than buying hard cider retail, and in these difficult economic times, you have to find ways of pinching every penny you can in order to buy more craft beer.
3) It’s delicious. Seriously, even if you’ve had pretty good commercial hard cider, wait until you see what you can do at home.
4) You and gluten don’t mix? Homemade hard cider is your new drinkin’ buddy.
5) After this tutorial, you’ll know exactly how to make great hard cider. I’m even going to tell you the secret of making never-ending, perpetual hard cider. Oh yeah, and this tutorial is pretty cheap too. In fact, it’s of the free variety. Why aren’t we charging? Good question. Better keep reading before we change our minds about our price point strategy…
6) And of course, in the zombie apocalypse, the person who knows how to make good booze will have a place in any tribe--- eh, maybe not the Mormon one. But there’s always the Muslim tribe! Wait-
Almost forgot--- This tutorial is actually a 2-in-1... A kind of a cider making choose-your-own adventure with two options:
Option 1) The first tutorial will show you how to make decent (not great) cider, which is a tutorial designed for my ADHD, bullet point, hurry up a UFC ad is on, tell me just enough to be dangerous, friends. (Sorry- even that sentence was a bit too wordy.) If this is you, scroll right down to “Materials”... if I haven’t lost you already.
Option 2) The second tutorial is for, well, those who want to make better than just decent cider. It’s for the reading, overachieving type. So do what you do best, and read on.
A quick note on vocabulary… In the U.S. and most parts of Canada, "cider" refers to a cloudy, unfiltered, unsweetened, and sometimes unpasteurized (typically from the roadside or apple farms), but always non-alcoholic apple juice. Apple juice is usually clear, filtered, pasteurized, but also non-alcoholic. Pretty much everywhere else in the world, "cider" refers to an alcoholic beverage. When I talk about making cider, I’m talking about the hard stuff. If you want to know how to make non-alcoholic cider, go to a farm.
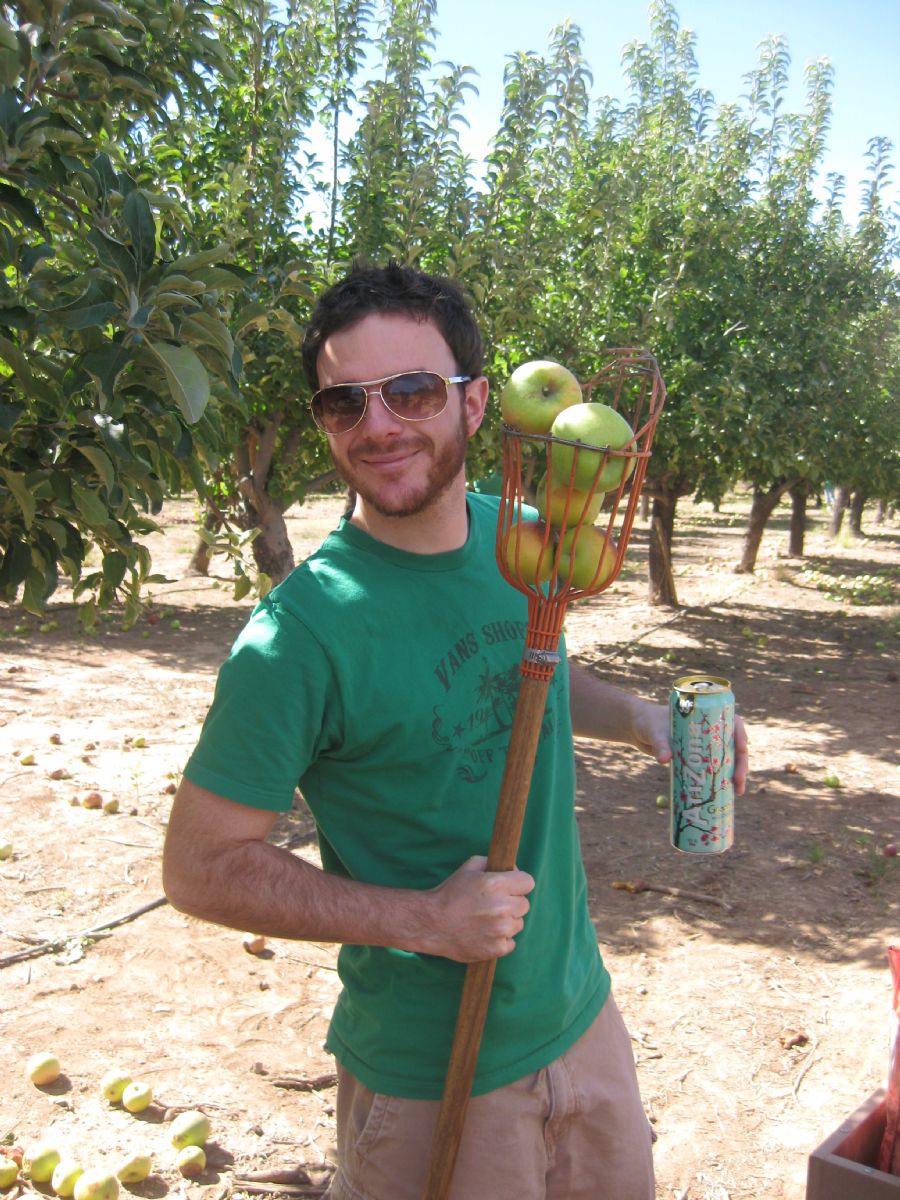
[Free plug for Arizona Iced Tea and wooden apple-picking stick. You're welcome.]
Oh, and by the way, we’re not just talking about making purely apple cider here. No sir, you can make a fruit cider with the addition of just about any type of fruit or fruit juice you can think of. For clarification, "cider" is defined as fermented apple juice, and "fruit cider" is defined as fermented fruit juice that contains some portion of apple juice and some portion of some other fruit juice(s). A fermented beverage that is made from juice other than apple juice is typically called "fruit wine", although 100% grape fermented juice is just called, you guessed it, "wine" and 100% fermented pear juice is called "perry". (There is some debate over how "perry cider" is defined, so we'll leave that definition alone for now).
Personally, I’ve made fruit cider with mango juice, prickly pear, tangerine juice, grapefruit, pineapple, watermelon, peach juice, tart cherry juice, whole cherries, pear juice, pomegranate juice, saguaro fruit, honeydew juice, blueberry juice, tea-lemonade, aronia berry juice, Earl Grey tea, even green juice (yeah, that’s the one with broccoli and spinach). You might be surprised at which ones turned out the best (more on that later). You can even crank out a killer honey-cider which is a sort of cider/mead hybrid.
Even if you have ZERO experience in homebrewing or home winemaking, don't worry. Not only is making cider easy, it's also a great way to get your feet wet in the art of fermentation as cider making skills are directly transferrable to homebrewing and winemaking.
Alright, sales pitch over. It’s cider making time.
First we’ll cover the materials you’ll need, and then the procedure. After that, there are some killer recipes, and a bit on trouble-shooting problems you might encounter.
Three words: Bucket. Juice. Yeast. That’s your barebones setup that’ll get the job done. If you’re the “D” student type shooting for decent cider, skip to the “procedure” part. Looking for great cider? Then allow me to elaborate.
1. Bucket/Jug (Fermentation Vessel): When choosing a fermentation vessel, you have two common choices: a food-grade plastic bucket (often referred to as an “Ale Pail”), or a glass carboy (basically a big glass jug); both of which can be procured at your local or online homebrew shop. Either plastic or glass will work fine; I use both. Plastic fermentation buckets come in different sizes, most commonly 6.5 and 7.9 gallon (although larger sizes are available), and glass carboys typically come in 3, 5, 6, and 6.5 gallon sizes. For 5 gallon batches of cider, it's highly recommended that you use at least a 6.5 gallon fermentation vessel to account for head-space (natural forming head/foam) that is produced during the fermentation process.
That said, there are some differences of which to be aware: Glass carboys are heavier, tougher to clean, more expensive, and more breakable than your standard plastic bucket. On the plus side, glass is inert, which for the purposes of cider making means that you don’t have to worry as much about your cider becoming infected by some bacteria hiding out in a scratch of a plastic bucket (which rarely happens), nor do you have to deal with the potential issue of the plastic bucket absorbing the flavor/aroma from previous batches.
My recommendation for a starting setup? Go with the plastic bucket. Not only is it lighter, safer, cheaper, and easier to clean, but it can double as a bucket to mix a no-rinse cleaning solution like One-Step or a food-grade sanitizer like Star San (more on that later).
You'll also need an airlock, which you plug into the hole in the lid of your fermentation bucket, or the mouth of the carboy. If using a carboy, then you'll also need a drilled plastic stopper which you will fit your airlock into. The purpose of the airlock is to allow CO2 to escape your fermenting cider, but also to prevent any bacteria or wild yeast from flying into and infecting your cider.
2. Juice
More critical than the glass or plastic fermentation vessel decision is the type of juice you choose. Just remember GIGO: Garbage in, garbage out. In other words, if you start with schlock juice, expect schlock cider. By the way, “schlock juice” is a technical term for any juice where one of the first ingredients is “high fructose corn syrup”... In other words, sugar water. Does this mean you should go the extra mile and source your juice from an apple farm or press your own? You could, and fresh pasteurized cider from the orchard will almost certainly yield the better hard cider, but there’s no need to over-complicate things on your first few batches. Ain’t no shame in sourcing your apple juice from the grocery store--- there are just a couple things to look out for when you do.
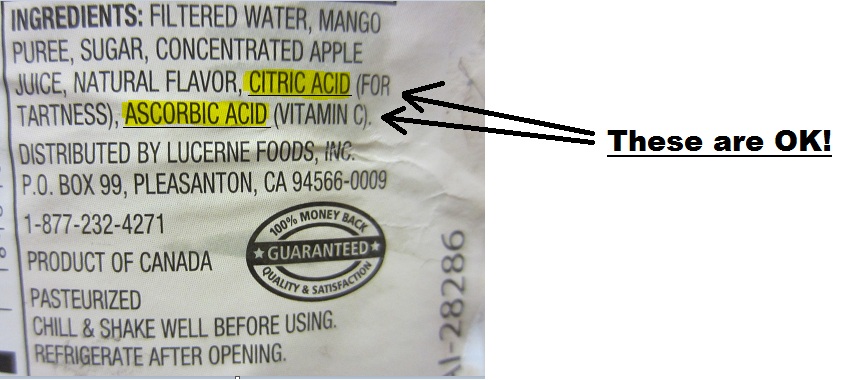
Ok, this is usually the part where other people will bark at you to AVOID ANY JUICE THAT CONTAINS PRESERVATIVES!!! Let’s bust the “no preservatives” myth right up front, shall we?
Read my font: You CAN make great cider even if the juice contains preservatives. Truth is, it may be neigh impossible to find certain juices that don’t contain some sort of added preservative such as citric acid or ascorbic acid. Those types of preservatives, which are sometimes referred to as “additives”, are fine. No problem. The kinds of preservatives that are not fine, at least for cider making purposes, are these: sodium benzoate or potassium sorbate. These are sometimes referred to as “artificial preservatives” and may prevent your cider from ever fermenting and becoming alcoholic (which is partly why they are added to juices in the first place). Just remember the difference, and you’ll be set.
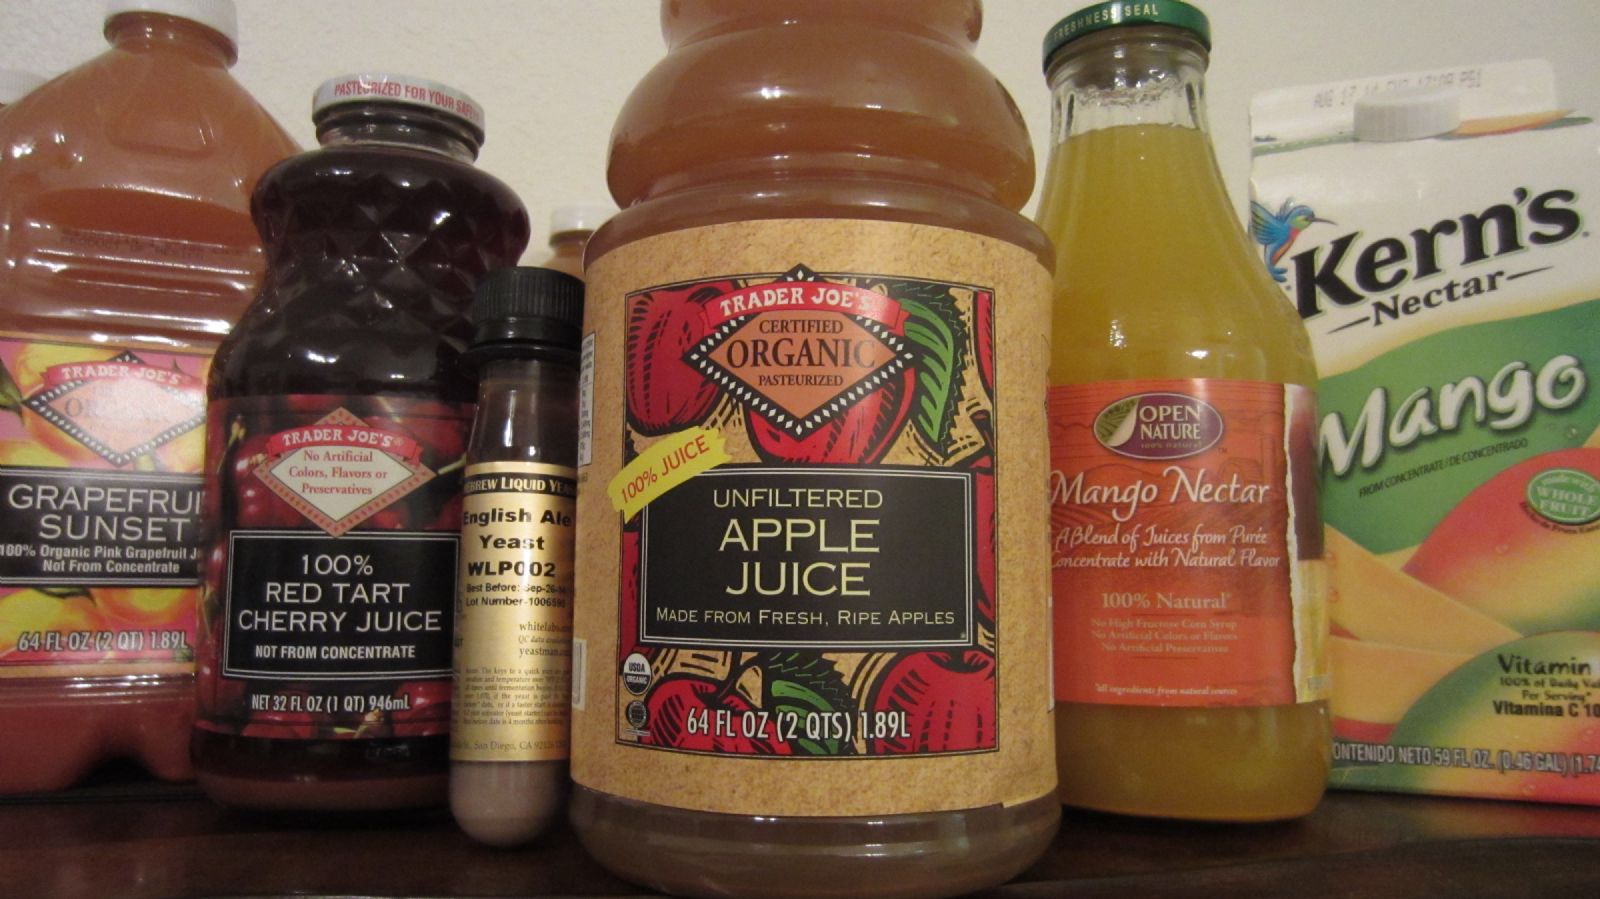
Apple Juice vs Apple Cider
Should you buy apple juice or apple cider? Buy both and see which one you like better. In the U.S., there's sometimes little difference between what retailers call "apple juice" and "apple cider". Both are almost always pasteurized, and sometimes both are unfiltered, as with the two varieties in the images below from Trader Joe's super market. That said, "apple juice" is usually clarified, whereas non-alcoholic apple cider is cloudy (unfiltered) and usually has more of a tart and earthy flavor profile than regular apple juice. Part of the reason cider and/or unfiltered apple juice is cloudy is because it contains pectin, which is said to lower serum cholesterol levels. All of these factors will change how your final product looks and tastes. And if you like the taste of apple cider, but not the cloudy appearance, there’s a way to clarify your cider which we’ll discuss in the “Procedure” part of this tutorial.
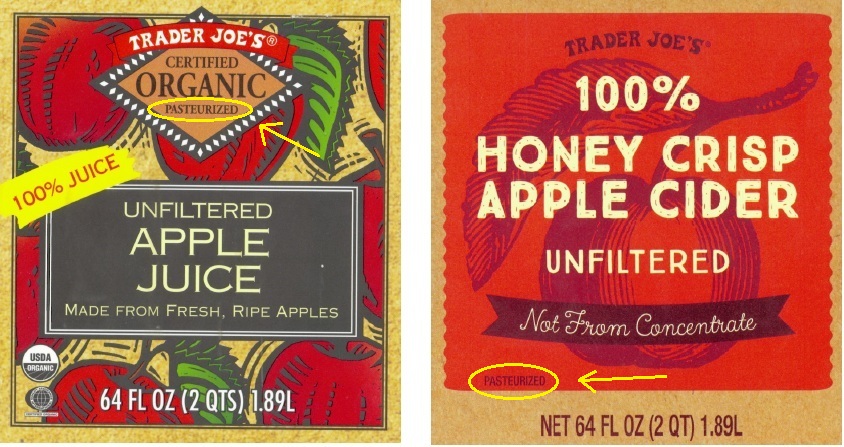
[Notice that both the "Apple Juice" and the "Apple Cider" above are pasteurized and unfiltered.]
As far as where to purchase your juice goes, you’re probably going to have the best luck at Trader Joes, Sprouts, Whole Foods, etc. And if organic juice is an option, go with it.
This is Key! Taste your juice! Not all juices are equal, even if you bought the expensive, non-GMO, organic, Dalai Lama recommended, holy juice pressed by Al Gore himself. Real world example: I paid good money for two 32 oz bottles of pear juice to be used for making an apple-pear cider. I tasted one, and it was blah. I tasted the other, and it tasted like pear juice. Same brand bought at the same time and opened at the same time. If I hadn’t tasted them prior to using them, I would have ended up with blah cider and then might’ve blamed the defect on something other than the actual cause, i.e. juice itself.
Life Hack! Apple Cider Glass Jug Bonus!: Sometimes you can find cider at a grocery store (Sprout's, Whole Foods, etc.) bottled in one gallon glass jugs. These are perfect for making mini or experimental batches of cider. You can buy these types of jugs at your local homebrew store for about $5-$6, or buy them already filled with organic cider for about $8.
3. Yeast
The job of yeast is to consume the sugars in your juice, and convert those sugars into alcohol and CO2. Now, you have a choice when it comes to the type of yeast you use, but let me recommend not fermenting your cider with baker’s yeast that you might find in the grocery store unless you want your cider to turn out nasty. Baker’s yeast is for bread, or gross tasting fermented beverages. You need brewer’s yeast (or wine yeast).. Brewer’s yeast is sold in both dry and liquid form. If you have a choice, buy the liquid one because you have more variety and, in my humble opinion, liquid yeast produces a better tasting final product.
You can find cider and wine yeast, but I recommend English Ale yeast, in particular WLP 002 if you're looking for a semi-sweet cider. Cider and most wine yeasts tend to leave you with a drier, and in that sense, less fruity, sometimes wine-like cider, whereas English Ale yeast will leave you with some residual sweetness and more fruit character, as is characteristic of most English Ales. If you know a little bit about these different types of yeasts, it can help you better control how your final cider may turn out.
Some people prefer wine yeast because they're after more of a drier, wine character in their cider. Wine yeast is typically able to convert more sugar and is more alcohol tolerant than most brewer's yeast. This makes sense if you consider that the alcohol percentage of most commercial wines range between 9-14%, whereas your standard beer is generally much lower than that, especially English Ale which is commonly less than 5% ABV. Without getting too technical about measuring potential alcohol content, just know that the more sugar you have in your juice, the more potential alcohol the yeast can produce. If we're talking about the typical juice you buy in the supermarket, it will have enough sugar in it to produce a cider between 5-8% ABV. Home winemakers will sometimes add extra sugar to their grape juice (or "must") to increase the alcohol content, and wine yeast is able to tolerate the increased levels of alcohol during fermentation. Brewers, on the other hand, do not traditionally add sugar to English Ale, and English Ale yeast has therefore adapted to be less alcohol tolerant, which means that at a certain point, the yeast will slow down and have difficulty consuming additional sugar. You can use this to your advantage if you are looking for a semi-sweet cider, but feel free to experiment with different yeasts to see what you like.
You might get lucky and some yeast varieties might add an intriguing complexity to your cider, but many types of yeast will leave your cider bone dry, decimating every last sugar molecule in sight, often taking the fruit character you’re trying to preserve along with it. Here’s a list of different yeasts and their characteristics… the ones that are described as “alcohol tolerant” will dry your cider out like a 10 year old Christmas Tree, a problem that cider makers have struggled with for centuries, which may not be a problem for you if that's a quality you're looking for.
Decent Cider Making Procedure: For my git ‘er done, anti-reading group, here’s the drill: Rinse bucket out with water. Dump juice in bucket. Add yeast. Cover bucket and let sit for 1-2 weeks. Cross fingers. Open bucket. Drink cider. Your tutorial is complete. Go forth and breed.
Great Cider Making Procedure:
Right up front, let me say that if you want to boil your store-bought juice/s, you can, HOWEVER, I don’t recommend it for three reasons: (1) Your store-bought juice is most likely already pasteurized (i.e. flash boiled), so this step has already been done for you (check the juice label to confirm). (2) Boiling various juices can change their flavor profile sometimes for the worse, so it’s not worth the risk. (3) Boiling your juice will take more time and possibly more equipment, not to mention you will lose juice due to evaporation during the boil. Yes, you could add extra water to the boil to make up for the lost juice, but if your juice is already pasteurized, there’s really no point.
1. Clean your fermentation vessel (glass carboy or plastic food grade bucket) with One-Step or Star San solution.
One-Step is a no-rise, human-friendly, percarbonate (oxygen-based) cleanser you can find at a homebrew shop. It is sold as a dry white powder that you dilute with warm water at a common ratio of 1 tablespoon to 1 gallon of water, but check the mixing ratio instructions on your product to be sure. You can mix the solution directly in your fermentation bucket (just remember to transfer that cleaning/sanitizing solution out of the bucket before you add your juice!).
Star San is a no-rinse, acid-based, food-grade sanitizer product that is arguably more effective at killing bacteria than One-Step cleanser. The product comes is a liquid syrup form and is diluted with tap water at a ratio of 1 ounce to 5 gallons or approximately 6 milliliters to 1 gallon of water. (1 ounce = 29.5735 milliliters; 29.5735 ml / 5 = 5.9147 ml per gallon). Fortunately, the Star San bottle comes with measuring lines which include milliliters. Recommended soaking time is 30 seconds if the object being sanitized is fully emerged in the Star San solution, or 1-2 minutes if the object being sanitized was only splashed, sprayed, wetted, or rinsed with Star San solution.
I've used both One-Step and Star San with no infected batches of cider, but I use Star San exclusively now as it is a sanitizer and is re-useable, unlike One-Step cleanser. Keep in mind that prolonged contact with diluted Star San and your hands may result in rough hands (skin burn) because as it turns out given enough contact time, phosphoric acid, the main ingredient in Star San, can dissolve skin cells. Wearing vinyl gloves reduces the risk of skin burn.
Ensure you thoroughly rinse your bucket by taking a paper towel or clean dish cloth and soaking it in the One-Step (oxygen-based) cleanser or Star San sanitizer, then wipe the entire insider of the bucket. After two minutes, transfer the cleaning/sanitizing solution to a big pot or other vessel for later use. Remember, both One-Step and Star San are no-rinse solutions. Even though both One-Step and especially Star San may form a foam, but unlike with soap foam, there is generally no reason to rinse your fermentation vessel after cleaning/sanitizing it with One-Step/Star San. (Don't fear the foam--- it will not leave your cider tasting "soapy".) Keep in mind, not all countries have safe (potable) drinking water, so there is little sense in rinsing off something you've just cleaned/sanitized with unsafe water.
If you’re using a carboy, you might want to clean the inside with a carboy brush, which is a long “L” shaped brush you can buy and a homebrew shop.
2. Take your juice bottle or jug, turn it upside down, and soak the end with the twist off cap in the pot of One-Step or Star San solution for 2 minutes. Soaking the juice bottles in One-Step or Star San solution inside of a fermentation bucket works really well (just remember to dump out the One-Step or Star San solution after you're done soaking the juice bottles if you're planning on fermenting in the same bucket. Yeah, that should go without saying, but mistakes happen.)
.JPG)
Remove juice bottle/jug from One-Step or Star San solution, rinse off with water, open AND TASTE the juice from a cup. If the juice doesn’t taste good to you, don’t use it. And no, whatever flaw you detect in the juice will not be magically fixed by the process of fermentation. In fact, usually the opposite will happen and that flaw may be accentuated after fermentation as many of the other components masking that off-flavor may very well be stripped away during fermentation, leaving your cider with a big fat pimple of a flaw on the tip of its nose for the world to see.
3. Dump your juice (or as wine makers call it, “must”) into your fermentation bucket/carboy. If using a carboy, insert a funnel that’s been cleansed with One-Step or sanitized with Star San solution into the mouth of the carboy and pour juice into the funnel.
Flavor Tip! To give your cider a bit more oomph (apple character, body and alcoholic goodness), consider adding a 12 oz can of quality frozen apple juice concentrate to the 5 gallon batch. Tree Top frozen apple juice concentrate is a favorite amongst home cider makers followed perhaps by Cascadian Farm frozen concentrate (found at Whole Foods), but really any quality apple juice will work as long as it contains no sodium benzoate or potassium sorbate.
NOTE: The majority of store-bought apple juice/cider is already flash pasteurized or blasted with ultraviolet germicidal irradiation (check the label) in order to wipe out any possible yeast and/or bacteria, so there is really no need to heat or boil your apple juice/cider in these cases. If you're working with unpasteurized cider from a farm or otherwise, you can still get away with not heating the cider, but add your own yeast quickly so as to beat out any of the other wild yeast or bacteria that may already be trying to expand their territory. Speaking of which...
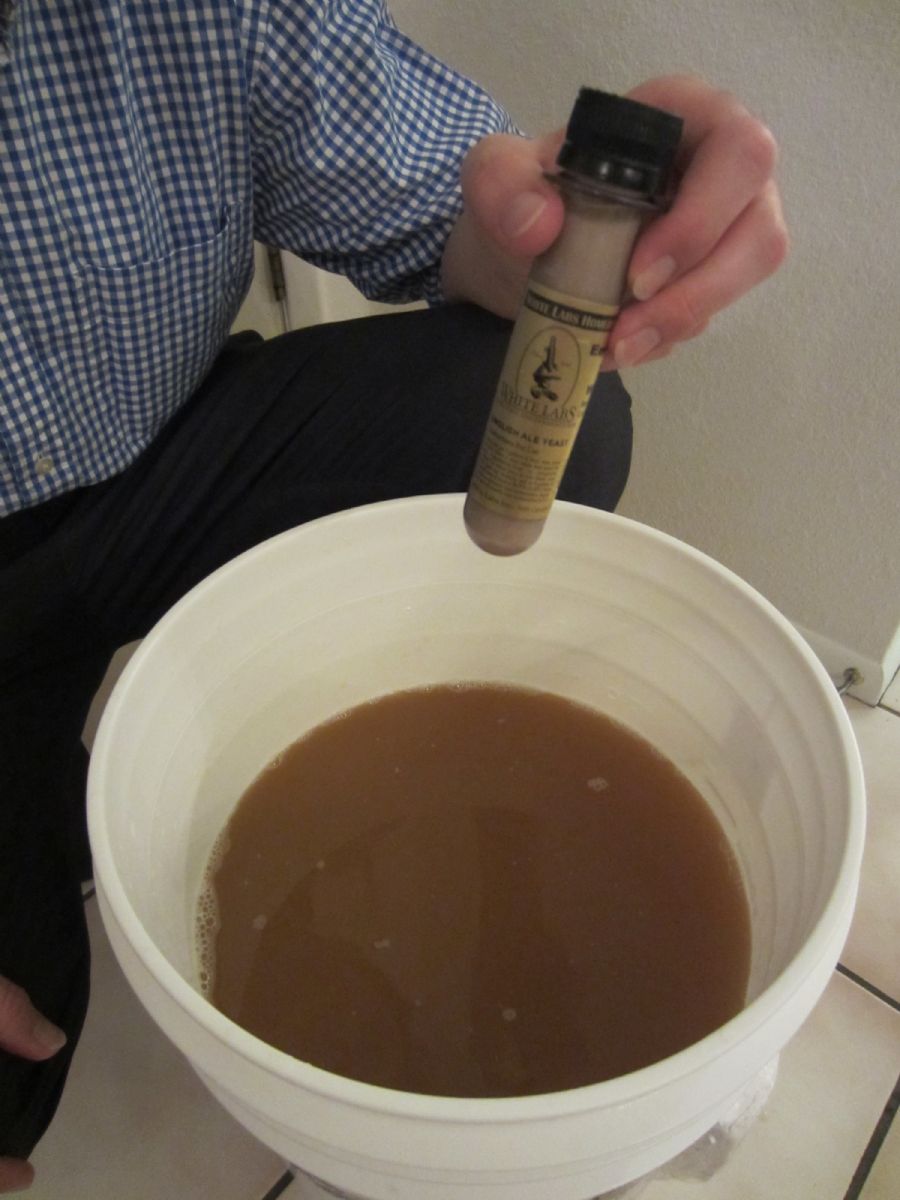
4. Add yeast: If using liquid yeast, place the unopened liquid yeast vial into the pot of One-Step or Star San solution for 30 seconds to one minute in order to cleanse. Remove vial from One-Step or Star San solution, rinse off with water, and add to fermentation bucket or carboy. Congratulations. You now have hard cider. Well, you still have to wait several days (5-14) for it to completely ferment, but the general idea is: yeast + apple juice = hard cider.
5. Seal your fermentation bucket with a lid (it should have come with a lid), cover the hole in the lid with a small piece of plastic and shake. If using a carboy, cover the mouth of the carboy with Saran Wrap and shake. Use your thumb to keep the Saran Wrap on the hole while you aggressively shake the bucket. The easiest way to do this is by placing the bucket on the ground and while one hand is holding the plastic wrap in place, use your other hand to tilt the bucket, then slide that hand under the bottom of the bucket for control, then shift the bucket back and forth for about 30 seconds allowing the juice inside to slush around and froth up.
The reason for shaking the bucket/carboy is that it adds oxygen to your cider which helps the yeast ferment. This is the ONLY time you want to shake or otherwise intentionally add oxygen to your cider, otherwise you may decrease the shelf-life of your cider, or risk adding off-flavors to your final product.
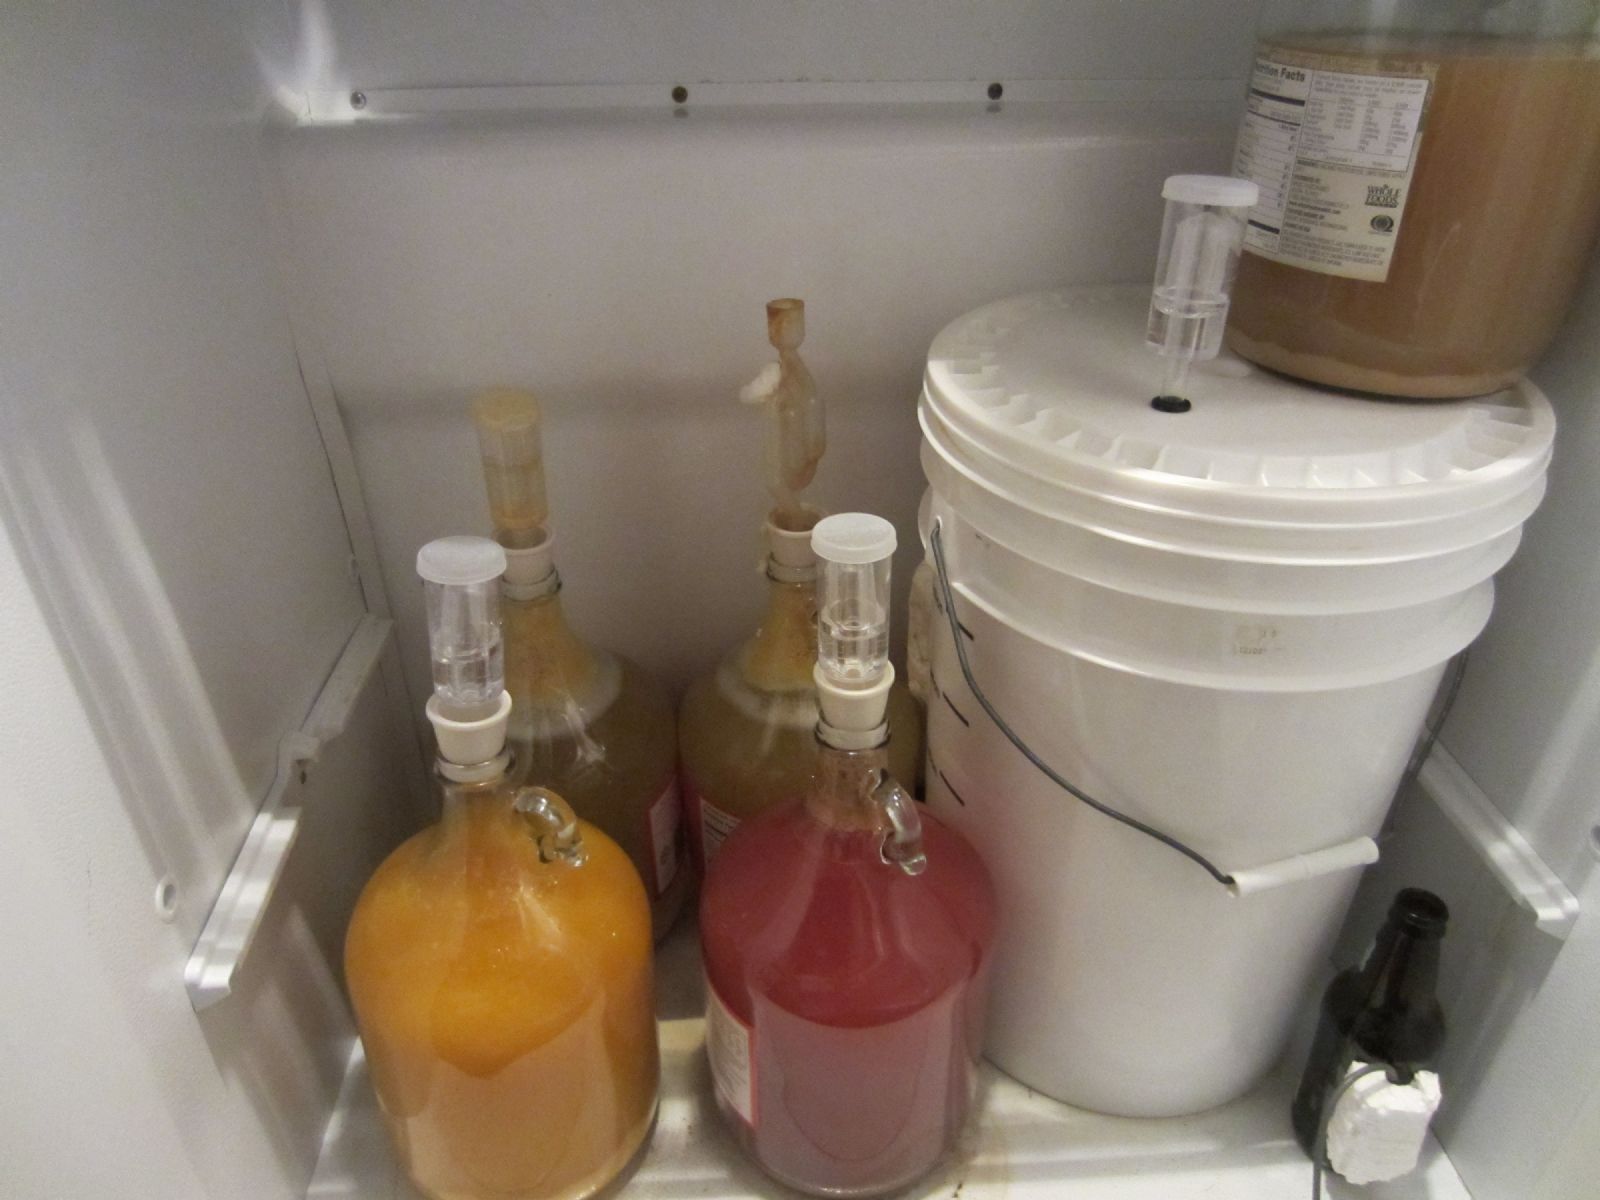
6. Insert an airlock into your lid, and place your bucket in a cool place (55-70°F / 12.78-21.11°C), and let sit for 1-2 weeks. Check the yeast packaging for the yeast's ideal fermentation temperature range if provided--- some yeast varieties can be finicky. Don’t have a room in the house that’s consistently 55-70°F (12.78-21.11°C)? Ok, here’s where you can REALLY improve your cider from above average to great. It’s called “temperature control” and here are two options to consider: the ghetto bucket, or the Cadillac upgrade. The ghetto bucket is basically an ice bucket big enough to accommodate your fermentation bucket. Place your fermentation bucket inside the empty ice bucket. Place ice around your fermentation vessel and add water. Do not fill the water up to the top of the bucket as you don’t want nasty ice water getting into your fermentation bucket. Continually monitor the temperature of the ice water with a floating thermometer ensuring that the temperature does not exceed much further than 65°F (18.33°C). Add ice as needed to reduce the temperature. Sound like a hassle? Well, it kind of is. The Cadillac method involves converting a refrigerator into a temperature controlled fermentation chamber and is probably the single best way to improve the quality of any fermented beverage.
Below is a video clip of what active fermentation looks like after about two to three days at 65°F (18.33°C). Depending on the juice (pear and pineapple for example), sometimes a foamy, off-white layer will form above the cider with tan, crusty gunk above that (yeast and proteins). This is normal.
Basically, if you see little bubbles starting to rise to the surface of your juice after about 24-36 hours, then you have a pretty good indication you have lift-off. If you are fermenting at lower temperatures, say between 55-60°F (12.78-15.56°C), you may not notice any bubbling action for 36-48 hours or perhaps longer. If it has been longer than 48 hours and you still do not see any sign of fermentation, considering increasing the temperature of the cider either by moving the bucket to a warmer place in the house or increasing the temperature in your fermentation chamber.
7. After 1-2 weeks (I ferment for 2 weeks), remove your lid and your cider is ready to drink.
Option Time
A) If you want slightly effervescent, barely carbonated cider (referred to as “still cider” or “apple wine”), you can transfer (a.k.a. “rack”) your cider back into the apple juice jugs or plastic bottles you originally bought, but remember to cleanse those containers first with One-Step. GENTLY and SLOWLY pour the cider into the cleaned containers using a funnel to control your pour. Keep in mind that there will be about an inch thick layer of yeast and sediment that has settled to the bottom of the bucket which you will want to leave behind in the bucket when pouring, so once you see that mudding looking yeast starting to bleed into your cider, stop pouring.
If you’re making 5 gallons of cider at a time, the bucket will be heavy, which makes lifting and carefully pouring a bit difficult. You can enlist the help of a friend to assist you with lifting and pouring, or you can purchase a plastic tool called an auto-siphon along with about 4 feet of plastic tubing from your local/online homebrew in order to siphon the cider out of the bucket, thereby eliminating the need to lift and pour.
B) If you want carbonated (sparkling) and bottled cider, then you’re going to need some bottles, a bottle capper, bottling bottle caps, and some sort of priming sugar. I show you how to do this here: How to Bottle.
C) If you already have a kegging system setup, then keg as usual and/or back sweeten to taste (see "Back Sweetening" below).
This is Key!
(1) If bottling, you will almost without exception be using some sort of sugar to create a mini-fermentation inside the bottle, thus creating a natural carbonation from the CO2 that's produced. No matter what type of sugar you decide to use, the sugar is referred to as "priming sugar", but depending on the kind of sugar, it can add an extra dimension to your cider. Get creative: although most people use corn sugar as their priming sugar which adds basically no additional flavor component, try priming with different types of honey, or sugars like brown sugar, turbinado, dextrose, or raw sugar to give your cider that elusive "it" factor.
(2) For all types of cider, it is important that you refrigerate it as soon as possible in order to preserve the cider's character. This means if you're bottling, refrigerate the cider after you've reached your desired level of carbonation. If kegging, well that's a no brainer- you already keg and refrigerate after fermentation is complete anyway.
Perpetual Cider
As promised, it’s time to discuss how to make perpetual cider so that no matter what's going on in your life, you always have something fermenting in the background. And the concept is simple...
Remember how when your cider is finished fermenting, the yeast falls to the bottom? Normally, you would toss that yeast out after you’re done transferring your cider off of it. Not this time. This time, after transferring (racking) your cider off the yeast, you’re going to leave the yeast right in the bucket, and (you guessed it) gently pour a fresh batch of unfermented apple juice or cider onto the yeast.
The yeast at the bottom of your bucket is super healthy, which is good for a solid fermentation, and will go to town on your apple juice lickity split. For commercial breweries, purchasing the quantities of yeast needed to continually meet brew schedule demands can get expensive, which is why they will capture and repitch the same yeast (more easily collected from conical fermenters) sometimes up to 20-25 generations depending on the yeast strain and procedure, but more commonly 5-10. And at least one brewer told me of a brewery that never changes their yeast out!
That said, White Labs (commercial yeast producer) recommends repitching up to 6-10 generations. After a certain number of generations, fermentation start times will slow and eventually the yeast will begin to mutate, which isn’t necessarily bad, but it will change the aroma and flavor profile of your cider often times for the better. In fact, for breweries trying to lock in their special (proprietary) house yeast, they will usually do it after a certain number of generations when the yeast has mutated enough to change their beer profile to exactly what they’re looking for. They then send that particular yeast generation off to the lab to be cultured in large volumes for immediate commercial use, but also safely preserved in a yeast library.
Mini-Batches
Before we jump into the various cider recipes, let's talk about making smaller quantity (usually 1 gallon) mini-batches. Mini-batches are a smart way to go because not only can additional fruit juices and ingredients get expensive when added to multi-gallon batches, but what if you don't like the way the recipe turned out? Make mini-batches until you really fall in love with a recipe, then scale it up. Remember, you can either purchase 1 gallon glass jugs at your local/online homebrew store, or be smart and buy apple juice/cider that already comes in a one gallon glass jug, use the apple juice, rise out the glass jug and presto, mini-carboy. You will need additional drilled plastic stoppers and airlocks, or in a pinch covering the mouth of the bottle with sanitized aluminum foil can work.
Blending
Pretty much all of the recipes we discuss involve blending, which is easy. You already know how to make your basic hard apple cider, so for ciders with any extra ingredient (fruit, non-apple juice, sugar addition, etc.), you are essentially just going to blend your already fermented apple cider with that extra ingredient.
The general technique when blending is to already have several gallons of apple cider already fermented and still in its plastic bucket (or carboy, although it's easy with a plastic bucket). For mini-batches, take your one gallon glass jug and pour in whatever addition you want to blend (non-apple fruit juice, etc.), then add your already fermented apple cider to that. Fit a plastic stopper and airlock into the mouth of your glass jug, and let ferment for 7-14 days in a cool area. Don't worry about adding extra yeast; there will be enough yeast in your already fermented cider to re-initiate fermentation in the glass jug.
The only other thing to know are your blending ratios, for example, how much apple cider to how much non-apple juice. Generally speaking, it’s a 1:1 ratio, or half cider, half non-apple juice, but this is where you can experiment a bit.
Fruit Cider Tips
A fruit cider is a blend of apple and some other fruit juice (remember, by definition "cider" must contain apple juice, otherwise the beverage would be better referred to as "fruit wine"). Having control over the percentage of apple juice you blend with the non-apple juice is important because you usually want people to identify that your cider is not just apple cider, which is why you have to be careful when picking out the non-apple juice from the grocery store because that juice may itself be a blend of other juices.
When entering a "fruit cider" into a cider competition (a BJCP competition for example), judges are typically looking for a balance between the apple component and the other fruit, however for yourself, you can blend juices to your personal liking.
When selecting a non-apple juice, you might notice that many juices sold on the shelves are actually blends of one or more different juices, usually (you guessed it) apple juice, and often white grape juice. You’re already blending your non-apple juice with apple juice but you still want people to really notice that other non-apple juice, so why would you want to dilute it with more apple juice in your blend?
And marketers are crafty. Let’s say you’re looking to buy some 100% pineapple juice, and you see some pineapple juice in the grocery store with big, bold printing on the label that reads “100% Juice!”. Sure, it may be 100% juice, but maybe only 50% of it is actually the juice you were looking for, in this example pineapple juice. So while you’re checking for the bad preservatives mentioned above, keep an eye out for if you’re buying a pure juice or a blend. This all comes down to having better control over your process, which allows you to fine tune and repeat the same recipe with precision.
If you really want to add a non-apple fruit flavor to your cider, consider using some quantity of Oregon Fruit Puree, which you can find at your local or online homebrew shop.
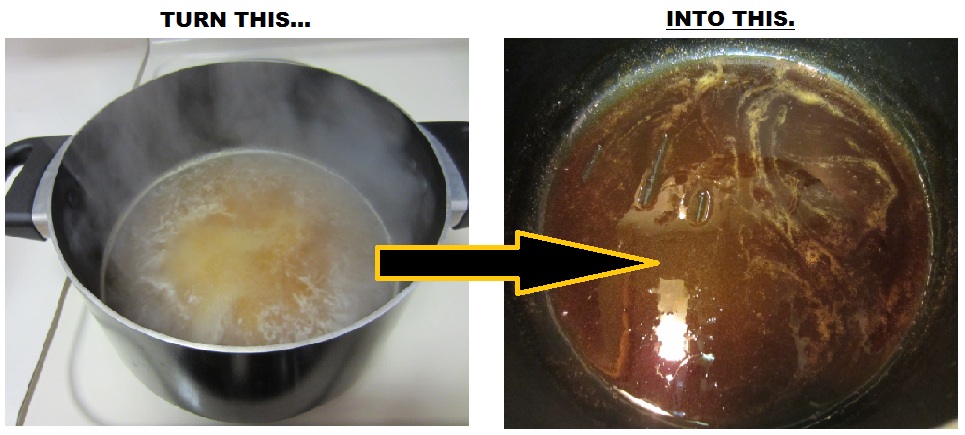
Candy Apple Cider: After your apple cider has finished fermenting (1-2 weeks), prepare an apple caramel on the stove as follows: take two pints of apple juice/cider, and reduce it on the stove in a large enough pot over the course of about 30-45 minutes. Maintain a low boil, occasionally stirring in order to avoid a boil-over and scorching. In the end, you will be left with a thick caramel which will smell like the outside of a candy apple. Turn off the stove. At this point, take one pint of apple juice/cider and add it to the caramel so as to dilute it. Add this mixture back to 1 or 2 gallons of your already fermented apple cider, and let re-ferment for 4-5 days. Then either proceed to bottle, or serve as is. Your finished cider will have more of a robust apple character, a noticeable caramel component, and be a bit more alcoholic; however the caramel notes will fade over time, so it's best to drink this one sooner than later (within 2 months). Keeping this cider refrigerated will also help preserve its robust character longer.
Pineapple Cider: Pineapple cider is a crowd pleaser and easy to get right, assuming you bought quality, 100% pineapple juice. As far as blending goes, you’re looking at a 1:1 ratio of apple cider to pineapple juice. If you want the pineapple juice to stand out a bit more, try blending 75% pineapple juice to 25% apple cider. Want an even bigger pineapple punch? Make a pineapple caramel the same way I outlined in the “Candy Apple Cider” recipe above, just replace the apple juice with pineapple juice. (Your house will smell like pineapple upside down cake.)
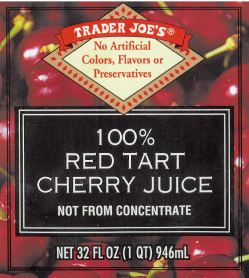
Cherry-Apple Pie Cider: For a general cherry cider, you can get away with a blending ratio of 25% cherry juice to 75% apple cider, particularly if incorporating a more assertive cherry juice take Trader Joe’s Tart Cherry Juice for example. However, in order to capture the type of complex flavor component found in baked cherry-apple pie, you'll need to kick up the cherry addition to a 50/50 blend ratio, and mimic the baked/caramelized character by blending in a cherry caramel addition like I outlined in the “Candy Apple Cider” recipe, in this case replacing the apple juice with tart cherry juice.
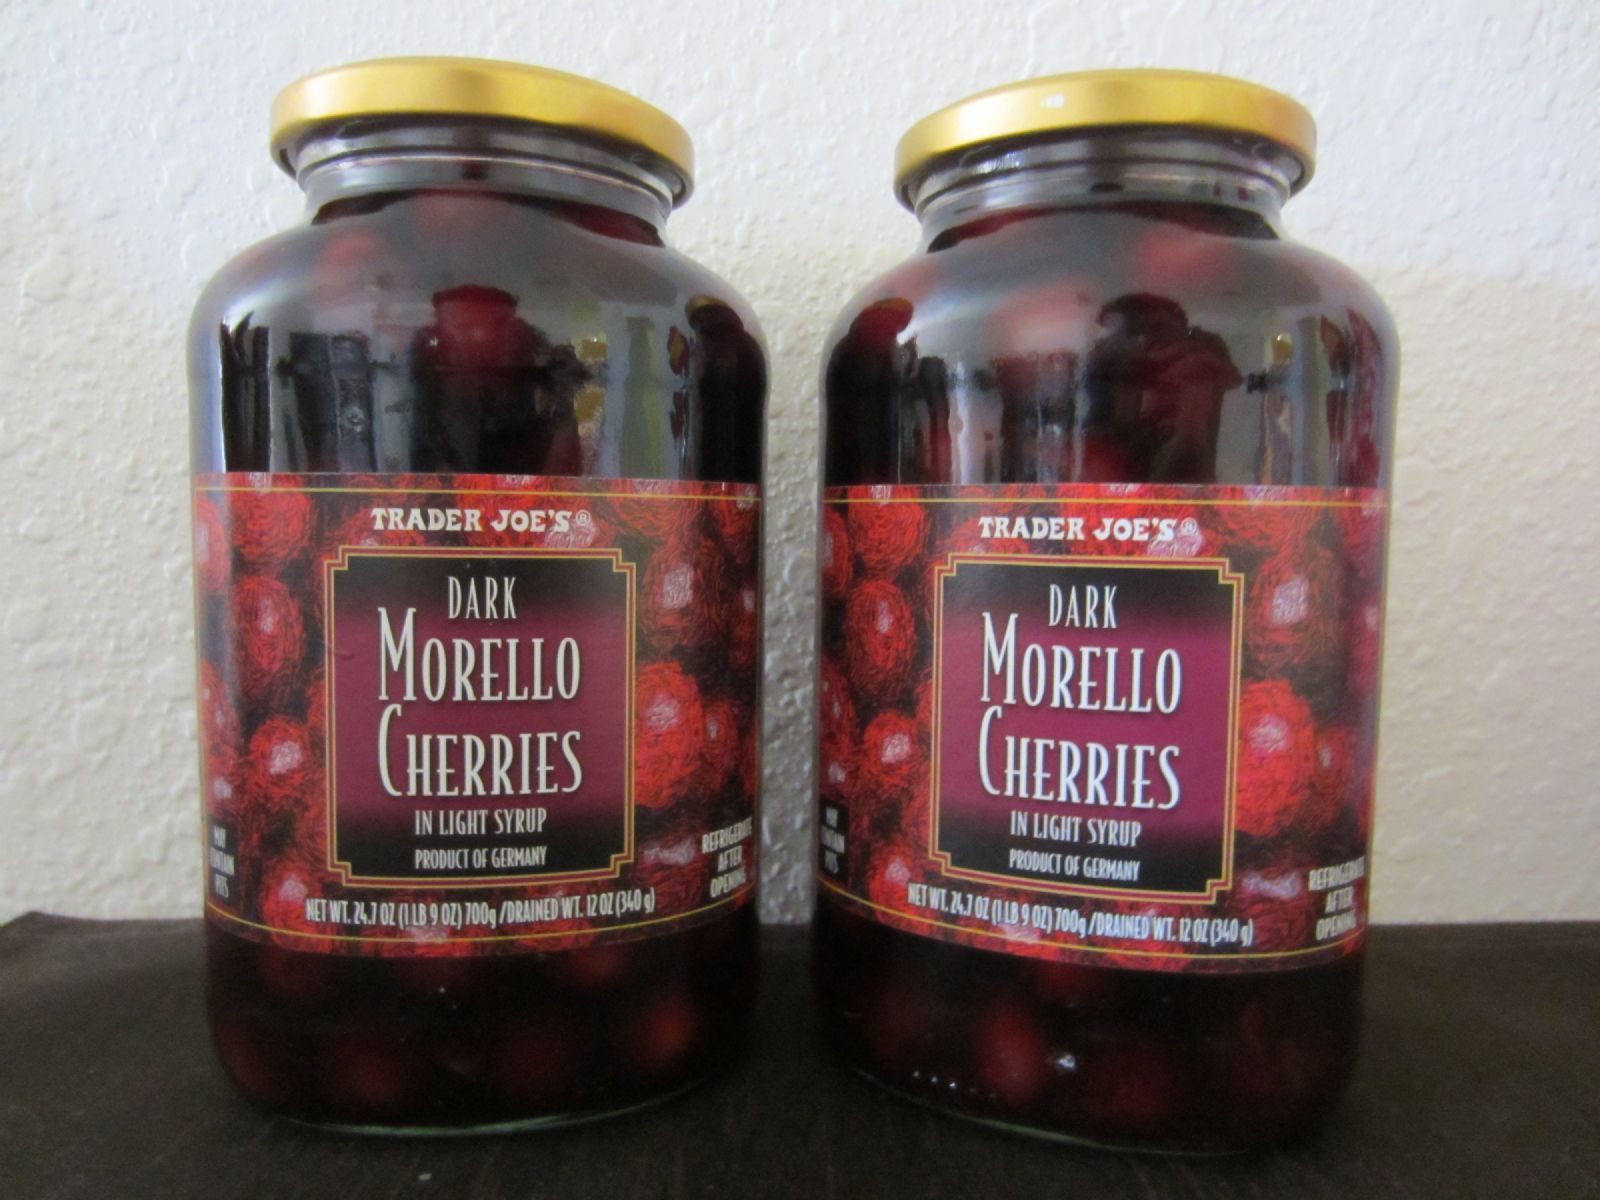
Zen-Perfection Cherry Cider: The cider that results from this recipe is one of the most incredible, beguiling, Zen-like delicious ciders you will ever encounter. The elusively smooth cherry character of this cider is achieved by fermenting two jars (juice and all) of Trader Joe’s Morello Cherries with a ½ gallon of already fermented cider (about a 1:1 ratio). Take a funnel and carefully dump the cherries into a 1 gallon glass jug, then top the jug off with already fermented apple cider. Leave your cherries in contact with your cider for at least three weeks (your cherries will naturally float to the top of the jug). There is something magical that happens when you leave this type of whole fruit in contact with your cider, and the longer you leave it (within reason), the more magic.
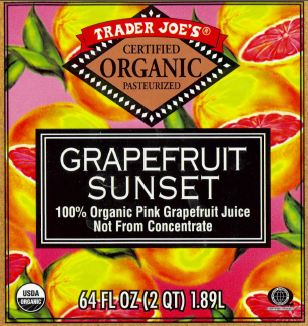
Grapefruit Cider: This type of cider might sound crazy, but if you like grapefruit, you are going to love grapefruit cider. Buy quality 100% grapefruit juice, either pink or white, and you’re looking at a simple 50/50 blending ratio. The grapefruit juice is acidic, so both the apple juice and English Ale Yeast will smooth some of those edges out.
Below is a video clip of fermenting grapefruit cider. Notice that this is no foamy ring (krausen) around the top of the juice. This is normal.
Pear Cider: Another slam dunk solid cider--- if you get it right. The deal with pear juice is that it’s subtle and delicate, especially compared with other juices. So we have to use some tricks to get that pear character to really stand out. Trick # 1: Purchase 100% pear juice (no blends). Trick # 2: TASTE your pear juice before you blend it. If it tastes good and full of delicious pear flavor, go with it. (I've had success using R.W. Knudsen Family Organic Pear juice.) Trick # 3: Ferment pear juice entirely on its own, or do at most a 50/50 blend between apple cider and pear juice. And feel free to reduce the blend percentages down to a 25% apple cider to 75% pear juice blend. And of course, if you're bottling, after you've reached your desired level of carbonation, put your pear cider in the refrigerator to preserve its fragile flavor.
By the way, you could make a 100% pear juice cider, although technically that would be called a "perry" and not a cider. In fact, you could probably ferment just about all of these fruit cider recipes with no apple juice at all, but again the result would be called "fruit wine", and not cider because technically "cider" always implies that apple juice was used in the recipe. (100% grapefruit juice may be difficult to ferment on its own due to its low pH.)
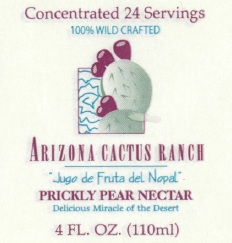
Prickle Pear Cider: Prickly Pear Cider is tasty, but can be a challenge for three reasons: (1) Most people don’t know what prickly pear cactus fruit tastes like (strawberry/watermelon-ish) and therefore might not be able to detect it, (2) even if you know what prickly pear tastes like, it’s still a subtle fruit when it comes to cider making so you have to use more than you think you’d need, and (3) it can be difficult to find prickly pear juice or extract suitable for cider making. If you live in a desert region like the Sonoran or Mojave deserts, you can go and harvest your own prickly pear fruit when in season and process them into juice; it’s free, just don’t get into a fight with a Javelina over the fruit- you’ll lose. If desert foraging isn’t an option, then you’re limited to what you can find in the store, which may be nothing (some Mexican grocery stores will carry already cleaned prickly pear fruit which are called "tunas" in Spanish--- a good price is 5 for $1). That said, there is a product called Arizona Cactus Ranch Prickly Pear Nectar, which is a concentrate. I would blend a 4 ounce jar with 1 gallon of apple cider. The final product actually tastes like well rounded, full-bodied, medium-sweet apple cider; it is still difficult even at that ratio to detect the prickly pear, but it definitely improves the cider.
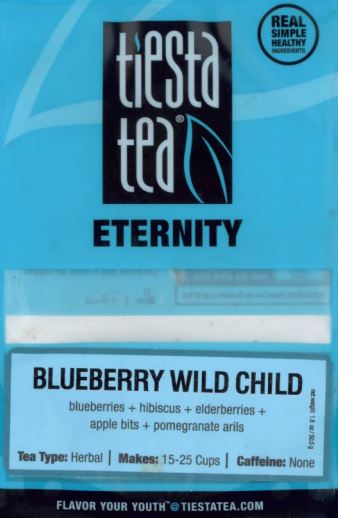
Blueberry Cider: Blueberry cider is tough to perfect not only because of its subtle flavor, but it usually finishes pretty dry and with a wine-like character in the flavor. Again, buy 100% blueberry juice (try googling "best blueberry juice brand"), give the juice a taste-test, and try a 25% apple cider to 75% blueberry juice blend. Alternatively, you can add two 15 oz cans of Oregon brand canned blueberries using a funnel into a 1 gallon glass jug, and then fill the rest of the jug with already fermented apple cider. Leave the cider in contact with the blueberries for at least 3 weeks. If you need to kick up the blueberry character of your blueberry cider even more, consider cold-steeping some blueberry tea into your fermentation vessel for a week. I've had luck with Tiesta Tea's Blueberry Wild Child at a ratio of 1.8 oz (basically the whole packet of tea) to 1 gallon, but your mileage may vary. You can either dump the loose leaf tea into your fermentation vessel and strain it out later (probably the easier method), or put the tea in a sterile hop bag or some other type of clean make-shift tea bag, tie a string around it and secure the string somehow so that it doesn't fall into your vessel. In either case, make sure to place your airlock back onto your fermentation vessel. If your final product isn't sweet enough, read about the fine art of "back sweetening" below.
Mango Cider: Mangos are delicious, probably my favorite fruit, but the frustrating thing with mango cider is that most of that intriguing mango flavor typically gets fermented out, leaving you with a white wine sort of fruit-ish cider drink. It's difficult, but possible to make a stunning mango cider. The best success I've had using a quality juice, tasting it, and using a 50/50 cider to mango juice blend, and back sweetening approriately (see below). Again, not all juices are equal, so without a doubt, the key is finding the best tasting juice.
Tangerine or Orange Cider: I can’t really recommend this one no matter the blend ratios. I find that at least with tangerine juice, something happens during the fermentation process that adds a sort of gritty Gojo Orange hand soap aroma to the finished product. If you had to do it, go with a 75% orange/tangerine juice to 25% apple cider blend. But frankly, you’d be better off mixing yourself up an orange or tangerine Mimosa.
Applejack: No, we’re not talking about kid’s cereal; we’re talking about some hardcore, intensely apple flavored liquor and you’ve got everything you need to make it. Remember that the freezing temperature of alcohol is a lot lower than water (water freezes at 32°F (°C), ethanol alcohol freezes at -173.2°F (-114°C), which is why you can toss a bottle of the hard stuff in the freezer and it won’t freeze. Keeping this in mind, you know that your cider contains both alcohol and water. If you can separate out some of the water from your cider, that will leave you with a greater concentration of alcohol, a process that’s referred to as “freeze distillation”.
Here’s how you do it: In a freeze-safe container (not glass), place your desired amount of still cider in the freezer. Just like how the yeast fell to the bottom when fermentation is complete, this time the alcohol will settle at the bottom, and ice will form on the top. Check on your Applejack every day, and scoop the ice layer off the top daily. Eventually there will be no more ice to scoop off, and, presto, Applejack. How strong will the Applejack be? Depends. The general rule of thumb is the colder the freezer, the stronger the ABV (alcohol by volume). At -30°F (-34.44°C), we’re talking approximately 33% ABV.
Fruitjack: See the process above for making Applejack; just replace your apple cider with any other fruit cider you made. Mangojack anyone?
[Disclaimer: The process of freeze distillation as described above is for educational purposes, and only for practice in countries where freeze distillation is legal. As there is no direct court ruling in the U.S. regarding Applejack/Fruitjack as of this writing, if you decide to utilize freeze distillation at home, proceed at your own risk.]
Apple Wine: Basically, you start with your standard cider recipe, but then blend in additional sugar to the fermentation. The type and amount of sugar is up to you. Some people like adding dextrose (about 2 pounds to a 5 gallon batch), but if you do, it's critical that you add it to your primary fermentation from the very beginning instead of later on as your yeast will have a tougher time converting the more complete malt sugar after it's gotten used to the simple sugar found in fruit. I usually make an invert sugar solution (sometimes called liquid Belgian Candi Sugar) on the stove (corn sugar, water, and citric acid/lemon juice) and add it to the cider after primary fermentation, but feel free to experiment. You can also substitute your ale yeast for wine yeast (Montrachet is a popluar choice), which will dry your cider out and leave you with a more wine-like character.
Trouble Shooting
Clarifying Cider: First of all, clarifying your cider is purely aesthetic and not necessary. That said, if you want to clarify your cider for whatever reason (competition/personal preference), it's easy. Your local/online homebrew store should sell a product called "pectinase" (or pectic enzyme) which can be added to your cider at any time before bottling or serving. Pectinase will clarify your cider by clumping together the pectin molecules in your cider, which then settle to the bottom of your fermentor. Your cider probably won't turn out crystal clear, but it won't be as cloudy. The process can take several days to complete (3-6), depending on how much cider you made and how much pectin it contains, and is probably more effective if added during primary fermentation.
Increasing Body: This is a common issue that arises from fermenting straight, store-bought apple juice. Either pick up some fresh pasteurized cider from the orchard (if you happen to live near one), or try adding either lactose and/or tannins to the store-bought stuff. You can find grape tannin in powder or liquid form in you local/online homebrew store. Grape tannin is potent--- about 1.42 grams (or 1/4 teaspoon) per gallon will do the trick. Lactose on the other hand, is not potent. Lactose is a milk sugar that the yeast cannot ferment, so in addition to body, it will add some sweetness to your cider (lactose is about 50% less sweet as that of table sugar). About 6.2 oz per gallon will give you some extra oomph.
In addition, adding about a 12 oz can of frozen apple juice concentrate during fermentation helps with body as well. (Tree Top brand frozen apple juice concentrate comes recommended first with Cascadian Farms brand frozen concentrate after that. Otherwise, just do a google search for "best frozen apple juice concentrate" and see what the internet has to say.)
Back Sweetening: You may notice that your cider has turned out drier than you would have liked, and you might want to add some sweetness back to it. Appropriately enough, this process is referred to as “back sweetening” and is a common practice for cider makers. The need to back sweeten arises because the yeast eat all of the fruit sugar in your cider and convert it into alcohol and CO2, which is nice, but sometimes the yeast doesn’t know when to quit.
Yeast are tough little fungi, and to stop them, your options are either to disable them with a few crushed Campden tablets and some Potassium sorbate, or you can temporarily put them to sleep by bringing the temperature down about 35-45°F. But this only keeps the yeast dormant--- if the cider is warmed back up to room temperature, the yeast will go back to work.
Commercial cider makers will usually kill off or filter out the yeast, then sweeten with juice or some type of sugar, and finally force carbonate the bottles. If you're fine with flat/still cider but want to back sweeten, your local/online homebrew store should carry a yeast-killing/back sweetening combo product referred to as "Wine Conditioner" (sorbic acid + sugar).
At the home level, there are a few little tricks you can use to sweeten up your cider without totally disabling the yeast if you determine it’s come out too dry:
1. When serving your cider, try adding a little unfermented cider (or other fruit juice) to balance it out (increase sweetness/flavor). This is by far the easiest solution.
2. Add a sugar that the yeast can’t process after fermentation is complete. Here we’re talking about sweeteners like xylitol, sorbitol, erythritol, stevia, Splenda, etc., but each of these sweeteners have their own advantages and disadvantages. ("Truvia" is comprised mainly of erythritol.)
Always watch your mixing ratios very carefully, because some of these sweeteners like stevia and Splenda can be orders of magnitude sweeter than regular table sugar, and it is very easy to permanently over-sweeten your cider to the point of it being rather undrinkable. (Stevia is 200-300 times sweeter than table sugar and Splenda (sucralose) is 600 times sweeter than table sugar.) Because it is so easy to over-sweeten with stevia and Splenda, I would avoid these sweeteners, especially when back sweetening 1 gallon batches of cider.
By contrast, some sugars are not as sweet as table sugar as is the case with sorbitol which is about 50% as sweet as table sugar, and erythritol which is about 60-80% as sweet as table sugar. On the other hand, xylitol, another non-fermentable sugar alcohol (polyol), is 95-100% as sweet as table sugar and leaves no aftertaste behind. However, the problem with xylitol (as with sorbitol) is that it carries the risk of a laxative effect depending on how many grams are consumed. A person's individual "laxation threshold" to xylitol may vary (based on body weight, previous consumption of xylitol, other foods consumed with xylitol, etc.), which complicates matters. That said, the Canadian Diabetes Association suggests that eating less than 10 grams of sugar alcohols (including xylitol) is a conservative recommendation representing a level unlikely to cause problems for the vast majority of people, however I have noted people who reported gastrointestinal (GI) symptoms (watery stool) at both 5 and 10 gram doses of xylitol dissolved in cider within 2-8 hours of consumption. Again, your mileage may vary.
In addition, people can reportedly build an increased tolerance to xylitol over time (after a few days), but in my case, I'd rather forego the trips to the bathroom in favor or a different option. (By the way, it's reported that other certain sugar alcohols such as sorbitol, lactitol, mannitol, and maltitol can also cause gas and bloating because it is difficult for intestinal bacteria to digest such sugars.)
If you decide to back sweeten a completely dry cider (1.000 final gravity and below) with xylitol, then adding .5 gram of xylitol to 1 ounce of cider will yield a medium sweet taste, and 1 gram of xylitol to 1 ounce of cider will yield a sweet taste (almost on par with Ace Cider/Magners Cider).
That said, I would use erythritol (and erythritol-based sweeteners) over xylitol as a back sweetener because the laxation threshold of erythritol is much higher than xylitol. Per one study, the laxative threshold of erythritol is estimated at 0.80 g/kg body weight for females and 0.66 g/kg body weight for males, with a suggested acceptable dose being up to 1 gram per kg of body weight in daily use. Another study showed that, when consumed in water, xylitol produced significantly more gastrointestinal (GI) symptoms including watery stool at 35 and 50 grams, whereas even at the highest does of erythritol (50 grams), no significant increase in watery stool was observed, and at 20 and 35 grams of erythritol no significant GI symptoms were observed. In fact at 20 grams of erythritol, no symptom of considerably more watery stool was observed. This is not to say that no increases in watery stool occurred from erythritol. For example, at 35 grams of erythritol, 1 out of 65 people noticed considerably more watery stool than usual, and at 50 grams that number jumped to 5 out of 65. But in all cases, xylitol sent folks running to the bathroom at a higher rate than erythritol. Not to mention, ideally, you're not back sweetening a bottle of cider with 20, 35 or 50 grams of erythritol.
In theory, it may also be possible to back sweeten with maltose (malt-based sugar found at homebrew shops) as solutions with high levels of fructose (e.g. >15-20%) will inhibit the fermentation of maltose.
3. This was mentioned above, but if you're bottling, remember to refrigerate your cider after you've reached your desired level of carbonation, which is usually 4-6 days. Here's the trick: On the 4th day after you've added your priming sugar, take one bottle of cider, cool it in your refrigerator or freezer until it's reached drinking temperature, then open the bottle and determine if the cider is carbonated to your liking. If not, leave the rest of your bottles out at room temperature for another day. Continue this procedure of waiting a day and opening a bottle until your cider is appropriately carbonated. At that time, place ALL of your bottles in your refrigerator. The reason you do this is to slow the yeast's rate of sugar consumption because your yeast is still active, albeit very slow at this point. Left at room temperature over the course of weeks or months, your cider will continue to dry out and lose more of its sweeter components and fruity character.
4. Similar to tip # 3 above, you bottle carbonate using apple juice or some other fruit juice. Before bottling, it helps to ensure that your cider has finished fermentation. This can be done with a hydrometer. You can attempt to calculate the additional amount of sugar added based on the amounts noted on the store-bought cider and the maximum resulting level of carbonation generated by that amount of sugar. Generally speaking, there are around 22-29 grams of sugar per 8 ounce serving of juice (check your label to verify), so adding about 4.5-5 ounces of juice to a completely fermented gallon of cider will reduce the risk of bottle bombs and carbonate your cider to approximately 2 volumes of CO2, which is about medium carbonation.
5. If you have a kegging system (or a counter pressure bottle filler), your back-sweetening problems just got a whole lot easier. Simply hit your cider with some Campden tablets (1 tablet per gallon) and Potassium sorbate (1/2 tsp per gallon) after fermentation is complete. This will prevent the yeast from reproducing which allows you to back sweeten with whichever sweetener or juice that you like (taste for balance), and then force carbonate.
Parting Words
This, my dear ladies and gents, concludes our journey into the wonderful world of great cider making and beyond. You’re now prepared with the specialized knowledge needed to amaze and astonish yourself and your liver with the most delicious cider you’ve ever experienced.
As for me? My fingers are tired--- an aliment best remedied with a cool, bubbly glass of… (wait for it) cider.
Oh, and if you do end up bottling your cider and want to add some nifty looking, easy to make labels for your delicious brew, check out this tutorial on How to Make Cider Labels [customizable label templates included].
Like my tutorial? Questions, comments, free beer? Feel free to drop me a line at dan@beersyndicate.com, or follow us on Twitter at twitter.com/beersyndicate.


From The Blog
Tips for Craft Brewery Success
The best business secrets wikileaked from the private records of the most successful craft breweries in the United States.
Beer Names You Might Be Saying Wrong
Enlighten yourself, but please don't correct others. It's just one of those Catch-69 situations, like when somebody has ketchup on their face.
The Beer Quiz
What's your beer IQ? This test measures an individual’s beer knowledge through a series of questions of varying levels of difficulty: Normal, Hard, and Insane.
Homebrewing Techniques
Beat the Stuck Fermentation Monster
You've brewed the perfect wort. You bullseyed your strike temp, you had a most excellent cold break, your OG was right on the money...
How to Cork Belgian Beer Bottles
So you wanna up your bottling game, huh? Well, you've come to the right place.
Top 40 Ways to Improve Your Homebrew
Admit it: No matter if in a DeLorean, TARDIS, or a hot tub, we’ve all thought about what advice we might give our younger selves if we could go back in time.
DIY Projects
How to Polish a Keg
Shining up your keg will probably not improve the taste of your beer, but it looks cool and inspires epic brewing sessions!
Convert a Refrigerator Into a Fermentation Chamber
Decided to take a huge step in improving your homebrew and set up a temperature controlled fermentation system, have ya? Smart thinking.
How to Convert a Keg Into a Brew Kettle
Convert that old keg into a brewing kettle. The advantages of using a keg for homebrewing pretty much come down to quality and cost.
|
|